Tag: homesteading

  • Accessible Gardening Tips for Everyone

    Gardening is one of life’s great joys. It keeps us active, brings us outside, and rewards us with fresh, healthy food. But sometimes the work involved—bending, lifting, carrying, and long hours on the plot—can become harder to manage. There are many reasons why at various time in your life gardening may prove more challenging. Times when your health or physical ability are limited, either temporarily or permanently. The good news is that with a few clever adaptations, some forward planning you can still enjoy growing your own vegetables, without it feeling overwhelming.

    This post address some of the adaptions, and suggestions for making gardening a bit more accessible for everyone.

    I do need to set some boundaries before we start. Firstly I’m not an expert, I have taken the suggestions in this blog from various disability focused websites, a wee bit of personal experience and general internet research. Secondly please don’t take my suggestions without doing your own research first, especially if you intend to spend money on a product. Thirdly I would also strongly recommend you consult a doctor or specialist to discuss your health needs in connection with gardening.

    Reduce bending, kneeling and repetitive strain

    Bending and kneeling are often the hardest parts of gardening. With the right setup and tools, you can protect your back and joints.

    Practical ideas:

    • Raised beds at different heights: Bringing the soil up to waist level means less stooping and kneeling. Beds can be built to suit different needs—standing, seated, or wheelchair height.
    • Containers on benches or tables: Lift pots (get someone to help you lift) and troughs up onto sturdy surfaces. Not only does this save your back, it can also create a lovely display of grouped vegetables or herbs.
    • Long-handled and ergonomic tools: If plants are at ground level extended handles can help keep you upright while hoeing or weeding. Padded grips can reduce strain on wrists.
    • Vertical gardening: Grow upwards with trellises, wigwams, or wall planters can help reduce bending. Beans, cucumbers, and tomatoes all climb well, making harvesting easier.
    • Garden kneelers with handles: These double as a seat and a support when you need to get lower. My advice for these types of garden kneelers is to buy the best you can afford as the cheaper ones often break. If you know a good carpenter they may be able to make you something bespoke and you can a cushion for extra comfort.
    • Back supports and braces: These can give extra stability, especially for longer sessions. They can be quite reasonably priced but may get hot and uncomfortable in the heat of the summer. They are useful for infrequent digging and twisting jobs where muscles are not built up for those particular tasks.
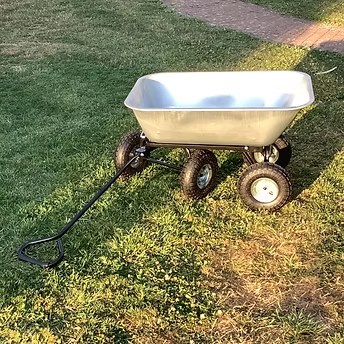
    • Use wheels for heavy loads: A lightweight barrow, trolley, or rolling cart saves your back. Break heavy jobs into smaller tasks and carry lighter loads. More frequent trips with lighter loads might seem counter intuitive but it can save injury or further muscle strain.
    • Switch tasks regularly: Avoid long spells of the same job. Alternate between sowing, watering, and harvesting to give your body a break.
    A sturdy hand truck with a tall frame and a large rubber wheel, designed for transporting heavy items easily.

    Improve mobility and access in the garden

    Getting around the garden or allotment safely and easily makes a big difference. Uneven paths, heavy tools, and long walks with a watering can all take the joy out of gardening.

    Practical ideas:

    • Smooth, wide pathways: Level, firm paths reduce trip hazards and make moving around more comfortable. Paths can be expensive to put in – but if you need them to be able to enjoy your garden then it might be worth considering. It also helps to keep your gardening space clear of possible trip hazards i.e. errant pots, bits of netting, garden tools. Obviously if you need ramps for wheelchair or frame access you may need to take advice from a qualified garden designer or builder to ensure ramps and paths are safe.
    • Zoning your space: Keep your most-used beds, compost bins, and water butts close together so you don’t have to make long trips. It’s worth taking time to consider the design of your gardening area, think about what you will need an plan your area well.
    • Rolling stools or wagons: Sit while you work, and use the storage underneath for tools. If you are in the market for one of these pieces of kit make sure you go to a reputable supplier and try them out before you buy. Some are studier than others so make sure you feel secure on it when sitting.
    • Tool caddies and buckets: Keep tools with you to save repeated trips to the shed. Anything from a bucket, basket, or box will do just make sure it’s easy to carry.
    • Lightweight barrows and trolleys: Two-wheeled barrows and folding carts are stable and easy to manoeuvre. Four wheeled barrows can also be useful as they are more stable yet still manoeuvrable. Keep in mind when planning your plot and you beds to leave enough space to wheel your barrow between the beds.
    • Accessible allotments: Many councils and allotment associations offer plots with wider paths, water points nearby, or raised beds. It’s always worth asking about options.

    Make planting and harvesting easier for tired or low vision eyes

    Gardening relies a lot on eyesight—spotting seedlings, reading seed packets, or identifying weeds. With small changes, you can make tasks simpler and safer.

    Practical ideas:

    • Large, clear labels: Use bold, high-contrast plant markers so crops are easy to identify. Labels can be colour coded with tape or tied with bright ribbon.
    • Bigger seeds or pre-spaced seed tapes: Beans, peas, and courgettes are easier to handle than tiny seeds. Seed tapes can reduce the fiddly part of sowing.
    • Contrasting containers and edging: Growing in light pots with dark soil (or vice versa) makes seedlings stand out. Raised bed edges also help define planting spaces. Put tape or paint darker pots so they stand out.
    • Smell and touch: Herbs and textured plants like mint, rosemary, or chives are easy to recognise without relying on sight alone.
    • Bright tape: Use this to mark the edged of garden beds, garden furniture, or your small handle tools to distinguish their use.
    • Sound beacon: A water feature, or wind chimes to identify certain areas of your space. Leave a radio on where you are working, so if you move from your work area you can easily identify your way back to your workspace.
    • Good lighting: Solar or plug-in task lights make evening gardening safer and easier.

    Make watering and feeding less effort

    Watering is essential but can be one of the heaviest jobs. Smart systems help reduce the strain.

    Practical ideas:

    • Drip irrigation or soaker hoses: These water plants slowly and directly at the roots, cutting out most manual watering. These can get expensive so make sure you do some research before you buy.
    • Water butts near beds: Place several around the garden so there’s always a nearby water source. Anything will do to collect water, an old bin, or a large bucket. Our polytunnel is away from the house & while our extendable hose will reach it’s a pain to get out and drag down to the tunnel. So we keep a water butt in the polytunnel, fill it when we have the hose out, then use the water from the butt. It’s ideal for those quick watering’s without having to drag 200 foot of hose across the garden
    • Self-watering pots and wicking beds: Containers with built-in reservoirs reduce the need for daily watering. Again these can be pricy although during the colder wetter months you can often find these on sale.
    • Mulching: A thick layer of compost, straw or small woodchips holds moisture, reduces weeds, can cut down on watering. Don’t underestimate the power of a good mulch. If you get the chance one summer do a test of side by side pots, mulch one and leave the other – after a few days pop you finger about an inch into the soil underneath and notice how the mulched pot retains moisture.
    • Lightweight watering tools: Choose smaller watering cans, a hose reel on wheels, or spray nozzles with easy triggers. Many hose attachments have a trigger, but be careful as some of them you have to manually depress constantly. This can be tricky with conditions such as arthritis, so try to get one that you don’t need to keep depressed.

    Choose easy, rewarding crops

    The right crops can give you healthy harvests with less work.

    Good options:

    • Salad leaves and spinach: Quick, forgiving, and keep producing after cutting.
    • Bush beans and dwarf peas: Productive, compact, and easy to harvest.
    • Cherry tomatoes: Perfect for pots, only need light staking, and crop for weeks.
    • Potatoes in bags or towers: No digging required—just tip out when ready.
    • Herbs: Low-maintenance, fragrant, and useful every day in the kitchen.
    • Perennials like asparagus or rhubarb: Plant once, harvest for years
    • Crops that can be grown vertically such as beans, cucumber, tomatoes,

    Extra tips for allotments

    Allotments are wonderful community spaces, but they can sometimes be more demanding than home gardens. A few changes help make them easier to manage.

    Practical ideas:

    • Ask for accessible plots: Many allotment associations now provide raised beds, level paths, or plots near entrances.
    • Share work with neighbours: Team up for heavy jobs like turning compost or moving soil.
    • Shared resources: Look for communal tool sheds, compost bays, or water points to reduce trips.
    • Ask for help: Don’t be afraid to ask for help, we all want our independence, but there is no point in making your condition worse or tiring yourself out because you didn’t ask the folk around you to help.

    Look after your body as well as your garden

    Gardening is exercise, so treat it that way. Working smart helps you stay comfortable.

    Practical ideas:

    • Warm up before tasks: Simple stretches protect your joints. It sounds silly to say warm and stretch your body before you do physical gardening tasks but it’s wise to approach this in the same way you would an exercise class.
    • Work “little and often”: 20–30 minute sessions with breaks are easier than hours at a stretch.
    • Alternate sitting and standing: Vary positions to avoid strain.
    • Supportive footwear and gloves: Prevent slips and protect your hands. It’s really tempting to just pop your flip fops on to do a bit of light gardening. However, once you are out there and get side tracked (we all get side tracked in the garden 😊) with more meaty tasks you risk not only damaging your feet, but also slips and trips. It’s a pain we all know – but please put your gardening shoes on!
    • Again ask for help when needed: Whether it’s lifting bags of compost or installing raised beds, sharing the load means you can keep gardening for longer.

    Quick Checklist

    • At least one raised bed at waist height.
    • Rolling stool or kneeler with handles nearby.
    • Long-handled tools and lightweight barrow.
    • Drip hose or water butt close to beds.
    • Clear labels and bold markers for plants.
    • 20–30 minutes of work, then a break.

    Final Thoughts

    Gardening doesn’t have to stop when the work feels harder. With a few smart adjustments—whether it’s raised beds, lighter tools, or watering systems—you can keep enjoying fresh vegetables without compromising your health. The key is to garden smarter, not harder, and to create a space that works for you. It doesn’t need to be pretty, it just needs to be safe and allow you to continue enjoy your garden.

    If you enjoyed this post or found it useful please consider subscribing to the solitaire gardener community. Subscribing is free and will keep you up to date with posts and exclusive content directly to your inbox. Just type your email address in the box below and hit the subscribe button.

    All subscribers will also receive a free download with tips and hints for DIY organic pest control.

  • Raised bed gardening

    Aerial view of a garden with various raised beds filled with healthy vegetables and plants, surrounded by gravel pathways.

    To raise or not to raise?

    Growing vegetables in raised garden beds has become increasingly popular among home gardeners, and for good reason. Raised beds provide greater control over soil health, water retention, and pest management compared to planting directly in the ground. They also make gardening more accessible, especially for those with limited mobility or poor-quality soil. While there are upfront costs involved, the long-term benefits often outweigh the initial investment. All that being said, planting vegetables direct into the soil is clearly a good option especially on an allotment, or if growing at scale (market gardening). While I use mostly raised beds I do still plant directly into soil. The soil on our property is very heavy clay which takes time to amend. Consequently, raised beds work well in my situation. The key is to take some time to consider what gardening methods will work for you in your particular situation.

    What type of raised beds to choose

    When choosing raised beds, many gardeners weigh up the differences between wooden and metal options. Wooden raised beds, often made from untreated cedar or larch, are affordable and easy to build yourself, typically costing between £40–£80 per bed depending on size and timber quality. However, wood does eventually rot and may need replacing every 5–10 years. You can cut the price of wooden beds even further you can use something like a wooden pallet taken apart and reassembled as a raised bed. This will take some work and you will need a few tools, but it’s a relatively simple process. Even more budget friendly if you can get pallets for free (try some of those free sites such as Trash Nothing)

    Metal beds, usually made from galvanised steel, are longer-lasting and can withstand weathering for decades. These often cost more upfront from around £60 –£200 per bed depending on width and depth. They are rot resistant, and can be purchased in different in a range of shapes and sizes. So shop around until you find a style and shape that suites your garden aesthetic.

    Metal raised bed are generally very easy to put together. They come in sections complete with the screws, nuts, and washers. A small cordless screwdriver will speed up the process of construction, but it’s not essential by any means. The quality of beds can vary, but like most things in life you get what you pay for. I use raised beds from a company called called ‘Estate to Garden’ based in Hampshire UK. Their beds are reasonably priced, the quality is excellent and they offer 5% for new customers quote the code WELCOME5 at checkout. I’m not affiliated in any way, but I’ve been purchasing from them for a few years now and like their products. This is the link if you are in the market for a raised bed https://www.estatetogarden.co.uk/

    Whether you choose metal or wood you need to make sure that you have enough soil or compost in which to plant. You are looking for around 12 to 15 inches (about 30 to 38 cm) for most crops. You can get away with about 6 inches (15 cm) for crops with shallow roots such as lettuce, but if you want to be able to plant crops such as carrots you will be looking at at least 8 to 10 inches (17 to 25 cm).

    Filling your raised beds

    Filling raised beds is another important consideration as the cost can quickly mount if you are filling an 80 cm raised bed with compost alone.

    Before you start filling your beds put a few layers of cardboard down as a base for the bed to sit on. You could use organic weed fabric, but carboard boxes are generally free and if you put down two or three layers it will be just as effective. Just make sure each layer overlaps and there are no gaps. Weeds love a gap 👀

    If your beds are shallow, layer with some organic material such as dried leaves, fine wood chip, or small twigs or a mixture of all three. Then either garden soil and or compost as your growing medium

    One cost-saving, and my preferred method of filling deeper beds is to use hügelkultur. Hügelkultur is a technique where rotting (decomposing) logs, branches, and other organic materials are layered at the bottom of the bed before topping with soil and compost.

    My method is as follows:

    • Layer 1: decomposing decaying logs
    • Layer 2: tree clippings small branches with foliage that is brown and unlikely to root
    • Layer 3: garden leaves (luckily we have a lot of trees on our property so leaves are not an issue to source)
    • Layer 4: spent (used) compost from pots and my potato bags – I keep all my spent soil in a big bag to use whenever I need a filler
    • Layer 5: garden soil (perhaps also include some manure)
    • Layer 6: compost about 4 – 5 inches (10 cm)

    Filling in this lasagne method not only saves money on filling material but also improves water retention and nutrient cycling as the buried wood slowly decomposes. Over time, hügelkultur beds become self-sustaining and reduce the need for fertilisers, so a good organic gardening option. There are a couple of woods to steer clear of if filling beds in this way. Avoid black walnut as your initial log layer as that can leach toxins and cedar as it will take forever to breakdown.

    You will find the soil level of your beds will reduce as the soil and compost settles over time. You can easily top them up with top soil and compost as this happens. My top tip here is to fill you raised bed, then wait a couple of weeks before planting to give the soil a chance to settle and all the layers to get to know each other. That way if the soil level drops significantly you are not in danger of planting into soil that’s not deep enough to support the plant.

    Water retention

    Water retention in raised beds is generally better controlled than in open ground, especially if you use mulch and organic matter to cover the soil surface. Wooden and metal beds can both dry out faster than in-ground gardens, so regular monitoring is essential. Stick your finger into the soil up to the first knuckle; if it feels dry, it’s time to water. You can also install a simple moisture meter to keep track more accurately. Adding compost annually and rotating crops helps maintain soil structure and fertility without the need for heavy amendments. Raised beds benefit from deep the watering of plants at their base. A layer of mulch around the plants base will also help with water retention and evaporation.

    Pest control

    A key advantage of raised beds is pest control. Because the growing area is elevated and defined, it’s easier to install barriers such as mesh covers or netting. Raised beds also discourage some crawling pests, like slugs, compared to planting directly in the soil. You’ll deal with fewer problems related to compacted ground, weeds, and soil-borne diseases. And unlike traditional gardens, you won’t need to spend time amending poor soil, since you control exactly what goes into the bed from the start.

    Having said that, any kind of raised bed won’t solve pest problems completely. There will still be slugs, snails, caterpillars and various moulds to contend with. However, as plants are raised from the ground and contained, it will at least give you a head start on controlling the critter population. For more on organic methods to control caterpillars see Butterflies can spell trouble for your brassicas

    Raised beds can also help with weed control you will find you have generally fewer weeds. The ones that do date to pop up are easier to spot and pull out as the soil is less compacted and freer draining. Again, this method won’t eliminate weeds completely, but will certainly make give you a fighting chance at controlling them. So don’t skimp on your initial cardboard base, as mentioned earlier make this at least 2 or 3 layers thick.

    Final thoughts

    Lastly, think carefully about where to position your raised beds. Observe your garden space for a few weeks to see which areas get the most sun, where water naturally drains, and whether nearby trees might cast unwanted shade. Remember that raised beds do involve extra costs, whether you build them yourself or purchase ready-made versions. DIY beds can save money if you have basic carpentry skills, while store-bought models save time and effort but require more investment. Either way, the benefits — potentially healthier crops, easier maintenance, and improved yields — make raised beds a smart choice for gardeners looking to grow organic vegetables efficiently.

    Gardening friends and colleagues may disagree with my raised bed love affair, but for me it works well – it gives me a degree of control over the plants environment and all the physical work is front loaded with the initial filling. Ideal for this slightly lazy solitaire gardener 😊

    If you enjoyed this post or found it useful please consider subscribing to the solitaire gardener community. Subscribing is free and will keep you up to date with posts and exclusive content directly to your inbox. Just type your email address in the box below and hit the subscribe button.

  • What to sow in September

    Keeping the garden productive with winter veg

    A variety of winter vegetables including spinach, leeks, lettuce, radishes, and peas, illustrated in a colorful and vibrant design.

    As summer fades into autumn, September in the UK still offers a surprising range of vegetable seeds that can be sown for late harvests or overwintering. With cooler nights and shorter days, it’s important to choose crops suited to the changing season. Many of these vegetables prefer mild conditions, and some will thrive with a little protection under cloches, cold frames, or greenhouses.

    A clear plastic water bottle with the bottom removed is placed in soil, serving as a makeshift cloche for plant protection.

    Don’t forget you can also plant in pots if space is at a premium, and a cloche can be as simple as a five litre water bottle with the bottom removed and holes poked in the sides for air flow.

    Below we will discuss some potential crops to sow in September to keep the garden productive.

    Spinach (Spinacia oleracea)

    Spinach seeds are small, angular, and slightly rough to the touch. They can be sown directly in the soil or in seed trays for later transplanting. Sow seeds about 1/2 to 1 cm deep. In September sowing, direct sowing works well in moist, fertile soil. They prefer a sunny spot but will also tolerate light shade, especially in early autumn. spinach seeds are big enough to handle so plant seeds about 7–10 cm apart. If planting in rows keep a spacing of around 20 – 40 cms between rows. Keep the soil consistently moist but not waterlogged. Spinach seeds will germinate in about 7–14 days at temperatures between 10–20°C. Plants will be ready to harvest in 6–8 weeks, and if you take the outer leaves first you will be able to harvest for months to come.

    • Seed shape: small, angular, rough
    • Germination: 7–14 days, 10–20°C
    • Position: sunny or partial shade
    • Maturity: 6–8 weeks
    • Watering: consistent, moist soil

    Pests & Protection: Spinach is vulnerable to slugs, snails, and leaf miners. Protect young seedlings with cloches or net, use beer traps, finely crushed egg shells, or wool pellets against slugs. Vile as it sounds handpicking slugs at dusk can help keep down the slimy slug population. Companion planting with onions and garlic helps deter leaf miners. If leaf miner occurs, remove affected leaves when first detected.

    Spring Onion (Allium fistulosum)

    It’s not too late to try a sowing of these tiny, black, and angular seeds. Best sown directly into shallow drills outdoors, but you can also start them in seed trays to transplant later. Germination takes 10–21 days at 13–21°C. They thrive in sunny, well-drained soil and are ready in 8–12 weeks

    • Seed shape: tiny, black, angular
    • Sowing depth: 1 cm
    • Row spacing: 15–20 cm apart, thin seedlings to 2–3 cm
    • Germination: 10–21 days, 13–21°C
    • Position: full sun, well-drained soil
    • Maturity: 8–12 weeks
    • Watering: light, regular moisture

    Pests & Protection: Vulnerable to onion fly and thrips (thunder flies). Use fine mesh netting, encourage ladybirds, and interplant with carrots.

    Cauliflower – All Year Round (Brassica oleracea var. botrytis)

    Cauliflower seeds are small, round, and dark brown. The “All Year Round” variety can be sown in September through to late October. They can be sown in seed trays or modules, ready for transplanting outdoors once young plants are sturdy. Germination takes 7–12 days at 15–20°C. Cauliflower prefers firm, fertile soil in full sun and benefits from steady watering. Maturity is usually 20–26 weeks, making it a longer-term crop but one well worth the wait for dense, tasty curds (the white part of the cauliflower).

    • Seed shape: small, round, dark brown
    • Sowing depth: 1 cm
    • Row spacing: 60 cm apart, thin or transplant seedlings to 50 cm spacing within rows
    • Germination: 7–12 days, 15–20°C
    • Position: full sun, fertile, firm soil
    • Maturity: 20–26 weeks
    • Watering: steady, consistent moisture (avoid drought stress)

    Pests & Protection: Cauliflower is vulnerable to cabbage white butterflies, pigeons, clubroot, and aphids. Protect seedlings with fine mesh netting to prevent caterpillars and bird damage. Firm the soil well when transplanting. Interplant with celery, dill, or nasturtiums to deter pests. Regular checks for aphids can be managed with a neem oil spray or by encouraging beneficial insects such as ladybirds. When using neem oil, follow the instructions on the bottle and don’t overconcentrate the solution. Too concentrated will leave too much oil on your plants that will easily fry in the sun.

    Lettuce (Lactuca sativa)

    Lettuce seeds are tiny, oval, and flat. They germinate in 7–10 days at 10–18°C. Can be direct sown under cloches or started in trays. Prefers sun or light shade. Plants mature in 6–10 weeks and need consistent moisture. Lettuces also do really well in pots, just make sure the pot has the depth of at least 50 cm. so they can put down strong root.

    • Seed shape: tiny, oval, light brown
    • Sowing depth: 0.5 cm (surface sow with light covering)
    • Row spacing: 25–30 cm apart, thin seedlings to 15–20 cm
    • Germination: 7–10 days, 10–18°C
    • Position: sunny or partial shade
    • Maturity: 6–10 weeks
    • Watering: regular, avoid waterlogging

    Pests & Protection: Lettuce is susceptible to slugs, snails, and aphids. Use beer traps, seaweed mulch, netting and encourage beneficial insects. Interplant with chives or garlic for natural deterrence. Again it may sound gross, but hand remove slugs at dusk if possible. If growing in pots get yourself some copper electricians taps and wrap it round the middle of your pot. It is said that slugs and snails won’t slither over the tape. Although I have to say that’s no guarantee 😊

    Radish (Raphanus sativus)

    Radish seeds are small, round, and reddish-brown. They germinate in 4–7 days at 8–20°C. Quick-growing, they dislike transplanting, so sow direct. Maturity in just 3–4 weeks

    • Seed shape: small, round, reddish-brown
    • Sowing depth: 1 cm
    • Row spacing: 15 cm apart, thin seedlings to 2–3 cm
    • Germination: 4–7 days, 8–20°C
    • Position: full sun, light soil
    • Maturity: 3–4 weeks
    • Watering: regular to prevent splitting

    Pests & Protection: Vulnerable to flea beetles and cabbage root maggots. Use horticultural fleece and companion plant with nasturtiums as trap crops. Rotate to prevent soil-borne pests.

    Pak Choi (Brassica rapa var. chinensis)

    Pak choi seeds are small, round, and dark brown. They germinate in 7–10 days at 10–25°C. Can be direct sown or in seed trays to transplant later. Plants mature in 6–8 weeks, thriving in sun or partial shade.

    • Seed shape: small, round, dark brown
    • Sowing depth: 1 cm
    • Row spacing: 30 cm apart, thin seedlings to 20–25 cm
    • Germination: 7–10 days, 10–25°C
    • Position: sunny or partial shade
    • Maturity: 6–8 weeks
    • Watering: consistent, avoid drying out

    Pests & Protection: Targeted by cabbage whites, flea beetles, and slugs. Use fine mesh netting, organic straw mulches, and beer traps. Companion plant with mint or dill to confuse pests

    Broad Beans (Vicia faba)

    Broad beans are large, flat, and kidney-shaped. Sow direct in drills for overwintering. Seeds germinate in 7–14 days at 8–15°C. They prefer sun and fertile soil. September sowings mature in spring–early summer. Broad beans also do really well in pots, as ever just make sure your pots are deep enough.

    • Seed shape: large, flat, kidney-shaped
    • Sowing depth: 5 cm
    • Row spacing: 45 cm apart, plants 20 cm within rows
    • Germination: 7–14 days, 8–15°C
    • Position: full sun, fertile soil
    • Maturity: harvest in spring–early summer
    • Watering: water well when pods form

    Pests & Protection: Often attacked by blackfly. Prevent by pinching out growing tips after flowering. Encourage ladybirds and plant marigolds or nasturtiums nearby as diversions. Cloches protect overwintered seedlings from slugs.

    👉 In summary, September in the UK and potentially other more temperate climates still provides plenty of opportunities to sow seeds. By paying attention to sowing depth, row spacing, and organic pest management, you can enjoy organic crops throughout the autumn and winter months.

    If you enjoyed this post or found it useful please consider subscribing to the solitaire gardener community. Subscribing is free and will keep you up to date with posts and exclusive content directly to your inbox. Just type your email address in the box below and hit the subscribe button.

    Thanks for reading Solitaire Gardener.

  • How to Start Your First Organic Vegetable Garden

    A beginners guide

    Close-up of ripe organic tomatoes in varying shades of red and green, growing on a vine.

    Starting an organic vegetable garden is one of the most rewarding ways to grow your own fresh, healthy food at home. Whether you have a spacious garden or a small balcony, this beginner-friendly ‘first steps’ guide will help you get started with the basics.

    Organic gardening is both practical, and I guess philosophical. The premise is eliminating the use of manufactured chemicals, therefore  limiting the damage to interdependent eco systems. For example the dreaded blue chemical slug pellets. While effective in controlling the slug population, they also damage other insects and can affect soil health. Organic gardening is about ensuring good soil health, and working with nature rather than trying to control her with chemicals.

    So if you want to tread a little lighter on the planet and grow some good nutritious food, below are some simple tips to get you started.

    1. Choosing the Right Location

    Your garden’s success starts with picking the right planting spot. Most vegetables need at least 6 hours of direct sunlight every day to grow well. Obviously, this is not possible in many regions but you are looking for the sunniest patch you can find for summer veg. Winter veg will tolerate some shade, but they are not total  vampires and will need some sunlight, which is why we plant them in late summer, as it gives them the last of sunshine to get established.

    Look for an area with good drainage (no puddles after rain) and enough space to plant your chosen vegetables comfortably. Most vegetables don’t like permanently soggy feet, just remember they’re plants, not ducks!

    Before you commit to planting anything, spend a few weeks observing your garden space at different times of the day. Notice which areas get the most sun in the morning, midday, and afternoon, and which are shaded. This will help you match sun-loving plants (like tomatoes and courgettes/zucchini) to the brightest spots, and reserve partially shaded areas for crops that can tolerate less direct sun, such as lettuce or spinach. If space is tight, consider raised beds or container gardening to make the most of your area. I’m a great proponent of raised bed gardening as it cuts down on weeding and can help with drainage. Some raised beds can be quite expensive and large to fill, so my suggestion is to use what you have. All you’re really looking for is something to contain the soil, a rectangle of house bricks two or three rows high, some breeze blocks, or some simple wooden boards will all suffice. Whatever you choose, just make sure there is drainage. Also remember that if you are using untreated wood, after a few years it will start to rot and break down.

    2. Preparing Your Soil

    Healthy soil is the foundation of an organic garden.

    Testing your soil:  Test your soil’s texture and pH — you can buy an easy soil test kit at a garden centre or online.
    Testing your soil is important because it tells you whether your soil is acidic, neutral, or alkaline, and whether it’s sandy, loamy, or clay-heavy. This helps you decide which crops will thrive naturally in your soil and whether you need to add organic matter or adjust pH levels to suit your chosen plants. Testing your soil is definitely best practice, but if I’m honest I don’t always test soil. So, while soil testing it is best practice, and will ensure your plants get the right nutrients. It not the end of the world if you don’t. You will learn over time which plants struggle in your soil and which will thrive.

    Organic compost: add plenty of organic compost to enrich the soil with nutrients. Spread a 5–7 cm (2–3 inch) layer of compost on top and gently fork it into the top 15 cm (6 inches) of soil. This improves texture, water retention, and fertility. Unless you have access to plenty of home grown compost, you will need to purchase few bags from the garden centre. To stay loyal to the principles of organic growing go for ‘peat fee’ compost.:

    Try a no dig solution: Once you have identified your growing spot, lay down a couple of layers of cardboard and pop your compost on top. The cardboard will help act as a weed barrier. This is where some kind of raised bed can be helpful to contain the soil. If you are using this method I would recommend at least 7 inches of compost. This will allow the plant roots to spread and anchor themselves. Brassicas in particular like their roots to feel firm and secure in soil.

    Mulching around your plants with straw, shredded leaves, grass clippings, or wood shavings helps keep moisture in and weeds down.

    3. Selecting Easy Vegetables to Grow

    As a beginner, choose vegetables that are known for being easy to grow and quick to harvest. This will not only give you a crop, but will also help you learn about your growing conditions, your soil and how a plant develops.

    Here are a few great options:

    • Lettuce: Fast-growing and perfect for salads.
    • Radishes: Ready to harvest in just a few weeks.
    • Runner beans/pole beans: Produce a good yield with minimal fuss.
    • Courgettes/zucchini: Very productive and tolerant of various conditions.
    • Carrots: Grow well in loose soil and don’t require much care.
    • Garlic: easy to grow and don’t require too much care, but do take longer to mature
    • Herbs: most herbs are fairly easy to grow,

    Start small — it’s better to succeed with a few crops than get overwhelmed, and remember grow what you like to eat. If you don’t like to eat it, don’t grow it.

    If your a little impatient (which we all are from time to time) you don’t need to grow everything from seed. You can buy small plants normally called ‘starts’ at a reputable garden centre. Look for healthy robust starts and get them in the ground or your chosen pot as soon as possible.

    4. Tools You’ll Need

    You don’t need a lot of fancy kit to get started, but a few basics make gardening easier:

    • A small trowel for digging and planting
    • Gardening gloves to protect your hands
    • A watering can or hose with a gentle spray nozzle
    • A garden fork or hoe for soil preparation (optional but useful)
    • A pair of secateurs,  these are great for cutting and snipping anything from string to small stems and twigs.
    • Containers if not planting direct into the ground. You can use module trays and seed trays from the garden centre. However, as long as you poke some holes in the base for drainage pretty much anything will do – yoghurt pots, the kids little fromage frais pots, egg cartons,

    Keep your tools clean and stored in a dry place to make them last.

    5. Planting Your Garden

    Follow the seed packet or plant label instructions for planting depth and spacing. Sow seeds directly into prepared soil or start seedlings indoors in a sunny spot and transplant them once they’re strong enough.

    When we say “strong enough,” we mean the seedlings have developed their first set of “true leaves” — these are the leaves that appear after the initial seed leaves (cotyledons). Seed leaves are usually smooth, simple and the first to appear., Their main job is to feed the young plant until it can photosynthesise on its own. True leaves look more like the adult leaves of the plant and indicate the seedling is ready to cope with outdoor conditions. Don’t be too keen to get seeds planted in seed trays or modules in the ground. You want those first true leaves to look healthy and established, before transferring them to their final growing spot.

    Water the soil gently but thoroughly after planting, and keep it consistently moist until seedlings emerge.

    6. Maintaining Your Garden

    Water your plants regularly — most vegetables prefer about 2.5 cm (1 inch) of water per week. Early morning watering is ideal because it allows plants to absorb moisture before the day warms up, reducing stress from heat and evaporation loss. It also means leaves dry out quickly, which helps prevent fungal diseases.
    If you water in the evening, plants still benefit from the moisture, but damp leaves overnight can sometimes encourage fungal problems — especially in cool, humid weather. If evenings are your only option, water at the base of plants to keep foliage dry and reduce risk

    • Handpicking visible insects like caterpillars (kids love doing this and transferring them to a bug hotel)
    • Planting companion plants (e.g., marigolds to deter aphids) Companion planting is the process of planting a specific plant near the plant you want to protect. The companion plant can help to either attract beneficial insects or deter pests.
    • Using natural sprays like neem oil (follow the instructions and don’t under-dilute) Some people swear by very diluted soapy water in a spray bottle. You could also try a garlic solution which can help deter pests. Pop 2/4 cloves of garlic cut into quarters into a spray bottle, fill with water and leave for about a week. It will then be ready to spay onto your plants.

    Prevention is belter than cure when it comes to pests – observe your plants on a regular basis, and take action early. Netting can be your friend and there are plenty of articles and help online around specific pests and disease.

    7. Harvesting Your Vegetables

    Harvest vegetables when they’re ripe but still tender. For example, pick lettuce leaves young for best flavour, or harvest beans when pods are firm but before seeds bulge. Your seed packets should give you an indication when the plant will be ready to harvest. Most seed packets have a small calendar that will indicate the best months to ‘sow’ ‘plant outside’ & ‘harvest’. You can also find many online guides that will give you the optimum growing window for each plant. If you order your seeds online this information is often supplied by the seed seller.

    Regular harvesting encourages plants to produce more. Use clean scissors or your secateurs to avoid damaging plants.

    Final Thoughts

    Starting your first organic vegetable garden is easier than you might think. Take it step-by-step, be patient, and don’t get discouraged if things don’t work the first time. My advice would be to sow seeds about every 2 – 3 weeks to ensure you have backup options. So if your first seeds don’t germinate or get damaged when planted out, you will be safe in the knowledge that you have more on the way.

     With practice, you’ll soon be harvesting fresh vegetables you grew yourself — healthy, delicious, and chemical-free.

    For more beginner tips, check out my other posts Labelling: Simple, but vital, Starting with Herbs, or Grow your own spinach: A year round superfood for the garden

    If you enjoyed this post or found it useful please consider subscribing to the solitaire gardener community. Subscribing is free and will keep you up to date with posts and exclusive content directly to your inbox. Just type your email address in the box below and hit the subscribe button.

  • Starting you self-sufficiency journey

    Take your time, be realistic, & start slowly

    A garden pathway lined with raised vegetable beds filled with lush green plants, including lettuce and herbs, leading to a white picket gate.
    The tidy productive dream

    Embarking on the journey toward being more self-sufficient in food is a beautiful, hopeful thing. But it doesn’t have to be all-or-nothing. It definitely shouldn’t be all-at-once.

    You need to pace yourself. It doesn’t matter what type of space you have. It could be a sprawling smallholding, an allotment tucked behind a row of terraces, a back garden, or just a few pots perched on a balcony. The key is to start small, be realistic with your time and energy, and most importantly—be kind to yourself. Remember, there are no prizes for burning out before the first harvest. Gardening is not a competition to be the busiest or most stressed out human.

    We all dream of the perfect plot. Evenly spaced rows of well behaved leeks with no rust. We want pole or runner beans that don’t resemble an amazon rain forest. We desire neat leaved brassicas that aren’t being devoured by the local caterpillar community.

    A garden with raised beds filled with various vegetables and greenery, featuring a narrow pathway and a wooden gate in the background.
    The messy reality

    It takes time to get to that point. Some of us, including me, never will. I’m a messy gardener who gets easily distracted. I go out to pick plums and end up clearing nettles or pruning something that I passed on the way.

    I make a list but am easily distracted – and actually that’s o.k. It’s your garden space so ‘you do you!’

    One of the most empowering ways to begin is to focus on just one or two things. This is especially important when you’re just starting out. Pick a crop you love and will actually eat. Choose something simple and reliable. Garlic is a good choice because it practically grows itself once it’s in the ground in autumn. Onions, are sturdy, satisfying, and store well. Herbs like dill, chives, or mint are ideal for beginners. Keep mint in a pot unless you fancy a mint invasion. These herbs will add joy to your cooking with minimal effort. Spinach, lettuce, and radishes can be quick wins, helping you build confidence as you go. Choose one or two, learn its quirks, and build out from there.

    There’s no need to splurge at garden centres (tempting as it is—we see you, eting up those fancy compost scoops and artisan trugs). Instead, use what you’ve already got lying around. An old egg carton makes a perfect seed tray. Toilet roll tubes? Excellent for peas and beans. Ice cream tubs, yoghurt pots, mushroom trays—give them a rinse, poke some drainage holes in the bottom and get sowing. A cracked washing-up bowl can become a salad bar. Upcycling not only saves money, but gives a second life to single use plastic container. Just make sure you remember to ensure you have some drainage holes in the bottom of your container. It will help your seed from being waterlogged. No plant or seed really likes it’s feet in a permanently soggy trench.

    Handy Starting Tips:

    • Start with one or two easy crop (e.g. garlic, spinach, herbs).
    • Use recycled materials for pots: egg cartons, yogurt pots, food trays.
    • Keep a notebook or app journal to track what you plant, when you panted it and how it grows. It will help you reflect on both your successes and areas to improve.
    • Make a simple calendar of sowing/planting times for your zone (UK: check RHS or your local council website; US: look up your USDA zone).

    When things don’t go to plan—and they will—try not to take it personally. Everyone has stories of seeds that didn’t sprout, slugs that threw a midnight rave, or tomatoes that simply refused to ripen. You’re not failing; you’re learning. Every failed crop teaches you something about your soil, your timing, your microclimate—even your patience. Document the journey. Photos, notes, a scrappy journal—anything to help you look back and see how far you’ve come.

    Finally, remember: this is not a race, and it’s okay if your energy or capacity fluctuates. You might have a full-time job, be raising children, living with illness, managing a disability, or just having a bad day (or week… or month). It’s okay. Take that list of 100 garden jobs and just do one. Sow one tray of seeds. Water one pot. Pull one weed. The magic is in consistency, not intensity. Little and often beats a heroic garden blitz followed by three days of lying down in the dark.

    Ways to Be Kind to Yourself in the Garden:

    • Pace yourself: One or two tasks done well every day will reap long term benefits
    • Celebrate small victories: First sprout? That’s a win.
    • Take breaks: Sitting in your plot watching and learning counts as gardening.
    • Share your progress: Social media, blogs, or just with a friend. Communities are great for support.
    • Be flexible: Didn’t get the seeds in? It’s not the end of the world, just buy some plug plants from a reputable garden centre and plan for next year.

    Being more self-sufficient is as much about mindset as it is about harvests. Dream big, yes, but be realistic and rest when you need to.. Eat your own spinach with pride, even if it’s one handful. And remember: you’re not just growing food—you’re growing resilience, skill, joy, and connection to the land. So dig in, mess up, try again—and be gentle with yourself every step of the way. 🌱

    Looking for easy ways to start your gardening adventure then check out this post Starting with herbs or this Labelling: Simple, but vital about why labelling is one of the most important gardening tasks

    Don’t forget to share below how you manage that massive garden ‘to do’ list.

    Thanks for reading solitaire gardener.

    If you found this post useful please do consider subscribing by typing your email address and hitting the subscribe button. It will enable you to get new posts directly to your inbox and stay up to date with new content.

  • Harvesting Onions – lift don’t pull!

    Harvesting Onions for Storage:

    Harvesting onions at the right time and in the right way can affect how well they will store in the months ahead. Once the tops of your onions begin to yellow and flop over it’s a sign they’re ready to be harvested. This normally happens in late summer but with the constant changes in our climate it can often happen earlier. When onions have ‘fallen over’ (bend at the neck) it’s a good indicator that your onions have reached maturity.

    It may be tempting to yank them out of the ground given that they are almost sitting on top of it anyway, but resist that urge! Pulling them out of the ground can not only bruise the bulbs, but can also tear the tops which can influence how they store later.

    Timing can also be key to longevity. Harvesting during a run of dry weather can ensure less moisture gets into the plant. Ideally have a couple of dry days prior to lifting to ensure the onions are nice and dry prior to lifting.

    Lifting them gently with a garden fork or hand tool is the way forward. You want to make sure you get underneath each onion and raise them gently out of the ground. Don’t be tempted to tug, taking some time and patience now will pay dividends in the future. Once you have the onion out of the ground gently remove the soil from around the root.

    This gentle lift will help preserve the neck (see photo above) and integrity of the plant – both keys for longer term storage.

    Be careful not to remove too much of the papery skin (or tunic) that protects the inner flesh. The skin will act as a protective layer during storage preventing them from drying out and rotting. It also helps to seal in moisture and acts as a barrier against dirt and disease.

    Don’t worry too much if you have onions that are not perfectly covered in the papery skin – they will still store, it just means that you will need to keep more of an eye on those and possibly use them up first.

    After harvesting, the curing process is crucial.

    Curing allows the moisture in the neck of the plant to dry out, damp soggy necks allow moisture down into the bulb which can cause the onion to rot. Curing also helps that papery skin to develop further so protecting your precious harvest.

    Lay your onions out in a single layer in a dry, (dry is the watchword here) warm, well-ventilated space like a garage, shed, or covered porch. Avoid direct sunlight, as it can sunburn the bulbs. Allow them to cure for two to three weeks, or until the necks are fully dry and the outer skin is crispy and rustling to the touch. The previously green foliage should also be brown, if it is still green then the onion may not be fully cured. Proper curing extends shelf life and minimizes the risk of mould or sprouting later on.

    You can dry them in a greenhouse, just make sure you do it in a shady spot and use a shade cloth over them if you are worried about them getting too much sun. They need to dry in there not roast 😊

    Once your onions are fully cured, it’s time to prep them for storage. Trim the roots with scissors and cut the tops down to about an inch or two above the bulb—or, if you prefer, leave the tops intact for braiding or plaiting. Any onions with soft spots, bruises, or signs of damage should be used up first, as they won’t store well. Gently brush off any excess dirt, but don’t wash them—moisture is the enemy of storage onions.

    For storage, choose a cool, dry, and dark place—ideally between 32°F and 40°F with low humidity. Mesh bags, crates, or hanging braids in a well-ventilated pantry or cellar all work well. Airflow is critical, so avoid sealed containers. Plaiting or braiding onions by their dried tops not only looks lovely but also helps with airflow and space efficiency.

    Check stored onions every few weeks and remove any that are starting to soften or sprout to prevent spoilage from spreading.

    Beyond traditional storage, there are other ways to preserve onions for the long haul.

    Dehydrating sliced onions for rehydrating later in stews or casseroles is an excellent option and ideal if you are short on space. My personal favourite is dehydrating any damaged onions from my harvest, then grinding them down to make onion powder. 

    You can also chop and freeze onions—though frozen onions are best used in cooked dishes, as they will lose their crunch. My tip for freezing onions is to ‘open freeze’ them first, then bag them. Pickling is another flavourful option, there are many recipes online for quick fridge pickles, red onions in particular make a very attractive looking pinkish pickle.

    Don’t worry if you don’t get the storage options it right the first time, it takes time to understand how your specific environment works. However, taking time to lift, cure, and store onions correctly and with care will help to ensure they last well into the winter months and possibly beyond.

    If you enjoyed this post or found it useful please consider subscribing to the solitaire gardener community. Subscribing is free and will keep you up to date with posts and exclusive resources directly to your inbox. Just type your email address in the box below and hit the subscribe button

  • Starting with herbs

    A potted rosemary plant with text overlay 'Herbs a good place to start' on a light background, surrounded by decorative herb illustrations.

    Growing your own herbs can be one of the most rewarding and straightforward ways to start the joyous growing your own.

    For new gardeners, the idea of cultivating a thriving, productive veg patch can seem daunting, but herbs are incredibly forgiving and offer the perfect starting point for new growers and those with smaller growing spaces.

    Whether you have a tiny balcony, a sunny windowsill, or a dedicated raised bed, there’s a herb out there waiting for you to discover. Starting small allows you to learn and make mistakes, without feeling overwhelmed, or jeopardising an entire food crop.

    Staring with herbs can help build you confidence as learn both to grow and to use that produce in the kitchen.

    When it comes to getting started, you have a few options. Those who enjoy the  journey from tiny speed to mature plant, growing herbs from seed is a budget-friendly and satisfying choice. The tip here is to purchase good seed from a reputable seed producer. Herbs like basil, coriander, and dill germinate relatively quickly and seeing their first true leaves emerge can be a magical experience.

    Alternatively, if instant gratification is more your style, or if you’re keen to enjoy fresh herbs sooner, purchasing established plants from a reputable garden centre is an excellent idea. Look for healthy, vibrant plants with good colour and no signs of pests or disease. This gives you a head start and ensures you’re beginning with strong specimens.

    You might also try buying pot grown herbs from the supermarket, dividing them and potting them on as individual plants. I have to say, personally I have not had the best results with this method – although am reliably told it is possible and what have you got to lose if you are buying that herb anyway.

    One of the great things about herbs is their versatility in terms of growing location. You can choose to plant them directly in the ground. This is often ideal for herbs that enjoy more space, will grow bushy and require less watering once established. Sage, Rosemary and Oregano are good examples. A word of warning about planting Mint directly in the ground. Mint spreads like wild fire so I would avoid putting any mint directly in the ground, regardless of what the seed packet tells you to do.

    For many new gardeners, or those with limited space, pots are a fantastic solution. They offer flexibility, allowing you to move your herbs to catch the best sun, bring them indoors during colder weather, or simply rearrange your garden design. Static raised beds also make lovely herb beds. Before you put a raised be in make sure you observe your space to ensure it is located in the sunniest spot for your Mediterranean herbs like basil. For more on raised bed gardening you might find this post interesting  Raised bed gardening

    Benefits of growing herbs in the ground:

    • Established plants can be more resilient to drought once their root systems are developed.
    • Often leads to larger, more prolific plants over time.
    • Can contribute to healthy soil ecosystems.
    • Less frequent watering may be required compared to pots.

    You might still need to protect your early seed growth from garden pests – using a closh (an old cut out water bottle with plenty of holes for airflow) will work fine.

    Benefits of growing herbs in pots:

    • Flexibility to move plants to optimise sunlight or protect from harsh weather.
    • Ideal for small spaces like balconies, patios, or windowsills.
    • Easier to control soil conditions and nutrients.
    • Perfect for containing aggressive growers like mint and oregano

    When growing herbs in pots it’s worth it’s worth taking the RHS (Royal Horticultural Society) advice into consideration. They suggest  you ‘Use a gritty, well drained compost, adding up to 25% by volume of course grit or perlite to loam based compost i.e. Jon Innes No.1’ https://www.rhs.org.uk/herbs/containers

    Basically that means make sure your pot can drain well and the soil is not to heavy or clay like. The course grit and perlite will give you a good start. However, if you put some big stones in the bottom of your pot, and fill it with fine compost that should suffice. Think drainage, herbs don’t like to be waterlogged. They are plants, not ducks 🦆

    Ultimately, growing herbs is an accessible and enjoyable entry point into gardening. Their low maintenance, combined with the immense satisfaction of harvesting your own fresh ingredients, make them a perfect choice for new gardeners.

    Don’t be afraid to experiment with different varieties and find what works best for your space and your taste buds. With a little sunshine, some water, and a bit of care, you’ll soon be enjoying the delicious rewards of your very own herb garden. Grow the herbs you love to cook with and not only will it bring you joy, but it will also save you paying over the odds for lower quality store bought herbs.

    If you found this post useful please consider subscribing, just enter your email address below and hit the subscribe button.

    Subscribing is free and will keep you up to date with posts and exclusive content directly to your inbox.

    Thanks for reading Solitaire Gardener.

  • Labelling: simple but vital

    The Power of the Plant Tag: Why Labelling Your Vegetable Seeds Matters

    Two small pots with young cilantro seedlings, one in a black container and the other in an orange container, both labeled with tags.
    Two young plants that at first sight look very similar. On the right is celery on the left celeriac.

    Planting a vegetable patch is an exciting adventure, filled with the promise of fresh homegrown goodness. However, in the initial enthusiasm it’s easy to overlook a crucial step: labeling your seeds when planted.

    Taking a few extra moments to label your seeds immediately after planting can save you a world of confusion, misidentification, and frustration later on. While it might seem like a minor detail in the grand scheme of things, taking a few seconds to clearly mark what you’ve planted can save you a world of confusion and potential disappointment down the line. Proper labelling eliminates guesswork, ensuring you can accurately track the progress of each variety and provide the specific care it needs.

    Beyond simple identification, labels become invaluable as your garden matures. Knowing exactly what you planted allows you to anticipate harvest times and plan your meals accordingly. It also helps you observe the particular characteristics of each plant, noting which varieties thrive in your specific soil and microclimate. Furthermore, if you’re saving seeds for future planting, accurate labelling is absolutely essential to maintain the integrity of each variety. Without clear markers, you risk cross-pollination and the unintentional creation of hybrid plants, potentially losing the desirable traits of the original seeds.

    In essence, labelling your vegetable seeds is an act of foresight and organisation that pays dividends throughout the growing season. It transforms your garden from a collection of anonymous green shoots into a well-documented and manageable space. So, grab your labels and make sure each tiny seed has its name proudly displayed – your future gardening self will thank you!

    Why Early Labelling Is Important

    1. Avoid Misidentification: Many seedlings look nearly identical in their early stages. Without a label, distinguishing between celeriac from celery or cauliflower from cabbage can be next to impossible even as the plants start to mature.
    2. Better Care Planning: Different vegetables have different watering, spacing, and feeding needs. Accurate labels ensure each plant gets the care it needs from day one.
    3. Track Germination: Labeling allows you to keep track of when and where seeds were planted, making it easier to monitor germination success or failure.
    4. Succession Planting: If you’re planning multiple crops in the same bed, labels help you manage timelines and avoid overcrowding or forgotten crops.
    5. Seed Saving: Knowing exactly what you planted is essential for collecting seeds at the end of the season, especially for heirloom varieties.
    6. You won’t remember: If I had a gold coin for every time I have said to myself that I don’t need to label because I will remember – then I would be a very rich woman. No matter the intention you won’t remember to go back and label 70% of the time. So again, label the second that seed hits the soil.

    Types of Plant Labels

    You don’t need anything fancy, but a little forethought helps. Here are some reliable options:

    • Plastic or Bamboo Plant Tags: Widely available and reusable. Write with a permanent marker or pencil for best longevity.
    • Wooden lolly Sticks: Affordable and biodegradable, great for indoor or short-term use. I say indoor because it makes no real difference what type of marker/pen or pencil you use eventually with a bit of rain or watering the lettering will smudge and you’re right back where you started.
    • Repurposed Items: Cut up old blinds, yogurt tubs, into lables. Even flat stones make excellent DIY labels. It might be worth popping a splash of varnish (clear nail varnish will do) over the lettering as equally the text will wash off over time.
    • Printable Garden Labels: These can be laminated for weatherproofing and aesthetics.
    • Digital Garden Maps: Not physical labels, but helpful for larger gardens where a master plan can guide your layout. Having said that, if you’re anything like me I can plan all I want to but will still plant randomly if my plan isn’t to hand.

    Tips for Staying Organised

    1. Create a Labelling Kit: Keep a small box with labels, a waterproof marker, twine, and scissors near to where you are planting your seeds.
    2. Label straight away: Make it a rule—no seed goes in the soil without a label going in right after. Delaying even by a few minutes can mean you move onto something else and forget.
    3. Use Abbreviations for Small Spaces: If you’re short on room, create a shorthand system—just be sure to note it somewhere! Perhaps keep it in your labeling kit box.
    4. Colour-Code by Plant Type: Use coloured labels or pens to distinguish herbs, vegetables, or flowers at a glance.
    5. Keep a Garden Journal: Record what you planted and where. If a label fades or disappears, your journal can save the day.
    6. Use both sides of your label: You can use both sides of your label especially those little white plastic ones. Yes I know it’s plastic, but they are significantly cheaper than some of the more fancy garden centre labels. If you intend to use the clean side of your label for some of this years seeds or event next year, make sure you cross out the text on the used side. Nothing more frustrating than having a label with writing on both sides and not knowing which is which.

    Your Future Self will Thank You

    Good labelling isn’t just about staying organised today. Later in the season, you’ll be glad you made the effort. From harvest planning to crop rotation next year, having a clear record of what was planted where, can improve your yields and reduce the risk of disease. It’s also a huge help if you want to share tips or seeds with other gardeners—or just avoid that courgette/zucchini overload you accidentally caused last year!


    Final Thought

    Labelling may seem like an insignificant task compared to digging or watering, but trust me it will save a whole lot of hassle later on. A little organisation early on leads to a smoother, more successful growing season. So next time you open that seed packet, grab your marker too—you’ll thank yourself later

    If you enjoyed this post or found it useful, please consider subscribing to the solitaire gardener community. Subscribing is free and will keep you up to date with posts along with exclusive resources directly to your inbox. Just type your email address in the box below and hit the subscribe button.

    Thanks for reading Solitaire Gardener – and don’t forget to like or comment.