Tag: self-sufficiency

  • Master Your Garden: The Art of Observation

    Master Your Garden: The Art of Observation

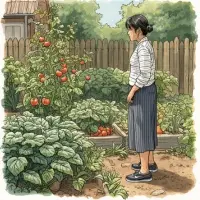
    A woman standing in a garden, observing tomato plants and other vegetables, surrounded by a wooden fence and greenery.

    At this time of year, the vegetable patch seems to change almost daily. Tomatoes are ripening, potato foliage starts to yellow, and courgettes (zucchini) somehow manage to double in size overnight.

    It’s an exciting, busy time of year, and with so much to do, it’s easy to fall into the trap of constantly thinking about the next job:

    • More watering
    • More sowing
    • More weeding
    • More harvesting
    • More jobs!

    But one of the most valuable gardening skills has very little to do with compost, tools or seed packets. It’s learning to slow down, observe, and really notice what your garden is trying to tell you.

    It sounds simple, but this habit can save you time, prevent problems, and make you a far more confident gardener. Taking just 5 or 10 minutes to practice observing will bring you a greater understanding of plant development and what works (or doesn’t) in your growing space.

    Your Garden Is Always Trying to Teach You Something

    Every season your garden gives you clues. As new gardeners, we naturally look for instructions, when to sow, when to water and how to solve problems.

    Over time, however, you begin to realise that your own garden is often the best teacher. Every plot/patch or pot is different, and the more closely you observe yours, the better you’ll understand what works, what doesn’t, and why.

    The question is whether you’re taking the time to notice and act on what it’s trying to tell you.

    Notice What Thrives – And What Doesn’t

    Have you ever grown a crop in the same place two years in a row and been disappointed both times? Perhaps the plants never seemed particularly vigorous. Maybe they struggled to produce a decent harvest or always looked slightly unhappy.

    It’s tempting to blame the weather and try the same thing again next year. Instead, take a closer look and ask better questions.

    • Is that part of the garden more exposed to wind?
    • Does the soil dry out quickly?
    • Is it shaded for longer than you realised?
    • Could it benefit from a little more shelter?

    Sometimes gardening isn’t about trying harder. It’s about recognising when a crop would simply be happier in a different spot.

    Learn the Difference Between a Problem and a Process

    One of the easiest mistakes for beginner gardeners is assuming that every change in a plant means something has gone wrong.

    In reality, plants are constantly changing as they grow.

    For example, lower leaves on tomatoes may yellow as the plant matures. Potato foliage naturally changes through the season. Onion tops begin to yellow and fall over as the bulbs approach maturity.

    Not every yellow leaf is a crisis; not every blemish needs a treatment.

    One of the biggest steps towards becoming a confident gardener is learning which changes are perfectly normal and which genuinely need your attention. The more seasons you observe, the easier this becomes.

    Watch How Vegetables Grow

    Some of the most valuable observations happen when we simply watch how our crops develop.

    Take potatoes, for example.

    Most people know that potatoes grow underground, but fewer pay attention to the stages above ground. Notice when the plants begin flowering. Different varieties behave differently, but flowering often coincides with tuber development beneath the soil. When the foliage begins to yellow and die back, the tuber is generally ready for harvest.

    You don’t need to keep digging around to see what’s happening. The plant is already giving you information.

    The same is true of onions.

    As harvest approaches, the neck softens, and the foliage begins to yellow and flop over. New gardeners sometimes worry that the plants are dying when, in reality, they are preparing for harvest. For more on harvesting onions see here Harvesting Onions – lift don’t pull!

    Courgettes/zucchini offer another excellent lesson in observation. Early in the season, plants often produce male flowers before female flowers appear.

    The male flowers sit on long, thin stems. Female flowers have a tiny immature courgette directly behind the bloom.

    Once you know the difference, you’ll never look at a courgette plant in quite the same way again. For more on abundant courgettes/zucchini, see here: Preventing Overgrown Courgettes: Essential Tips

    Understanding which flowers are which can help you recognise pollination problems and, if necessary, hand-pollinate flowers yourself.

    More importantly, it helps you understand what the plant is doing and why.

    Once you begin recognising these natural signals, you’ll rely less on the dates printed on seed packets and more on what your own plants are telling you. Growing guides are invaluable, but your garden will always be the best guide to what’s happening in your particular conditions.

    Become Curious About Successes

    Most of us pay close attention when things go wrong.

    We notice:

    • The slug damage.
    • The yellowing leaves.
    • The failed germination.

    But how often do we stop to investigate success?

    Imagine one lettuce survives untouched while the others are reduced to lacework by slugs.

    Do we ask:

    • Was it growing in a slightly drier position?
    • Was it closer to a path?
    • Did it happen to be planted near chives, spring onions, garlic, or another strongly scented plant?
    • Was it simply the first plant the slugs overlooked?

    You may never know for certain, but curiosity is valuable. Curiosity is one of the best gardening tools you can develop. Today’s observation often becomes next year’s success.

    Notice the Patterns in Your Garden

    Every garden develops patterns:

    • The corner that stays damp after rain.
    • The bed that warms up first in spring.
    • The spot where carrots always seem happier.
    • The area where slugs appear after every wet evening.
    • The plants that dry out first during warm weather.
    • The flowers that bees visit most often.

    These patterns become visible only when you slow down enough to see them, and once you do, they can transform how you garden.

    Keeping a small notebook and jotting things down will help.

    Jot down things like:

    • First potato flowers
    • First ripe tomato
    • Areas affected by slugs
    • Crops that performed well
    • Places where plants struggled
    • Unexpected successes

    A few notes this year can make planning next year’s garden far easier.

    Pay Attention to Pests and Problems

    Observing pests in particular is one of the best ways to catch problems early.

    Look for:

    • Small nibbles in lettuce leaves
    • Aphids gathering on soft new growth
    • Whitefly on brassicas
    • Slug trails on damp mornings
    • Powdery mildew on courgettes later in the season
    • Yellowing leaves that spread rather than remain isolated

    Catching an issue early is often easier than solving a major problem later. But the goal isn’t to become anxious or inspect every leaf obsessively. It’s simply to become familiar with what is normal in your garden.

    Notice the Wildlife Too

    Some of the most useful observations have nothing to do with vegetables. Pay attention to the wildlife as well. Bees, hoverflies, ladybirds and birds all tell you something about the health of your garden. A productive vegetable patch isn’t just full of plants; it’s a thriving ecosystem.

    It’s a community of living things interacting with one another. The more you notice those relationships, the more fascinating growing food becomes.

    Your Garden This Year Is Planning Next Year’s Garden

    Every season leaves behind valuable information. The tomatoes that thrived in one bed, the brassicas that struggled in another, the courgette that needed watering more often than you expected – all of these are quietly helping you plan next year’s garden.

    The most experienced gardeners aren’t necessarily those with the biggest gardens or the longest list of qualifications. They’re often the people who’ve simply learnt to notice more.

    Your garden is quietly teaching you how to grow next year’s crops. All you have to do is pay attention.

    Final Thoughts

    Gardening has a wonderful way of reminding us that not every problem needs an immediate solution. Sometimes the best thing we can do is pause, watch, and learn.

    Every healthy plant, every failed crop, every visiting bee and every nibbled leaf is giving you information. The more attention you pay, the more your confidence will grow. Not because you’ve memorised every gardening rule, but because you’ve learnt to understand your garden.

    So the next time you head outside, leave yourself five minutes before picking up the watering can. Walk slowly, look closely, and let your garden tell its story. You might be surprised by just how much it tells you.

    If you want a good video on the topic of observing your growing space, Huw Richards has some useful tips here: Observe and Interact | Ultimate Gardening Skills Series. It’s an older vid, but still relevant.

    If you enjoyed this post or found it useful, hit the like button and consider subscribing to the Solitaire Gardener community. Subscribing is free and will keep you up to date with posts & exclusive content directly to your inbox. Just type your email address in the box below and hit the subscribe button. You can also follow me on BlueSky, Pinterest or Instagram.

    More helpful Veg growing blogs see below

    If you are interested in coaching or mentoring focused on gardening and greater self-sufficiency, please visit my coaching pages here Garden Coaching – Mindset and Motivation. If you’re feeling overwhelmed by your garden projects or are struggling with motivation, then coaching may be for you. I can help you reach your gardening goals, keeping you motivated and help you plan your self-sufficiency dream your way!

  • Preventing Overgrown Courgettes: Essential Tips

    Preventing Overgrown Courgettes: Essential Tips

    A garden scene featuring lush green zucchini plants with various zucchinis visible among the leaves. An overlay text reads 'I'll hide in plain sight' with an arrow pointing to a hidden zucchini.

    If you’ve ever gone out to admire your courgette/zucchini plants, spotted a perfectly sized fruit, and thought, ‘I’ll pick that tomorrow’. You excitedly wander into the garden the next day, only to discover what appears to be a small submarine lurking under the leaves. You’re not alone. Trust me, I’ve been growing Courgettes/Zucchini for years, and this still happens to me more times than I would like to admit.

    One of the biggest surprises for new gardeners is just how quickly courgettes grow. They seem to spend weeks doing very little and then suddenly decide it’s time to produce more food than any sensible household could possibly eat. The good news is that this means you’re doing something right. The slightly less good news is that if you don’t keep an eye on them, those lovely little courgettes/zucchinis can quickly become full-sized monster marrows.

    Below, we’ll explore how you can avoid this pesky perennial problem with actionable steps.

    From here on in, I’m going to use the term courgette – apologies to folk who use the term zucchini, but here in the UK we call them courgettes, so it’s just a more natural term for me to use.

    When Should You Harvest a Courgette?

    Most courgettes are best harvested when they are around 6–8 inches long (15–20 cm). At this size, the flesh is tender, the skin is soft, and the flavour is arguably at its best. Smaller courgettes are often sweeter and more delicate than larger ones.

    The mistake many new gardeners make is waiting for them to get bigger because bigger feels like better value. In reality, once a courgette is beyond about 10 inches long (25 cm), the seeds begin to develop, the skin thickens, and the texture becomes less appealing.

    That’s not to say larger courgettes are unusable. They can still be grated into cakes, soups, chutneys, and pasta sauces. But if you’re after the classic tender courgette, about 6-8 inches is the perfect size.

    The Secret to More Courgettes

    Here’s a useful trick that newer gardeners should be aware of: picking courgettes regularly actually encourages the plant to produce more fruit.

    The plant’s goal is to mature its fruit and produce seed. If you keep harvesting, the plant thinks it hasn’t finished its job yet and continues producing fresh flowers and new courgettes. Leave several fruits to mature into marrows, and the plant may slow down production considerably.

    Think of harvesting as sending the plant a message: ‘More please!’

    A Few Harvesting Tips

    • Check plants every day during warm weather.
    • Harvest when fruits are 6–8 inches (15–20 cm) long.
    • Use a sharp knife or secateurs rather than pulling fruits off by hand.
    • Cut the stem cleanly about 1 inch (2.5 cm) below the fruit.
    • Lift leaves gently when checking plants – courgettes are experts at hiding enormous fruits underneath.

    Many gardeners joke that courgettes don’t grow overnight. They grow when you’re not looking 🫣

    Watering Matters More Than You Might Think

    Courgettes are thirsty plants. Their large leaves lose a lot of moisture, particularly during warm summer weather.

    Aim to water deeply once or twice a week rather than giving little daily sprinkles. During hot spells with temperatures above 25°C (77°F), you may need to water more frequently, especially if plants are growing in containers.

    Try to water around the base of the plant rather than over the leaves. This helps reduce the risk of fungal diseases and ensures water reaches the roots where it’s needed most.

    For more on the concept of ‘deep watering you can read more here Unlock Healthy Growth with Deep Watering Techniques

    A layer of compost or mulch (such as dried leaves, fine wood chips, etc.) around the plant can also help retain moisture and reduce watering needs.

    What If The Leaves Start Looking Papery?

    One thing that often worries new gardeners is when older leaves begin to look dry, rough, or papery.

    In most cases, this is completely normal. Courgette plants produce huge leaves, and as the season progresses, some of the oldest ones naturally age and die back.

    However, papery leaves can sometimes indicate:

    • A lack of water during hot weather
    • Wind scorch
    • Natural ageing of older foliage
    • Powdery mildew later in the season

    If only a few older leaves are affected and the rest of the plant looks healthy, there’s usually no cause for concern. Just remove badly damaged leaves to improve airflow around the plant. In fact, it’s often a good idea to remove some of the lower leaves to help with airflow. Having said that, I wouldn’t lose any sleep over the thinning of leaves. If the plant looks healthy, it should be fine.

    If you notice a white powdery coating developing on leaves, this is often powdery mildew. Improving airflow, watering consistently, and removing the worst-affected leaves can help slow its spread.

    Common Problems and Simple Fixes

    Lots of Flowers But No Courgettes

    Don’t panic. Male flowers appear first and don’t produce fruit. Female flowers arrive shortly afterwards and can be identified by the tiny swelling behind the flower

    Fruits Rotting While Still Small

    This is often caused by poor pollination. Encourage pollinators into the garden by growing flowers nearby, or try hand-pollinating. You can hand-pollinate by using a small paintbrush.

    If you want more information on hand-pollinating courgettes, here are links to a couple of good, easy-to-follow YouTube vids. These will give you more confidence and show you exactly what steps to take to hand-pollinate. Why Aren’t My Squashes Fruiting? Boost pollination of squash, zucchini/courgettes & pumpkins (had pollinating comes in at 5 mins in this vid – but it’s well worth watching the whole thing). This short is also very helpful How to pollinate courgettes!

    Wilted Leaves During the Day

    Courgettes often wilt temporarily in hot sunshine, even when the soil is moist. Check again in the evening before assuming they need water.

    Slugs Attacking Young Plants

    Mature courgettes usually cope well, but younger plants can be vulnerable. Barriers, regular checks, and encouraging natural predators can all help.

    If you’re planting direct, use a closh or netting until the plant is big enough to cope with little beasty slugs.

    If you start seeds in a pot or module tray, pot on into a larger pot until the plant is about 5 – 6 inches tall before transferring to its final growing space. You want a nice, strong, healthy plant before planting out.

    Help! I Have Too Many Courgettes

    This is a surprisingly common problem and one I have almost every year.

    If your plant is producing more than you can eat, consider:

    • Freezing grated courgette
    • Making soup
    • Baking courgette cake
    • Adding it to pasta sauces
    • Making chutney
    • Giving some away to friends, neighbours, or unsuspecting relatives

    You’ll quickly discover that growing courgettes often turns into a community project.

    Although you will be a wee bit late to plant start courgette seeds

    Embrace the Occasional Marrow

    Despite all the jokes, there’s nothing wrong with growing a marrow 😊 In fact, many gardeners deliberately leave one or two fruits on the plant each year to mature into marvellous marrows. These are excellent stuffed, baked, or turned into chutney.

    The important thing is understanding the difference. If you want tender courgettes, harvest little and often. If you want marrows, let them keep growing.

    Either way, few vegetables are as productive, rewarding, or enthusiastic as the humble courgette. Just don’t be surprised if tomorrow’s harvest is twice the size of today’s.

    Final Thoughts

    If your courgettes occasionally get away from you, don’t worry – you’ve joined a very large club of gardeners who’ve discovered a giant fruit lurking under the leaves a week too late. Every oversized courgette is proof that your plant is healthy and productive – so chalk that up as a win.

    Harvest little and often if you can, embrace the occasional marrow if you can’t, and remember: there are far worse gardening problems to have than an abundance of homegrown food. Happy harvesting – and don’t forget to check under those leaves!

    If you enjoyed this post or found it useful, hit the like button and consider subscribing to the Solitaire Gardener community. Subscribing is free and will keep you up to date with posts & exclusive content directly to your inbox. Just type your email address in the box below and hit the subscribe button. You can also follow me on BlueSky, Pinterest or Instagram.

  • Top Vegetables to Sow in June for a Bountiful Harvest

    Top Vegetables to Sow in June for a Bountiful Harvest

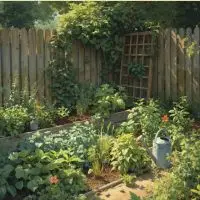
    A lush garden with various plants and vegetables, surrounded by a wooden fence and a trellis in the background.

    June is a surprisingly good month for sowing vegetables, particularly for crops that enjoy warmer soil and longer daylight hours. While early spring often gets most of the attention, many heat-loving plants actually establish faster and more reliably once the weather and the soil has warmed. In the UK and other temperate climates, June sowings can still provide generous harvests later in summer and well into autumn.

    This is also one of the easiest times for newer gardeners to sow seeds directly into the soil outdoors. Germination is usually quicker, seedlings grow away faster, and there’s less need for heated propagators, grow lights, or balancing trays on windowsills. So if your growing season got off to a slow start, don’t worry, there’s still plenty of time to fill beds, containers, and tubs with healthy, productive vegetables.

    Before we dive in, a word of warning for those with a greenhouse or polytunnel. Last week in the UK it was very hot with many undercover growing areas reaching 40 °C (104 °F) plus. These daytime temps can be quite distressing for seeds, making germination problematic. Seeds generally don’t do well in sizzling soil temperatures. If this is the case for you, It’s worth considering an alternative spot for seed sowing during very hot periods.

    So let’s get into 5 veg seeds you might like to sow in June, some of which will also grow perfectly well in large pots or containers.

    PUMPKINS

    Pumpkins can still be started in early June, particularly in milder parts of the UK and other temperate climates. While giant pumpkins may need a longer season, many smaller and medium-sized varieties grow perfectly well from early June sowings.

    Pumpkins are part of the wide-ranging Cucurbitaceae family. More specifically, they are classified under the genus Cucurbita. Squashes, courgettes/zucchini and butternut squash are also part of this genus. This whole family of plants likes heat and tend to spread out. They require lots of space unless you train them to grow vertically.

    Growing Conditions

    • Sow in rich, fertile soil with plenty of organic matter
    • Ideal temperature: 18–30°C (65–86°F)
    • Sow seeds 1 inch deep (2.5 cm)
    • Plant in a sunny, sheltered position

    Containers?

    It is possible to grow pumpkins in pots – but choose a large container at least 18–24 inches wide (45–60 cm) and keep plants well fed and watered. Pots tend to dry out more quickly, so regular ‘deep watering’ is important. For more on ‘deep watering’, see her Unlock Healthy Growth with Deep Watering Techniques

    Pumpkins are also hungry plants, so adding compost or well-rotted manure before planting will make a noticeable difference to growth and fruit production. In fact, if you have a compost pile that’s not quite ready, it might be the ideal environment to grow pumpkins.

    TURNIPS

    Turnips, bizarrely, are part of the Mustard family (Brassicaceae). I think they are one of the most versatile and underrated vegetables in the garden. A June sowing of turnips can yield a crop of lovely, tender roots for late summer and early autumn.

    They don’t take up much space, and the leaves can be used in a similar way to spinach. So really, you get two crops for the price of one – what’s not to like?

    I know lots of folk, especially in the UK, who view the humble turnip as nothing more than ‘animal feed’. But trust me, a young, sweet roasted turnip with Sunday dinner or in a pan roast with other root veg is an absolute delight.

    Growing Conditions

    • Prefers cooler growing conditions
    • Ideal temperature: 10–18°C (50–65°F)
    • Sow seeds ½ inch deep (1 cm)
    • Thin seedlings carefully for decent-sized roots

    As ever, I try not to thin seeds – I can’t bear ditching them. I try and sow each individual seeds at the allotted packet spacing. However, that’s just my personal preference – you do what works best for you.

    Germination & Harvest

    • Germinates in around 7–10 days
    • Ready in roughly 6–10 weeks

    Containers?

    Turnips can be planted in containers or tubs, but make sure the container is fairly deep. These tasty little all-rounders can have taproots up to 30 inches (76 cm) long, so they need plenty of depth.

    SPRING ONIONS (SCALLIONS)

    Spring onions are fast, satisfying, and ideal for squeezing into spare gaps around the garden. They are extremely versatile in the kitchen, and you can use both the white bulb and the green stalk

    Spring Onions belong to the Amaryllidaceae family – specifically Allium Cepa. This broad family and includes garlic, shallots and chives.

    These are brilliant for small-space gardeners because they take up very little room.

    Growing Conditions

    • Sow directly outdoors
    • Ideal temperature: 10–25°C (50–77°F)
    • Sow thinly at around ½ inch deep (1 cm)
    • Keep watered during dry weather

    Germination & Harvest

    • Germinates in 7–14 days
    • Harvest in roughly 8–10 weeks

    Very suitable for containers and troughs.

    Containers?

    Spring onions are perfect for containers; just make sure the soil in your pots doesn’t dry out. Keep the soil moist (not soaking), and they will be just fine in containers with reasonable spacing.

    KALE (INCLUDING BLACK KALE/CAVOLO NERO)

    Kale is one of the most rewarding crops you can sow in June, particularly because it can continue producing well into autumn and even through winter in milder areas. Black kale, often sold as Cavolo Nero, is especially popular for its dark, crinkled leaves and excellent flavour once the weather cools slightly.

    Kale is another plant belonging to the Brassicaceae family.

    June is an excellent time to sow kale directly outdoors as it often produces sturdier plants with less fuss than earlier indoor sowings. A June sowing can also help avoid some of the early spring pests.

    When harvesting, pick the outside lower leaves first; it will encourage the plant to keep producing for months.

    Growing Conditions

    • Sow directly into prepared soil or raised beds
    • Ideal temperature: 10–24°C (50–75°F)
    • Sow seeds around ½ inch deep (1–1.5 cm)
    • Thin seedlings to around 18 inches apart (45 cm) once established
    • Prefers fertile soil with good moisture retention

    Germination & Harvest

    • Germinates in roughly 5–10 days
    • Baby leaves can be harvested in around 30 days
    • Mature leaves are usually ready in 8–12 weeks

    Containers?

    Yes, kale grows surprisingly well in large tubs or deep containers, particularly the compact varieties. Choose containers at least 12 inches deep (30 cm) and keep plants well watered during dry spells.

    SWEDE (RUTABAGA)

    Swede is one of those vegetables that quietly rewards patient gardeners. Sow direct in June, and it will have plenty of time to develop, ready for harvest through the winter months. Swede benefits from maturing slowly and is well-suited to the UK and generally more temporated growing conditions.

    Swede, along with Turnips (see above) are a part of the Brassicaceae family, commonly known as cruciferous vegetables. They include broccoli, sprouts, kale and cauliflower, etc.

    Young swede seedlings can attract flea beetles and cabbage root fly, so covering newly sown rows with fine mesh or fleece can help plants establish more successfully. Cooler autumn weather also tends to improve the flavour, making roots sweeter and less woody.

    Growing Conditions:

    • Best sown directly outdoors where it is to grow
    • Ideal temperature: 8–20°C (46–68°F)
    • Sow seeds around ½ inch deep (1–1.5 cm)
    • Space rows around 18 inches apart (45 cm)
    • Thin seedlings to roughly 8 inches apart (20 cm)

    Swedes prefer fertile, moisture-retentive soil and grow best when watered consistently during dry periods.

    Germination & Harvest:

    • Germinates in around 7–14 days
    • Harvest from roughly 12–16 weeks after sowing
    • Can often remain in the ground well into winter in milder areas

    Containers?

    Possible, but not ideal unless using a very deep container. If growing in tubs, choose one at least 16 inches deep (40 cm) to allow good root development.

    OTHER VEGETABLES YOU CAN STILL SOW IN JUNE

    If you still have room, June is also a good time to sow:

    • French beans
    • Runner beans
    • Carrots
    • Courgettes (zucchini)
    • Peas
    • Radishes
    • Pak choi
    • Florence fennel

    Many herbs can also be sown in June, such as basil, coriander (cilantro), dill, and parsley. If you haven’t started sowing herbs yet, there is still time – sow a few seeds every 1-2 weeks through June for a good continuous supply.

    Final Thoughts

    June gardening often feels calmer than the frenetic rush of early spring. So if you haven’t started yet, or if earlier sowings didn’t go to plan, there is still plenty of time to grow productive, delicious food this season.

    Start with a few things you genuinely enjoy eating, keep watering simple and consistent during dry spells, and don’t overcomplicate it. A handful of well-cared-for plants will almost always bring more satisfaction than trays and trays of seedlings that become overwhelming.

    Remember – if you’re feeling behind, don’t panic. Garden centres are full of healthy plug plants and young vegetable plants at this time of year, and many crops catch up remarkably quickly once planted into warm soil. Don’t let anyone tell you that if you don’t grow from seed, you are not a proper gardener. Gardening is about enjoyment, and what fits with your lifestyle. So you do you!

    If you enjoyed this post or found it useful, please consider subscribing to the Solitaire Gardener community. Subscribing is free and will keep you up to date with posts & exclusive content directly to your inbox. Just type your email address in the box below and hit the subscribe button. You can also follow me on BlueSky, Pinterest or Instagram.

    For more content, see below:

  • Simple Ways to Preserve Everyday Herbs (Without Fancy Equipment)

    Simple Ways to Preserve Everyday Herbs (Without Fancy Equipment)

    Illustration of various herbs hanging from a line, potted herbs on the ground, a jar labeled 'Herb Salt', and a cup of herbal tea on a decorative table under a sunny sky.

    There’s something incredibly satisfying about snipping fresh herbs straight from the garden instead of paying supermarket prices for tiny packets that go mushy faster than you can use them. A handful of homegrown sage, rosemary, thyme, chives, or parsley can flavour meals, make simple herbal teas, and quietly save you money week after week. The challenge, of course, is that herbs often grow faster than we can use them fresh, and that’s where a few simple preserving methods come in. In this guide, we’ll look at easy, accessible ways to dry, freeze, and store common everyday herbs so you can make the most of what you grow without needing expensive equipment or specialist knowledge.

    Preserving your own herbs also helps stretch the usefulness of each plant far beyond the growing season. Instead of watching handfuls of fresh herbs bolt or go woody before you can use them, you can turn them into something practical for later in the year – jars of dried thyme for winter stews, frozen parsley ready for sauces, or rosemary-infused oil for roasting potatoes. It’s a simple way to reduce waste, make the most of what you grow, and build a small store cupboard of flavours you’ve produced yourself. Better still, most herb preserving is wonderfully low-tech. You don’t need expensive dehydrators or specialist equipment; a warm room, a low oven, a freezer, and a few clean jars are more than enough to get started.

    If you’re looking for advice on growing herbs, I have a couple of past blogs that you might find helpful How to grow your own Rosemary, Ultimate Guide to Growing Sage at Home

    The Basics: When and How to Harvest

    Before preserving, it helps to harvest your herbs at their best. Aim to pick them on a dry day, ideally in the morning after the dew has dried but before the heat of the day. This is when their oils, and therefore flavour, are strongest. Use clean scissors or secateurs and avoid taking more than a third of the plant at once to keep it healthy and productive.

    When it comes to the jars and containers you will use, make sure everything is clean. Although hot, soapy water will suffice, to be sure, I always put any jar I’m going to use through the dishwasher first and dry thoroughly.

    Air Drying Herbs (The Simplest Method)

    Drying is one of the easiest and most effective ways to preserve herbs like sage, rosemary, and thyme, which all have lower moisture content.

    How to do it:

    A variety of herbs, including lavender and sage, hanging from a string against a wooden background.
    • Gather small bunches and tie the stems together – ensure you tie the stems tightly
    • Hang them upside down in a warm, dry, well-ventilated space
    • Leave for 1–3 weeks until fully dry
    • Store in airtight jars, away from light

    The ventilation is the key here. You should also ensure that the space you choose is not prone to condensation, otherwise your herbs won’t dry properly.

    Low Oven Drying Herbs (The Simplest Method)

    How to do it:

    • Gather your herbs and roughly chop them into similar-sized pieces. This helps them dry more evenly and usually speeds up the drying process while reducing the risk of mould or damp centres, particularly with thicker sage leaves.
    • Spread the herbs out on a baking tray or baking sheet lined with parchment paper.
    • Try to arrange the herbs in a fairly even layer without overcrowding the tray. Don’t worry about making it perfect, just give the pieces enough space for airflow.
    • Set your oven to a very low temperature, around 30–40°C (85–105°F), and leave the door slightly open to allow moisture to escape.
    • Dry until the herbs feel crisp and fully dry, but not browned or baked. Once cooled, crumble the herbs and store them in a clean jar. If you want to add an oxygen absorber for longer storage, you can, but it’s entirely optional

    This method is best for:

    • Sage, rosemary, and thyme
    • Less suited for: chives and parsley (they lose flavour when dried). Having said that, I do this all the time but in quite small batches, and it works well enough.

    I tend to dry most herbs in the oven, crush them into small pieces and then store them in an airtight container. There really is nothing like using your own homegrown herbs in the kitchen. I haven’t bought sage, rosemary, or thyme for at least 5 years. Which I have to say, fills my heart with joy on so many levels 😊

    Freezing Herbs (Best for Soft Leaves)

    Freezing helps retain the fresh flavour of softer herbs like chives and parsley.

    Simple freezing method:

    • Chop herbs finely
    • Make sure your herbs are dry. Even though you will be adding water, you don’t want to be freezing soggy herbs
    • Place into ice cube trays
    • Cover with water or oil
    • Freeze, then transfer cubes to a container or bag

    You can also freeze herbs loose in bags, but I find cubes are more practical for cooking. These should last from around 6 to 12 months without significantly losing their flavour.

    For freezing loose herbs, I find it best to ‘open freeze’ them first before putting them into a bag. To do this, just wash, dry and chop your herbs – here you do want to make sure they are completely dry to prevent ice crystals from forming. Lay them on a baking tray and spread them out so they are not on top of each other. Pop the tray in the freezer until the herbs are fully frozen. Once you are happy, they are frozen – you can then quickly transfer them into a bag. In theory, this will result in herbs that don’t end up as an unidentifiable clump 😊

    This method is best for:

    • Chives, parsley, and even thyme, if you prefer a fresher taste

    Preserving in Oil

    My caveat to preserving herbs in oil is to always store them in the fridge or freezer – never at room temperature! I know many people who do this, and it’s been fine, but I need to make clear that there can be a risk of breeding the bacteria that can cause botulism. This is due to the mixtures anarobic low acid environment.

    Botulism is rare and sounds scary, but don’t forget people have been preserving foods since time began (well, almost). I only mention it because I wouldn’t want anyone new to preserving to be lax with their safety standards. So, to reiterate – when preserving herbs in oil, don’t store at room temp!! The fridge or freezer is best.

    Having said all that, herbs preserved in oil are incredibly useful in the kitchen and feel like a bit of a luxury without much effort. My advice with this method is to use the best quality oil you can afford. The oil makes an excellent carrier for the herby flavour and has so many uses in the kitchen: Marinades, soups, stews and Mediterranean-style dishes.

    How to do it:

    • Pack clean, dry herbs into a jar
    • Cover fully with oil (olive oil works well)
    • Store in the fridge and use within 7 days – the best advice is to use within 1 to 2 weeks, but to be honest, mine never lasts that long anyway, and I wouldn’t want to push it to the 2 weeks – just in case.
    • For longer storage, freeze herb oil in cubes instead.

    This method is best for:

    • Rosemary
    • Thyme
    • Sage
    • High water content herbs, such as chives, are less stable and will spoil more quickly
    • High woody herbs such as sage, rosemary, and thyme are more stable in oil

    Preserving Herbs in Butter

    Herb butter is one of the easiest and most useful ways to preserve fresh herbs, and it feels far more luxurious to use than the effort involved. It’s perfect for using up small handfuls of herbs and works beautifully melted over vegetables, stirred into potatoes, or spread onto fresh bread.

    How to do it:

    Close-up of sliced herb-infused cheese on a wooden platter, garnished with fresh mint leaves and lime slices.
    • Soften 4 oz (115 g) of butter at room temperature – no need to stick to the 4 oz, you can use however much or little as you prefer.
    • Finely chop your chosen herbs
    • Mix the herbs through the butter evenly
    • Optional: add garlic, lemon zest, or black pepper to taste
    • Spoon onto parchment paper and roll into a log, or press into small ice cube trays
    • Chill in the fridge or freeze for longer storage

    Best herbs for herb butter:

    • Sage
    • Chives
    • Parsley
    • Thyme

    Frozen herb butter will usually keep well for several months in the freezer. It can be sliced straight from frozen whenever you need it. It’s also an excellent way to preserve herbs that may not dry particularly well, such as chives (and parsley), while still keeping plenty of their fresh flavour.

    Note: If keeping in the fridge, make sure your fridge temp is between 3 and 6 °C (39 and 45 °F) and don’t keep longer than 4 to 7 days. Most UK-based fridge temps are set between 3 & 5 °C, so you should be fine – but always worth checking.

    Preserving herbs doesn’t need to be complicated, expensive, or perfectly organised to be worthwhile. A few jars on a shelf, a handful of frozen herb cubes, or a roll of herb butter tucked into the freezer can quietly save money, reduce waste, and bring a little bit of summer flavour into your kitchen long after the growing season ends. Start small, use what you have, and see what works for you. You may be surprised how quickly these simple habits become part of everyday life. Let me know in the comments what your favourite simple preserving method is.

    If you enjoyed this post or found it useful, please consider subscribing to the Solitaire Gardener community. Subscribing is free and will keep you up to date with posts & exclusive content directly to your inbox. Just type your email address in the box below and hit the subscribe button. Once subscribed, I’ll send a free ‘DIY Organic Pest Control’ download.

    You can also follow me on BlueSky, Pinterest or Instagram.

    See below for recent past blogs

  • Find Peace: Calm the Chaos and Remember, It’s Not Too Late

    A garden with wooden raised beds, one filled with various vegetables and plants and the other empty, set against a grassy background.

    Everything, Everywhere, all at Once.

    May is when most veg patches, whatever the size, really start to take off. It’s also the time most veg growers come to the slightly alarming realisation that they are either inundated with plants at various stages of growth, and feel totally overwhelmed, or so far behind they feel like giving up.

    Whether you are growing on a balcony or on acres of land, this scenario is completely normal and happens to both new and experienced growers alike. So if you are an overwhelmed seed starter or a late bloomer, this blog is for you. We will discuss how you can approach both ends of this spectrum with a calm and practical approach.

    Whatever stage you are at – take a breath! You are not failing, and the season is far from over. Gardening is not about perfection or keeping up with anyone else. It is about learning how to work with the space you actually have, your time, your energy levels, and what you genuinely enjoy eating and growing.

    Remember, you are in control – you dictate what happens next. Even the Monty Dons’ and Charles Dowdings’ of this world make mistakes and learn something new every season. You’re no different! Cliche though it might sound, gardening is a long journey of joy, with a heap of trial and error thrown in for good measure.

    In this blog, we will take the solitaire gardener approach to each end of the problem.

    If You’re Feeling Overwhelmed

    This often starts innocently enough. You sow a few extra ‘just in case’ plants, then a few more because the seeds were there anyway, and suddenly you have 12 courgettes (zucchini) plants, 3 trays of cabbages, nowhere left to walk in the greenhouse, and you’re desperately trying to work out where you are going to put them all. The important thing to remember is this: there is absolutely no rule that says every seedling you start must be planted out.

    If you only have room for one courgette plant, it is perfectly reasonable to:

    • Compost the extras
    • Give the excess to friends, neighbours, or relatives
    • Swap them locally for something you need and have space for
    • Keep one spare as insurance and let the rest go

    Offloading extra plants can feel wasteful at first, especially for newer gardeners, but overcrowding your space with too many plants often creates more stress and poorer harvests in the long run. One healthy courgette/zucchini with enough space to fully mature can easily outproduce several struggling plants crammed together.

    For newer growers, this is an example (below mobile/right desktop) of underestimating the space a mature plant might need. The young cabbage plant on top looks innocent enough – but a fully grown cabbage is really quite a substantial beast. So, when assessing the space you have available, always consider the plant’s size when fully grown.

    Top image shows young cabbage seedlings in soil; bottom image shows a mature cabbage head with tightly packed leaves.

    It’s worth being honest about your available growing space. Before planting out, take a proper look at your beds, containers, greenhouse, etc. and work out what will realistically fit. A raised bed measuring 4 feet by 8 feet (1.2 x 2.4 m) fills surprisingly quickly once mature plant spacing is taken into account. This is where many gardeners become overwhelmed – not because they failed, but because seedlings are deceptively small.

    Your seed packet should have a spacing guide; all you need to do is remember that the seed company have based this on the size of the mature plant. Many gardeners will ignore the seed packet and wing it with spacing. But my advice for newer gardeners is to take the seed company’s advice until you have grown that particular plant for a couple of seasons. Learn how the plant develops, at what stage of growth you like to harvest it etc. Then by all means, you can go rogue with your spacing.

    The famous or infamous “just in case” plants are another common trap. Keeping a couple of spare cabbages or brassicas, in case caterpillars eat the originals, is understandable and sometimes sensible. But rather than endlessly potting on backup plants, it may be more effective to focus on protecting the ones already in the ground with mesh, netting, and regular checks for pests. Often, the calmer, simpler solution is not to grow more plants, but to look after the ones you already have a little more carefully. Trust me, I am totally guilty of this one, and will do everything I possibly can to find more space rather than ditch the spare, ‘just in case’ plants. But there comes a point where I have to commit to the plants I already have, and focus on giving them the best care possible. I’d much rather devote my limited time and energy to a smaller number of healthy, productive plants than become overwhelmed trying to look after too many.

    If space is tight, avoid the temptation to rush out and buy more raised beds or extra planters. Often, the best solutions are the simplest ones. Use containers you already have, repurpose buckets or tubs with drainage holes, or simply grow fewer things better. A calm, manageable garden will almost always be more productive and far more enjoyable than one that constantly feels out of control.

    If You’re Feeling Behind

    On the other side of the spectrum are the gardeners who look around in May and feel they’ve completely missed the boat. Maybe life got in the way, the weather was miserable, or the motivation simply wasn’t there earlier in spring. The good news is this: in the UK and other temperate climates, there is still plenty of time to grow food successfully.

    In fact, May is one of the best months for direct sowing. The soil has had a chance to warm up, and depending on where you are in the world, the chance of frost has receded. Seeds germinate faster in warmer soil, and young plants often establish more quickly than they would have done in cooler spring conditions.

    You can also see my ‘What to sow in May’ for more information on 5 easy sowings you start in May Five Vegetables to Sow in May for New Gardeners

    There is still time to sow the following – and this is by no means an exhaustive list:

    • Beetroot
    • Lettuce
    • French beans
    • Carrots
    • Courgettes
    • Chard
    • Peas
    • Spring onions

    If starting from seed still feels overwhelming, there is absolutely nothing wrong with buying plug plants or young plants from a garden centre. A healthy tomato or courgette/zucchini plant from a reputable garden centre can catch up remarkably quickly. Gardening is not a competition to see who started earliest under grow lights in February – It’s about doing what fits with your lifestyle.

    If you feel like you’ve missed the boat this season, trust me, you haven’t. But it may be a good opportunity to start thinking ahead for next year. In late December or early January, set aside a little time to choose just three things you’d like to grow from seed. Gather everything you’ll need into one place: your seeds, pots, trays or modules, and some potting compost. So when March arrives, you’re ready to get started without the last-minute scramble. Even blocking out a little ‘seed sowing time’ in your calendar now can make the whole process feel calmer and far more manageable when the new growing season begins.

    Ultimately, whether you feel overwhelmed or behind, the answer is usually the same: simplify the next step. Plant what you have room for. Grow what you genuinely like to eat. Water well, observe often, and accept that every season teaches you something new. Even experienced gardeners make mistakes, lose plants, sow things too early, or realise halfway through summer that they grew far too much spinach, again!

    You are in control of your garden. No one else gets to define what success looks like in your growing space. Start where you are, use what you have, and trust that a calm, steady approach will ensure your gardening continues to bring you joy.

    If you enjoyed this post or found it useful, please consider subscribing to the Solitaire Gardener community. Subscribing is free and will keep you up to date with posts & exclusive content directly to your inbox. Just type your email address in the box below and hit the subscribe button. Once subscribed, I’ll send a free ‘DIY Organic Pest Control’ download.

    You can also follow me on BlueSky, Pinterest or Instagram.

    See below for more blogs on organic veg growing approaches, how-tos, tips and hints

  • Unlock Healthy Growth with Deep Watering Techniques

    A woman in overalls watering plants in a lush garden, with a wooden fence and blue sky in the background.

    Watering is one of those gardening skills that feels deceptively simple, yet it’s where many new veg growers lose confidence. Few things make gardeners second-guess themselves, like watering. Too much, too little, too late – it can feel like guesswork until you learn what your plants are really asking for. The truth is, there isn’t a single perfect schedule – but there is a clear goal.

    When we water, we’re not just keeping plants alive; we’re encouraging a strong, resilient root system that can support healthy growth. Get that right, and everything else becomes so much easier.

    A helpful way to think about watering is in terms of depth rather than frequency. Gardeners often debate between “little and often” versus less frequent, deeper/longer watering. ‘Deep watering’ means you saturate the soil to a depth of about 6 ins (7 cms). So you water less often, but concentrate on the slow, deep water penitration.

    My best advice is to go for deep watering, and in this blog, I’ll tell you why I think this method is best.

    Having said that, do I sometimes give my veg patch a quick surface water? Yes, of course I do, especially when I’m really busy, or I can’t be bothered to drag the hose across the garden. Life gets in the way for everyone! But for the most part, I try to stick to a deep watering plan because I know my veg patch will appreciate the effort.

    In most cases, especially for vegetables growing in the ground, a deep watering once or twice a week is far more beneficial than light daily watering. This approach encourages roots to grow down into the soil, where moisture is more stable. Granted it takes longer, but it will produce a better harvest in the long run.

    Deep watering

    • Encourages deeper roots – Deep watering encourages roots to grow further down into the soil where moisture stays more stable, helping plants become stronger and better anchored.
    • Improves drought resilience – Plants with deeper root systems are better able to cope during hot weather or dry spells because they can access water below the dry surface soil.
    • Reduces evaporation – Watering thoroughly allows moisture to soak deeper into the ground instead of sitting on the surface, where it can quickly evaporate in the sun or wind.
    • Creates steadier growth – Consistent moisture lower in the soil helps plants grow more evenly, reducing stress that can lead to wilting, split fruits, bolting, or poor harvests.

    Shallow watering, by contrast, keeps roots near the surface, making plants more vulnerable to drying out.

    If you want a more visual explanation of deep watering, MIGardener has a very informative video on his YouTube channel, Deep Watering – How to do it & Why it Matters to Your Garden

    That said, there are moments in a plant’s life when watering needs to be more attentive. When you first sow seeds or plant out seedlings or plug plants, water plays a crucial role in helping them settle in. A newly planted seedling should be watered in well, which means giving it a generous soak so the soil settles around the roots and removes air pockets. This “anchoring” helps roots establish quickly. From there, you can ease into a more measured watering rhythm, allowing the soil surface to dry slightly between waterings while ensuring moisture remains below.

    As plants grow, their water needs change. Leafy crops like lettuce will need fairly consistent moisture to prevent bolting, while deeper-rooted plants like cabbage or sprouts can go longer between waterings. Once plants begin to produce fruit, such as tomatoes, courgettes, and beans, water becomes even more important. At this stage, inconsistent watering can lead to problems like split fruits or blossom end rot in tomatoes. Regular, deep watering helps maintain steady growth and better-quality harvests.

    It’s also worth adjusting your approach during dry spells or hotter summer weather. If you’ve had a week or more without meaningful rain, your plants will almost certainly need extra support, even if they look fine on the surface. Soil can dry out quickly in warm conditions, especially in containers and raised beds. During these periods, you may need to water more frequently, but still aim to water deeply rather than just wetting the surface. A good soak every few days is far more effective than a quick daily sprinkle.

    A couple of simple habits will make a big difference:

    • Water at the base of the plant, if possible, not over the leaves
    • Water early in the morning or later in the evening to reduce evaporation
    • Check soil moisture before watering, rather than sticking to a rigid schedule

    (Keep an eye on your slug population if watering during the evening. They love dark, damp conditions. If you notice a significant increase, try changing to a morning watering routine if at all possible).

    Watering at the base can feel counterintuitive – after all, plants get rained on from above. But rain is usually gentle and spread out, while a watering can or hose delivers water much more directly. Wet leaves, especially in warm or still conditions, can encourage disease. By watering the soil instead, you’re delivering moisture exactly where it’s needed: the roots. It’s simply a more efficient and safer way to water most vegetable crops.

    If you are new to growing veg don’t get too caught up in trying to water everything at the root – although it’s what I would recommend. Depending on your plant spacing and growing conditions, it’s not always possible to get the hose or the watering can that close to the soil. So, as close to the root of the plant as you can is fine – if you’re half a foot above the ground, the plant will still be fine. Most veg plants, once established, are quite robust, so don’t fret if you can get your hose or watering can that near to the plant root. It’s the amount of water you’re giving the plant that’s key here.

    Perspective – If I am using a hose, I water each plant or a very small section of plants while counting slowly to 20 or 30. To water all my outside raised beds takes around 1 1/2 hours. This sounds like a lot, but I’m only watering around once a week or possibly twice when the weather is very hot.

    To build your confidence, it helps to learn the signs your plants give you. Many vegetables will show early indicators if they need more water:

    • Leaves starting to curl or droop
    • A dull or slightly grey-green leaf colour
    • Soil pulling away from the edges of containers
    • Dry soil when you check below the surface
    • Crispy edges to leaves

    One of the simplest and most reliable methods of checking if your plants need more water is the finger test. Push your finger about 1–2 inches (2.5–5 cm) into the soil. If it feels dry at that depth, it’s time to water. If it’s still damp, you can wait another couple of days. This removes guesswork and helps you respond to your garden’s actual conditions.

    You’ll often see more advanced setups like drip irrigation or soaker hoses. While these can be very effective (and widely used by market gardeners), they’re not essential for most home gardens or allotments. A simple watering can or hose will do the job perfectly well. What matters far more is consistency and observation, not the equipment you use.

    It’s also worth thinking ahead in terms of water use. With increasingly dry summers and the increasingly common summer hosepipe bans in the UK, even a small amount of water storage can make a difference. A water butt connected to a shed, outside wall or greenhouse is ideal, but even a few containers to catch rainwater can help keep your garden going during dry spells. If you’re growing your own food, a little self-reliance with water goes a long way.

    Finally, a practical tip that’s often overlooked – think about where you plant. If you can, position your most water-hungry crops closer to your water source. The easier it is to water, the more likely you are to stay consistent, especially during busy periods or hot weather. Lugging heavy watering cans across the garden quickly becomes a chore, and anything that removes that friction will help you care for your plants more effectively.

    Conclusion

    Ultimately, watering is less about strict rules and more about observation and consistency. Aiming to water deeply encourages strong roots and responds to what your plants are telling you. With a little practice, observation and patience, it becomes second nature and one of the most satisfying parts of caring for your garden.

    I find watering strangely meditative. Admittedly, there are days when it feels more like a chore than a pleasure, but once I get started, it gives me the chance to slow down, observe my plants more closely, and really appreciate the process of watching them grow. It’s a bit like doing exercise – I never want to do it, but I know that once I’ve started, I’ll enjoy it and I know it’s good for me 😊

    Let me know in the comments what your watering routine is, or if you struggle to keep to a routine.

    If you enjoyed this post or found it useful, please consider subscribing to the Solitaire Gardener community. Subscribing is free and will keep you up to date with posts & exclusive content directly to your inbox. I’ll also email you a copy of my free Organic Pest Control Guide.

    Follow me on BlueSky, Pinterest or Instagram.

    See below for more content.

  • Five Vegetables to Sow in May for New Gardeners

    A vibrant vegetable garden with raised beds filled with various plants, surrounded by colorful flowers, under a sunny sky with a few birds flying.

    May might be one of the most exciting months in the gardening calendar. The soil is warming up, the risk of frost is fading, and there’s a wide range of crops you can sow directly outdoors or start undercover. For new gardeners, it’s the perfect time to build momentum and fill your growing space with reliable, productive vegetables. Below are five excellent crops to sow in May, along with everything you need to know to grow them successfully.

    My advice, as always, is to start slowly – If you are anything like me, you want to plant everything, but trust me when I say, it’s easy to get overwhelmed. So start small, build your skills and enjoy your success.

    Carrotts

    Carrots are best sown directly into the ground, as they dislike being transplanted. You might try varieties such as ‘Early Nantes’, ‘Chatenay’ or ‘Autumn King’

    How to sow:

    • Sow seeds outdoors in shallow drills/lines about ½ inch (1–1.5 cm) deep
    • Space rows 12 inches (30 cm) apart
    • Ideal soil temperature: 10–18°C (50–65°F)

    Because carrot seeds are teeny tiny most people sow and then ‘thin out’. ‘Thinning out’ just means once the seedlings are about an inch or so high, you take some of them out, so those left have space to grow. I can never quite bring myself to ditch the crowded seedlings. So I take the time to space each seed about 2-3 inches apart. It’s a faff, but I think it’s worth it.

    Conditions:

    • Light, stone-free soil is essential for straight roots
    • Keep soil consistently moist during germination (10–21 days)

    Care:

    • Thin seedlings to prevent overcrowding if needed
    • Water regularly to prevent roots from becoming tough
    • Keep as weed-free as possible

    Containers/raised beds:

    • They grow well in deep containers (at least 12 inches / 30 cm)
    • Easily grown in raised beds

    Pests:

    • Carrot root fly

    Protection tips:

    • Cover crops with fine mesh or fleece to block egg-laying flies
    • Avoid thinning seedlings on windy days (this releases scents which carrot root fly adore)
    • Grow in raised beds or containers where the risk of root fly is lower

    Harvest:

    • Ready in 8–12 weeks, depending on variety (longer varieties may take a little more time to mature)
    • Harvest when roots reach usable size

    French Beans (Dwarf or Climbing)

    French beans are fast-growing and perfect for May sowing, but wait until the risk of frost has passed. These can be sown direct or under cover to get them started, then planted out to their final position.

    How to sow:

    • Sow seeds 1 inch deep (2.5 cm)
    • Space 6 inches apart (15 cm) for dwarf varieties
    • Ideal temperature: 15–25°C (59–77°F)

    Conditions:

    • Warm, sunny position
    • Well-drained soil

    Indoor option:

    • Can be started indoors in pots and planted out after 3–4 weeks
    • Sow one or two seeds at the most into a small pot
    • Start on a sunny windowsill, in a greenhouse, or in a raised bed with a glass cover. A raised bed with a clear plastic hoop cover will be fine as long as there is some airflow

    Care:

    • Water regularly, especially during flowering
    • Provide support for climbing varieties
    • Put the supports in when you plant to avoid damaging the roots when the plant is established

    Containers/raised beds:

    • Dwarf beans grow well in containers
    • Climbing beans suit raised beds with supports

    Pests:

    • Slugs (young plants)
    • Aphids

    Protection tips:

    • Use slug barriers or wildlife-friendly pellets when plants are young
    • Check plants regularly and remove aphids by hand or with a water spray
    • Encourage beneficial insects like ladybirds

    I’d love to say I have solved the problem of slugs in my garden – but they are seanky little blighters. My best advice is to protect the plant as much as possible. I tend to start most beans in the greenhouse and plant out when they are a good size. When plants are a little larger, they’re less vulnerable and more robust. I also protect them with a closh – nothing fancy, just a 5lt clear plastic water bottle cut in half with some holes for airflow. The RHS website has some helpful tips and tricks for slugs, which you can read here RHS slug advice

    Harvest:

    • Pick regularly when pods are young and tender to encourage more production

    Salad Lettuce

    Lettuce is ideal for succession sowing, giving continuous harvests through summer. Sow a few seeds every couple of weeks for a good supply. Lettuce comes in four main categories: crisphead, butterhead, romaine, and loose leaf. Each has its own distinctive flavour. My favourite is a loose leaf and romaine: loose leaf is versatile in salads and sarnies, while the slight bitterness of the romaine varieties gives an interesting twist.

    How to sow:

    • Sow seeds thinly at ¼ inch deep (0.5 cm)
    • Space rows 12 inches (30 cm) apart
    • Ideal temperature: 10–20°C (50–68°F)

    Conditions:

    • Prefers cooler conditions and partial shade in warmer weather
    • In hot weather, lettuce tends to bolt – once the plant has bolted, the leaves can become slightly bitter

    Indoor option:

    • Can be started in trays or modules and transplanted
    • A sunny windowsill will be fine – make sure the soil doesn’t dry out completely

    Potting on:

    • Transplant when seedlings are large enough to handle
    • Keep young plants protected by covering them with a cloche, or by using a simple pot barrier. This can be made by cutting the bottom off a large plastic plant pot and placing it over the seedling once it’s planted in the ground. This helps shield the plant from pests like slugs while it gets established. For even extra protection, pop some copper tape around the pot.

    Don’t be too hasty to get your lettuce in the ground. Again, a strong, slightly larger plant will fare better than a tender, young seedling.

    Care:

    • Keep soil consistently moist
    • Avoid letting plants dry out, as this can trigger bolting

    Containers/raised beds:

    • Perfect for pots, window boxes, and raised beds

    Pests:

    • Slugs and snails
    • Aphids

    Protection tips:

    • Use copper tape, barriers, or evening checks for slugs and snails
    • Grow in raised containers to reduce slug damage
    • Spray aphids off with water or use a mild soapy solution

    Rehoming slugs and snails at dusk is probably one of the most effective ways to control the slug and snail population. It’s messy and a bit gross, but it’s worth the effort.

    Harvest:

    • Pick outer leaves as needed or harvest whole heads

    Courgettes (Zucchini)

    Courgettes are productive and perfect for sowing in May. My last blog was focused on courgettes – but they are worth mentioning again because they are such prolific producers. Just two or three plants will see you through the summer months. If you want a deeper dive into growing courgettes/zucchini, see here How to Grow Courgettes: A Simple Step-by-Step

    How to sow:

    • Sow seeds 1 inch deep (2.5 cm)
    • Space plants 36 inches apart (90 cm / 3 feet)
    • Ideal temperature: 18–24°C (65–75°F)

    Indoor option:

    • Start indoors earlier, or sow outdoors in May

    Conditions:

    • Warm, sunny position
    • Rich, fertile soil – use plenty of compost and mulch around the base, especially if you’re growing vertically

    Care:

    • Water deeply and regularly
    • Feed weekly once flowering begins – use a comfrey or nettle tea

    Containers/raised beds:

    Pests:

    • Slugs (young plants)
    • Aphids

    Protection tips:

    • Protect young plants with cloches or fleece early on
    • Use slug barriers until plants are established
    • Rinse off aphids or pinch out heavily affected tips

    Harvest:

    • Pick when fruits are 6–8 inches long (15–20 cm)
    • Harvest frequently to encourage more fruit

    Beetroot

    Beetroot is easy to grow and ideal for sowing directly outdoors, but equally happy when started under cover. I prefer the non-red varieties, such as chioggia or Golden Burpees.

    How to sow:

    • Sow seeds 1 inch deep (2.5 cm)
    • Space rows 12 inches (30 cm) apart
    • Ideal temperature: 10–20°C (50–68°F)
    • Beet seeds are easy to handle, so pop one or two seeds per module if starting indoors.

    If starting seeds outside, you can plant two or even three seeds quite close together; as the roots develop, they will push each other apart. This sometimes results in slightly smaller beets, but they are fabulous for roasting and pickling.

    You can do the same with the beet seeds you start in modules or pots. When you plant them out, you can pop them in the ground together or gently tease them apart to plant separately if you wish.

    Conditions:

    • Well-drained soil in a sunny or lightly shaded spot

    Care:

    • Water regularly for even root development
    • Keep weed-free

    Containers/raised beds:

    • Suitable for containers at least 10 inches (25 cm) deep

    Pests:

    • Leaf miners – Leaf miners are small insect larvae that live inside leaves, creating pale, winding tunnels as they feed between the layers of the leaf (don’t panic!)
    • Slugs

    Protection tips:

    • Leaf miner – Remove affected leaves quickly to prevent the spread of leaf miners. Wash the leaves with soapy water every couple of days until the problem resolves. I find it easier to apply this soapy water solution with a spray bottle.
    • Use netting if infestations are persistent
    • Protect young plants from slugs with barriers or regular checks

    Harvest:

    • Harvest when roots reach golf ball to tennis ball size
    • Leaves can also be eaten when young, much like spinach.

    Final Thoughts

    May is a generous month for sowing, offering warm soil and long daylight hours that help seeds germinate quickly and plants establish strongly. Whether you’re sowing directly into the ground, starting seeds in trays, or growing in containers, the key to success is consistent watering, good spacing, and keeping a close eye on young plants as they establish.

    For new gardeners in the UK and other temperate climates, these five vegetables offer a reliable and high-yielding place to start. With just a little care and attention, you’ll be well on your way to a heap of healthy veg you can use throughout the summer months or preserve for later.

    If you enjoyed this post or found it useful, please consider subscribing to the Solitaire Gardener community. Subscribing is free and will keep you up to date with posts & exclusive content directly to your inbox. Just type your email address in the box below and hit the subscribe button. You can also follow me on BlueSky, Pinterest or Instagram.

    If you are interested in coaching or mentoring focused on gardening and greater self-sufficiency, please visit my coaching pages here Garden Coaching – Mindset and Motivation. If you’re feeling overwhelmed by your garden projects or are struggling with motivation, then coaching may be for you. I can help you reach your gardening goals, keeping you motivated and helping you plan your self-sufficiency dream your way!
  • How to Grow Courgettes: A Simple Step-by-Step

    A vibrant illustration of zucchini plants growing in a garden, featuring large green leaves, vegetables in various stages of ripeness, and ladybugs among the foliage.

    I love courgettes; they are one of the most rewarding, prolific and versatile vegetables you can grow at home. They’re fast-growing, highly productive, and perfect for beginner veg growers. With just a couple of plants, you can enjoy a steady harvest throughout summer. Whether you’re growing in a garden, raised bed, or even a large container on a balcony, courgettes are a reliable and satisfying crop to add to your growing space.

    Why Grow Courgettes?

    Courgettes (known as zucchini in the US) are popular for good reason:

    • They are easy to grow
    • They are high-yielding – one plant can produce many fruits
    • They grow quickly from seed to harvest
    • They are versatile in the kitchen
    • They can be grown in small spaces or containers
    • They can be trained to grow vertically if you’re short on space

    Step 1: Sowing Courgette Seeds

    Courgettes can be started indoors on a warm sunny windowsill or sown directly outside once the weather and soil warms.

    Top tip: Always sow seeds on their edge rather than flat to help prevent rotting.

    Indoor sowing (recommended for a head start)

    • Sow from April to May
    • Plant seeds 1 inch deep (2.5 cm) into individual pots
    • Use good-quality peat-free compost and water lightly
    • Keep in a greenhouse, or on a sunny windowsill with a cloche (protective cover) if needed
    • Ideal temperature: 18–24°C (65–75°F)
    • They germinate within 5 – 10 days

    My compost of choice is Petersfield peat-free growing medium RETAIL RANGE – it’s a bit more expensive, but I swear by it.

    My last frost date is early May, so I generally start seeds under cover around mid to late April. That means they are ready to go out in mid to late May when the risk of a frost has diminished.

    Direct sowing outdoors

    • Sow from late May to June when any chance of a frost has passed
    • Choose a sunny, sheltered spot
    • Sow seeds 1 inch deep (2.5 cm)
    • Space sowing positions about 36 inches apart (90 cm / 3 feet)

    Top Tip: If all else fails and your seeds, for whatever reason, don’t germinate, there is nothing wrong with buying plug plants from the garden centre. Often, people see this as a failure. I see it as a viable option when either seeds fail or you don’t have the time, energy or inclination to grow from seed. Nothing wrong with that – and no one will ever know if you don’t tell them 🤫

    Step 2: Caring for Seedlings

    Once seedlings emerge:

    • Keep compost moist but not waterlogged
    • Ensure plenty of light to prevent leggy growth
    • Turn pots regularly if on a windowsill for even growth – plants will always grow toward the light.

    When plants develop a few true leaves, they will begin to grow quickly. They love the summer heat and should romp away nicely.

    Step 3: Planting Out

    If you started plants indoors, the best practice is to harden them off before they go to their final growing spot: this means gradually getting the young plants used to being outside.

    • Gradually expose them to outdoor conditions over 7–10 days
    • Start with a couple of half days, then gradually increase the time the plant spends outside. This should be the case whether you are planting them directly into the ground or a large pot.

    Once hardened off:

    • Plant out after the last frost (for me, that’s early May, but a quick internet search will tell you when the last frost date is for your area)
    • Space plants 36 inches apart (90 cm / 3 feet)
    • Plant into rich, fertile soil with plenty of compost or well-rotted manure

    Courgettes grow into large, leafy plants, so give them plenty of room. Alternatively, you can train them to grow vertically. The plants will need plenty of support to grow vertically or over an arch, but it is possible, particularly if you are short on space. This video from ‘That British Homestead’, How to train a Courgette plant vertically’ is worth a watch if you are considering growing vertically.

    Step 4: Protecting Young Plants

    Young courgette plants can be vulnerable to pests, especially early on.

    Common pests include:

    • Slugs and snails (the most common threat and the bane of most people’s lives 😊)
    • Aphids (greenfly)
    • Occasionally, birds disturb young plants

    Protection tips:

    • Use barriers, beer traps, and physical removal as a last resort; you could try wildlife-friendly slug pellets
    • Place cloches or fleece over young plants
    • Check regularly, especially in damp weather
    • Cover with a light netting if birds
    A transparent plastic bottle placed in soil, presumably used for gardening purposes.

    Once plants establish, they usually grow strongly and can tolerate minor damage. My version of a closh to protect young plants is just a 5Ltr plastic water bottle with holes cut into it for ventilation.

    Personally, I don’t use slug pellets, even the organic wildlife-friendly ones. I use beer traps and take a stroll around vulnerable young plants late evening, picking slugs and snails as I go. Does it help keep down the slug population – yes, is it my favourite gardening job – absolutely not!

    Step 5: Ongoing Care

    Courgettes are hungry and thirsty plants, so regular care is key.

    Courgette plants are monoecious, which means they produce both male and female flowers on the same plant. Male flowers appear first are on a really thin stem and have no signs of swelling at the base. Female flowers appear a little later and have a swollen base, which will eventually (if fertilised) become a courgette. Rather than go into the whys and wherefors in this blog – it’s long enough already! You can read more information about male and female pollination in courgette plants here: Identifying Male and Female Courgette Flowers. It’s from ‘Simply Seeds’, a reliable seed company I use regularly (I’m not an affiliate of Simply Seeds)

    To keep plants thriving:

    • Water deeply and regularly, especially in dry weather
    • Feed weekly with a comfrey of nettle tea (liquid fertiliser) once flowering starts
    • Mulch around the base to retain moisture
    • Avoid wetting the leaves when watering to reduce disease risk
    • Try to keep the plant weed-free
    • Give them a hand to pollinate if they are struggling – see ‘Simply Seeds’ link above

    Courgette plants grow large, with big leaves and spreading stems. A mature plant typically forms a low, bushy mound with broad leaves and bright yellow flowers, followed by developing fruits. The flowers can also be eaten – many people deep fry them in a light batter.

    Step 6: Harvesting Courgettes

    Courgettes grow quickly – often faster than expected! But don’t worry if a courgette fruit gets too big, then essentially you’ve grown yourself a free marrow!

    • Harvest when fruits are about 6–8 inches long (15–20 cm)
    • Pick regularly to encourage more production
    • Use a knife or twist gently to remove at the base of the fruit

    Step 7: Cooking and Using Courgettes

    Courgettes are incredibly versatile and can be used in many dishes; they can be cooked or eaten raw.

    Simple cooking ideas:

    • Slice and sauté with garlic, pepper and olive oil
    • Roast with other vegetables
    • Add roasted to pasta dishes or slice and use in stir-fries
    • Grate into salads or mix with mashed potatoes and egg to form a fritter

    Easy recipe ideas:

    • Courgette fritters – grated courgette mixed with egg, flour, mashed potato and herbs, then pan-fried
    • Roasted courgettes – chopped, drizzled with oil, pepper, a little salt and roasted until golden

    They also work well in soups, curries, and even baking (such as courgette cake).

    The internet is packed with yummy courgette recipes, so have a search and see what takes your fancy.

    Final Thoughts

    Growing courgettes from seed is one of the easiest and most rewarding ways to start growing your own food. With just a little care, you’ll be rewarded with a steady supply of fresh, homegrown vegetables throughout the summer. For new gardeners in the UK, and in other temperate climates, courgettes are a dependable crop that builds confidence and delivers real results.

    If you enjoyed this post or found it useful, please consider subscribing to the Solitaire Gardener community. Subscribing is free and will keep you up to date with posts & exclusive content directly to your inbox. Just type your email address in the box below and hit the subscribe button. You can also follow me on BlueSky, Pinterest or Instagram.

    • Master Your Garden: The Art of Observation
      The post emphasizes the importance of observation in gardening, encouraging gardeners to slow down and learn from their plants. By recognising growth patterns and changes, they can address issues effectively and enhance their confidence as gardeners.
    • Preventing Overgrown Courgettes: Essential Tips
      If you’ve ever gone out to admire your courgette/zucchini plants, spotted a perfectly sized fruit, and thought, ‘I’ll pick that… Read more: Preventing Overgrown Courgettes: Essential Tips
    • Top Vegetables to Sow in June for a Bountiful Harvest
      June is an excellent month for sowing various heat-loving vegetables, with rapid germination and growth. Ideal conditions for crops like pumpkins, turnips, and spring onions encourage healthy yields. Newer gardeners can still enjoy successful harvests, even if the growing season began slowly.
    • Simple Ways to Preserve Everyday Herbs (Without Fancy Equipment)
      Preserving homegrown herbs through air drying, freezing, and preserving in oil offers a cost-effective ways to enhance cooking, reduce waste, and enjoy fresh flavours all without special equipment or complicated methods.
    • Find Peace: Calm the Chaos and Remember, It’s Not Too Late
      Everything, Everywhere, all at Once. May is when most veg patches, whatever the size, really start to take off. It’s… Read more: Find Peace: Calm the Chaos and Remember, It’s Not Too Late
    • Unlock Healthy Growth with Deep Watering Techniques
      Effective watering fosters strong root systems in plants. Deep watering enhances drought resilience and reduces evaporation, essential for healthy growth. Observational skills help gardeners adjust their watering techniques for optimal results.
    • Five Vegetables to Sow in May for New Gardeners
      May is an exciting time for gardening with warm soil and reduced frost risks. New gardeners can focus on easy-to-grow crops like carrots, beans, lettuce, courgettes, and beetroot for successful harvests.
    • How to Grow Courgettes: A Simple Step-by-Step
      Courgettes are easy, high-yield vegetables perfect for beginners, growing well in various spaces. They require minimal care, produce ample harvests, and can be used in diverse dishes, ensuring a rewarding gardening experience throughout summer.
    • Growing Swiss Chard: A Beginner’s Guide
      Swiss chard is a hardy and versatile leafy vegetable, rich in vitamins and easy to grow, making it perfect for beginners. It can thrive in various conditions and provides a long harvesting season. With several popular UK varieties, chard can be enjoyed in many dishes, enhancing garden spaces with its colorful stems.
    • What to Sow in March
      As meteorological spring begins in the UK, it’s time to sow seeds while practicing restraint to avoid being overwhelmed. The blog discusses various seeds to plant indoors and outdoors, emphasizes proper soil preparation, and offers tips on nurturing young plants. It encourages gradual sowing for manageable growth throughout the season.

    If you are interested in coaching or mentoring focused on gardening and greater self-sufficiency, please visit my coaching pages here Garden Coaching – Mindset and Motivation. If you’re feeling overwhelmed by your garden projects or are struggling with motivation, then coaching may be for you.

  • What to Sow in March

    A vibrant cartoon scene of a farm with a scarecrow standing in a field of young plants, surrounded by greenery and a clear sky.

    We are now officially in meteorological spring in the UK and finally the seed packets that have been burning a hole in your seed box are ready to be unleashed.

    It’s an amazing time of year – the daffodils are in full bloom, the days are getting longer and there is a real feeling of hope and anticipation in the air.

    The tendency is to frenetically start sowing seeds left, right and sideways. However, my advice here is to practice a degree of restraint – yes we want to get planting, but we don’t want to get overwhelmed or swamped with seeds we can’t nurture properly.

    In this blog we will look at a number of seeds you could start in March, and talk a little about soil prep ready for your young plants. I will link to earlier blogs for more planting information if you need it and will do a deeper dive into more plants over the coming weeks.

    What you can sow indoors

    * Plant by end of March beginning of April

    The above list covers some of the basics but is by no means exhaustive. My best advice here is to ensure you always read the seed packet to check the best time to sow your seeds.

    In terms of sowing seeds indoors, in a greenhouse or in a polytunnel we still need to be a bit careful with regard to temperatures. The days are certainly getting warmer, but the nights are still chilly and the weather particularly in the U.K. can change quite considerably come late March. Snow at Easter time is not unheard of, so use cloches and propagators for extra protection. In fact even indoors at this time of year I would use a clear plastic cover over seed trays and pots.

    The process of planting is fairly simple: Fill a seed try or seed modules with seed or potting compost. I generally make sure the seed compost is moist prior to sowing as I’m always a bit concerned that I will dislodge the seeds with my watering can – I can be a bit heavy handed even with my tiny seed watering can 😊

    Once your soil is dampened pop your seed on the surface and cover with a light smattering of soil and press down lightly. You firm them in lightly to make sure the seed has good contact with the soil. The general rule is don’t cover your seeds with soil more 2 or 3 times the width of the seed. You want them deep enough to be moist and dark – but not so deep that they run out of energy trying to break the soil surface. This is not an exact science, but generally if the seeds are small don’t bury them too deep. Remember to label your seeds! – trust me you will forget no matter how much you convince yourself you will remember what you’ve planted Labelling: simple but vital

    Your seed packet will tell you roughly how long your seeds will take to germinate. Once your seeds are around 2 to 3 inches tall you can repot them into a slightly bigger pot until you, and the weather, are ready to pop them into their final growing spot.

    If you are on a budget you might find this blog useful, it’s all about what alternatives you can use for seed trays, cloches or propagators Starting Seeds on a Budget: Simple Tips for Beginners

    If you are looking for a recommendation for seed modules, I use Charles Dowding’s version – they are a bit more expensive but I’ve had mine for 5 years now and they are as good as the day I bought them Charles Dowding seed containers

    Sow direct outdoors

    • Parsnips
    • Potatoes
    • Chard
    • Carrots
    • asparagus crowns
    • Spinach
    • Peas
    • Broad beans
    • Onion & Shallot (Sets not seeds)
    • Jerusalem artichokes

    Planting outside (planting direct) can be a bit hit and miss this time of year, but it’s still worth giving it a go. For example if you missed an autumn planting you get another opportunity to plant garlic – the bulbs may not be quite as large with a spring planting, but they will still be perfectly serviceable.

    If you are planting seeds direct it’s worth keeping an eye on the weather and consider using some horticultural fleece at night or if temperatures dip during the day. In fact whenever I plant outside at this time of year I still cover each seed with a closh. This is no more than the top of a 5 litre water bottle with holes in for airflow and pinned down with a garden U peg or tent peg.

    A clear plastic bottle placed upside down in soil, with green grass and a wire fence in the background.

    Makeshift closh to protect young plants.

    Soil Preparation.

    Soil preparation is important and worth spending some time on as it will give your young plants a stable start and allow them to put down firm roots.

    Make sure your planting area is clear of weeds and debris if you are planting in the ground you might want to give it a little rake just to break up any clumps. Add organic matter such as manure or compost – pop your young plant in the soil and cover the surface with a mulch (a good couple of inches or about 5 – 8 cm’s) to help retain water. For mulch you could use leaves, more compost, bark (fine broken down bark is always good) straw, or grass clippings.

    I wouldn’t get too hung up with the thickness of your mulch – if you don’t have enough to put 5 – 8 cm’s worth, don’t worry. Even a small layer is better than nothing at all.

    Obviously if you are planting seeds direct then don’t mulch until your plant is about 4 or 5 inches – 10 to 12 cm’s. Otherwise you will bury your seed too deep.

    Try not to mulch up the stem of your lovely young plant. Too much mulch around the stem can create excessive moisture and leave your plant venerable to rot and disease. I will often pop my plants into the soil, then mulch the whole bed. After that, I go round and move the mulch away from each plant creating a little mulch free circle around each plant.

    I garden in mostly raised beds as I find this easier, and it certainly means I have less weeding to do. The same principle as above applies when prepping your raised beds. However, raised beds generally hold water better than planting in the ground so you may not need quite so much mulch.

    Final Thoughts

    My best advice as the season gets going is not to panic. March, April and May are really busy times for veg growers, particularly if you are gardening on your own Tips for Successful Solo Vegetable Gardening . But you have time, we are still only in early spring, so plan out your seed sowing routine over the coming weeks and months. Gardening is a bit like the rest of life – little and often is often the answer. Sowing 5 tomato seeds this week and another 5 in two weeks time will mean you are not repotting dozens of plants at the same time and ensure you have a succession sowings.

    Over the next few weeks I will do a deep dive into some of the plants I have mentioned in this blog. Hopefully this will give you a more in-depth information – planting depths, best growing conditions, what pests to look out for etc. So keep an eye on these pages or subscribe to the site so you get upcoming blogs direct to your inbox.

    Let me know in the comments what fruit or veg you would like me to focus on over the coming weeks – and don’t forget to follow me on BlueSky, Pinterest and Instagram.

    If you are interested in coaching or mentoring focused on gardening please visit my coaching pages here Garden Coaching. If your feeling overwhelmed by your garden projects or are struggling with motivation then coaching may be for you.

  • Essential Pantry Reset Tips

    A cozy pantry filled with jars of fruits, vegetables, and other preserves, with a wooden shelf, a window letting in light, and a bowl of apples.

    The Purpose of a Reset

    Late winter very early spring sits in that strange space between seasons. Seed packets are coming out, the light is slowly returning, and while there might be some activity on window sills and in greenhouse the garden is still holding its breath. So while we have a moment to breathe, it’s a great time to think about last years produce. What’s still sitting on the shelves? what’s buried at the bottom of the freezer? What’s has quietly gone gooey at the back of the cupboard and what may be going mushy in the ground?

    An end-of-winter preserving reset isn’t about guilt or waste, it’s about awareness. It’s about clearing space, learning from last season, and making sure what we grow and preserve this year truly fits the way we live and eat.

    So grab a cuppa and let’s take a look at – what actually got used, your storage space, what’s been overlooked, quality control and lessons learned.

    The Purpose of a Winter Reset

    February is the perfect time for assessing your preserved harvests from last year. A planned yearly reset can help you:

    • Prevent waste
    • Plan for the coming season
    • Limit overplanting
    • Reduce overwhelm
    • Assess any preserving tools you may need

    This is not about feeling guilty when you discover half your stash of garlic is soft and mushy. It’s about being realistic and honest with yourself. It’s about taking a little time now to consider how you will use up the preserves you have left ready for the coming harvests.

    So before you sow a seed consider last season’s yields and what improvements you might make this year this year.

    Think through the preserving methods you used. If on a regular basis your stock doesn’t last – consider

    There’s often a disparity between what we think we are going to use and what we actually use. This is why a realistic assessment of what you and your family actually consume is essential.


    Honest Inventory

    So how do we get started?

    The first step in to do a complete inventory.

    • Pull everything out so you can physically see it
    • Note patterns such as what was used first, what did you run out of?
    • What did you genuinely mean to use, but didn’t because life got in the way
    • What needs to go on the compost heap or fed to the chickens
    • What is not looking so good, but can be used in cooking over the next week or so
    • What is past it’s best, but might be salvaged using other methods i.e. dehydrating, freezing

    Don’t forget to do the same with the freezer as well as what’s on shelves and in root cellars, cupboards and pantries.

    Once you have the information gleaned from your audit there are some questions to ask yourself.

    • Did I preserve too much of one particular crop?
    • What did I enjoy eating in early September which didn’t go down so well in early January?
    • Notice patterns: what disappeared first?
    • Identify “fantasy preserves” (the things you meant to use but didn’t).
    • Be honest about family preferences.
    • Track what became weeknight staples.
    • What should I have preserved more of?

    From here you can start to consider not only what you will grow this year, but also how much. Obviously you do you, and garden how you see fit, but the exercise above should help you plan more strategically. It will ensure your produce is working for you – not you working for it.

    Safety & Quality

    Before we move on we do need to talk about safety and quality control. With this in mind you should check the following:

    • Inspect jar seals (concave lids, no leaks).
    • Check for off smells, bulging lids, cloudiness.
    • Identify freezer burn but note what’s still usable in soups/stews.
    • Discard without hesitation if unsure.

    I do want to reiterate the last point – if you are in any doubt please throw it out!


    Physical Storage Audit (Space Matters)

    The next thing to consider is your storage space. This is something I regularly misjudge – in fact I misjudge it so much that last year we ended up buying and extra freezer for our produce. Sorting your storage prior to filling the shelves and freezer can not only save you money, but will also save you time later in the season.

    Again a good audit is about asking the right questions, so let’s look at some you can ask yourself to assess your storage space.

    Cupboards

    • Are shelves overcrowded?
    • Can you see labels easily?
    • Are jars stored properly (cool, dark, stable)?
    • Can you reach everything easily without having to get the step ladders out?

    Think ease of finding things – for this I tend to use a lazy-Susan’s with all labels facing outward. However I know others like to line up jars one behind the other and some use coloured dots to denote the year. Whatever system you use make sure it works for you and your family.

    Freezer

    • Is it efficient or chaotic?
    • Do you know what’s lurking at the bottom?
    • Are containers uniform or random?
    • Are you using the freezer space effectivley
    • Are like items stored with like items – or they haphazard & all over the place
    • Are you using old plastic storage containers that degrade over time?

    Dry Storage

    • Check airflow, temperature consistency.
    • Remove anything soft, mouldy, shrivelled.
    • Do your storage containers allow airflow?
    • How often did you access your dry storage (root cellar)

    The more time you spend curating your space in rediness the easier it will when it comes to the frenetic perserving period.

    If certain produce stores poorly it might be time to think about trying a variety of bread for better storage.


    In-Ground

    Don’t overlook what may still be in the ground.

    • Check beds for overwintered crops.
    • Dig gently for rogue potatoes.
    • Assess what survived frost and what didn’t.
    • Make notes about varieties that held up well.
    • It’s o.k. to take ravaged winter plants to the compost bin.

    Remember that if you label things when you plant them, they will be easier to find come the end of the season.


    Lessons Learned From Last Season

    Before you order seeds or sharpen a single blade, pause and look back honestly. Not at what looked impressive on the shelf, but at what actually felt good.

    Ask yourself:

    • What stressed me out during preserving season?
      Was it the rush of everything ripening at once? The late nights in a hot kitchen? The pressure to “deal with it all” before it spoiled?

    Did I preserve because I genuinely wanted to, or because I felt I should?
    It’s easy to fall into the idea that a good gardener cans, freezes, dries and ferments everything. But obligation has a way of turning abundance into real burden.

    • Was I short on time?
      Did preserving compete with family, rest, or work during an already busy stretch of the year?
    • Did I run out of shelf space?
      Overflowing jars can quietly become clutter and guilt instead of pride.
    • And most importantly:
      What did we genuinely enjoy eating?
      Which jars were opened eagerly in winter, and which are still sitting there?

    Once you’ve reflected, make it practical:

    • Write down three things you would absolutely repeat.
    • Write down three things you would change next season.

    Keep it simple.

    Reflection turns last year’s overwhelm into this year’s clarity. Clarity is what makes preserving feel purposeful instead of pressured.


    Final Thoughts

    Gardening and preserving your produce should be fun and fulfilling. We all get a little stressed at times, especially when a glut of produce comes along. However it’s not something that should keep us awake at night! It’s not a competition regardless what people around you are doing and we shouldn’t believe all the perfect preserved produce we see on our social media.

    Take your time – do a realistic audit of your storage space and time – review your lessons learned – and plan for the coming season based on your findings. Keep it simple and enjoy.

    If you enjoyed this post please take a look at my other posts and subscribe to receive blogs direct to your inbox. You can also follow me on Pinterest, BlueSky, and Instagram

    For more posts see below…….