Category: Organic no dig gardening tips and techniques

No dig hints, tips, and techniques, including topics such as soil health, garden tools, no dig strategies, pest and disease control.

  • Find Peace: Calm the Chaos and Remember, It’s Not Too Late

    A garden with wooden raised beds, one filled with various vegetables and plants and the other empty, set against a grassy background.

    Everything, Everywhere, all at Once.

    May is when most veg patches, whatever the size, really start to take off. It’s also the time most veg growers come to the slightly alarming realisation that they are either inundated with plants at various stages of growth, and feel totally overwhelmed, or so far behind they feel like giving up.

    Whether you are growing on a balcony or on acres of land, this scenario is completely normal and happens to both new and experienced growers alike. So if you are an overwhelmed seed starter or a late bloomer, this blog is for you. We will discuss how you can approach both ends of this spectrum with a calm and practical approach.

    Whatever stage you are at – take a breath! You are not failing, and the season is far from over. Gardening is not about perfection or keeping up with anyone else. It is about learning how to work with the space you actually have, your time, your energy levels, and what you genuinely enjoy eating and growing.

    Remember, you are in control – you dictate what happens next. Even the Monty Dons’ and Charles Dowdings’ of this world make mistakes and learn something new every season. You’re no different! Cliche though it might sound, gardening is a long journey of joy, with a heap of trial and error thrown in for good measure.

    In this blog, we will take the solitaire gardener approach to each end of the problem.

    If You’re Feeling Overwhelmed

    This often starts innocently enough. You sow a few extra ‘just in case’ plants, then a few more because the seeds were there anyway, and suddenly you have 12 courgettes (zucchini) plants, 3 trays of cabbages, nowhere left to walk in the greenhouse, and you’re desperately trying to work out where you are going to put them all. The important thing to remember is this: there is absolutely no rule that says every seedling you start must be planted out.

    If you only have room for one courgette plant, it is perfectly reasonable to:

    • Compost the extras
    • Give the excess to friends, neighbours, or relatives
    • Swap them locally for something you need and have space for
    • Keep one spare as insurance and let the rest go

    Offloading extra plants can feel wasteful at first, especially for newer gardeners, but overcrowding your space with too many plants often creates more stress and poorer harvests in the long run. One healthy courgette/zucchini with enough space to fully mature can easily outproduce several struggling plants crammed together.

    For newer growers, this is an example (below mobile/right desktop) of underestimating the space a mature plant might need. The young cabbage plant on top looks innocent enough – but a fully grown cabbage is really quite a substantial beast. So, when assessing the space you have available, always consider the plant’s size when fully grown.

    Top image shows young cabbage seedlings in soil; bottom image shows a mature cabbage head with tightly packed leaves.

    It’s worth being honest about your available growing space. Before planting out, take a proper look at your beds, containers, greenhouse, etc. and work out what will realistically fit. A raised bed measuring 4 feet by 8 feet (1.2 x 2.4 m) fills surprisingly quickly once mature plant spacing is taken into account. This is where many gardeners become overwhelmed – not because they failed, but because seedlings are deceptively small.

    Your seed packet should have a spacing guide; all you need to do is remember that the seed company have based this on the size of the mature plant. Many gardeners will ignore the seed packet and wing it with spacing. But my advice for newer gardeners is to take the seed company’s advice until you have grown that particular plant for a couple of seasons. Learn how the plant develops, at what stage of growth you like to harvest it etc. Then by all means, you can go rogue with your spacing.

    The famous or infamous “just in case” plants are another common trap. Keeping a couple of spare cabbages or brassicas, in case caterpillars eat the originals, is understandable and sometimes sensible. But rather than endlessly potting on backup plants, it may be more effective to focus on protecting the ones already in the ground with mesh, netting, and regular checks for pests. Often, the calmer, simpler solution is not to grow more plants, but to look after the ones you already have a little more carefully. Trust me, I am totally guilty of this one, and will do everything I possibly can to find more space rather than ditch the spare, ‘just in case’ plants. But there comes a point where I have to commit to the plants I already have, and focus on giving them the best care possible. I’d much rather devote my limited time and energy to a smaller number of healthy, productive plants than become overwhelmed trying to look after too many.

    If space is tight, avoid the temptation to rush out and buy more raised beds or extra planters. Often, the best solutions are the simplest ones. Use containers you already have, repurpose buckets or tubs with drainage holes, or simply grow fewer things better. A calm, manageable garden will almost always be more productive and far more enjoyable than one that constantly feels out of control.

    If You’re Feeling Behind

    On the other side of the spectrum are the gardeners who look around in May and feel they’ve completely missed the boat. Maybe life got in the way, the weather was miserable, or the motivation simply wasn’t there earlier in spring. The good news is this: in the UK and other temperate climates, there is still plenty of time to grow food successfully.

    In fact, May is one of the best months for direct sowing. The soil has had a chance to warm up, and depending on where you are in the world, the chance of frost has receded. Seeds germinate faster in warmer soil, and young plants often establish more quickly than they would have done in cooler spring conditions.

    You can also see my ‘What to sow in May’ for more information on 5 easy sowings you start in May Five Vegetables to Sow in May for New Gardeners

    There is still time to sow the following – and this is by no means an exhaustive list:

    • Beetroot
    • Lettuce
    • French beans
    • Carrots
    • Courgettes
    • Chard
    • Peas
    • Spring onions

    If starting from seed still feels overwhelming, there is absolutely nothing wrong with buying plug plants or young plants from a garden centre. A healthy tomato or courgette/zucchini plant from a reputable garden centre can catch up remarkably quickly. Gardening is not a competition to see who started earliest under grow lights in February – It’s about doing what fits with your lifestyle.

    If you feel like you’ve missed the boat this season, trust me, you haven’t. But it may be a good opportunity to start thinking ahead for next year. In late December or early January, set aside a little time to choose just three things you’d like to grow from seed. Gather everything you’ll need into one place: your seeds, pots, trays or modules, and some potting compost. So when March arrives, you’re ready to get started without the last-minute scramble. Even blocking out a little ‘seed sowing time’ in your calendar now can make the whole process feel calmer and far more manageable when the new growing season begins.

    Ultimately, whether you feel overwhelmed or behind, the answer is usually the same: simplify the next step. Plant what you have room for. Grow what you genuinely like to eat. Water well, observe often, and accept that every season teaches you something new. Even experienced gardeners make mistakes, lose plants, sow things too early, or realise halfway through summer that they grew far too much spinach, again!

    You are in control of your garden. No one else gets to define what success looks like in your growing space. Start where you are, use what you have, and trust that a calm, steady approach will ensure your gardening continues to bring you joy.

    If you enjoyed this post or found it useful, please consider subscribing to the Solitaire Gardener community. Subscribing is free and will keep you up to date with posts & exclusive content directly to your inbox. Just type your email address in the box below and hit the subscribe button. Once subscribed, I’ll send a free ‘DIY Organic Pest Control’ download.

    You can also follow me on BlueSky, Pinterest or Instagram.

    See below for more blogs on organic veg growing approaches, how-tos, tips and hints

  • Unlock Healthy Growth with Deep Watering Techniques

    A woman in overalls watering plants in a lush garden, with a wooden fence and blue sky in the background.

    Watering is one of those gardening skills that feels deceptively simple, yet it’s where many new veg growers lose confidence. Few things make gardeners second-guess themselves, like watering. Too much, too little, too late – it can feel like guesswork until you learn what your plants are really asking for. The truth is, there isn’t a single perfect schedule – but there is a clear goal.

    When we water, we’re not just keeping plants alive; we’re encouraging a strong, resilient root system that can support healthy growth. Get that right, and everything else becomes so much easier.

    A helpful way to think about watering is in terms of depth rather than frequency. Gardeners often debate between “little and often” versus less frequent, deeper/longer watering. ‘Deep watering’ means you saturate the soil to a depth of about 6 ins (7 cms). So you water less often, but concentrate on the slow, deep water penitration.

    My best advice is to go for deep watering, and in this blog, I’ll tell you why I think this method is best.

    Having said that, do I sometimes give my veg patch a quick surface water? Yes, of course I do, especially when I’m really busy, or I can’t be bothered to drag the hose across the garden. Life gets in the way for everyone! But for the most part, I try to stick to a deep watering plan because I know my veg patch will appreciate the effort.

    In most cases, especially for vegetables growing in the ground, a deep watering once or twice a week is far more beneficial than light daily watering. This approach encourages roots to grow down into the soil, where moisture is more stable. Granted it takes longer, but it will produce a better harvest in the long run.

    Deep watering

    • Encourages deeper roots – Deep watering encourages roots to grow further down into the soil where moisture stays more stable, helping plants become stronger and better anchored.
    • Improves drought resilience – Plants with deeper root systems are better able to cope during hot weather or dry spells because they can access water below the dry surface soil.
    • Reduces evaporation – Watering thoroughly allows moisture to soak deeper into the ground instead of sitting on the surface, where it can quickly evaporate in the sun or wind.
    • Creates steadier growth – Consistent moisture lower in the soil helps plants grow more evenly, reducing stress that can lead to wilting, split fruits, bolting, or poor harvests.

    Shallow watering, by contrast, keeps roots near the surface, making plants more vulnerable to drying out.

    If you want a more visual explanation of deep watering, MIGardener has a very informative video on his YouTube channel, Deep Watering – How to do it & Why it Matters to Your Garden

    That said, there are moments in a plant’s life when watering needs to be more attentive. When you first sow seeds or plant out seedlings or plug plants, water plays a crucial role in helping them settle in. A newly planted seedling should be watered in well, which means giving it a generous soak so the soil settles around the roots and removes air pockets. This “anchoring” helps roots establish quickly. From there, you can ease into a more measured watering rhythm, allowing the soil surface to dry slightly between waterings while ensuring moisture remains below.

    As plants grow, their water needs change. Leafy crops like lettuce will need fairly consistent moisture to prevent bolting, while deeper-rooted plants like cabbage or sprouts can go longer between waterings. Once plants begin to produce fruit, such as tomatoes, courgettes, and beans, water becomes even more important. At this stage, inconsistent watering can lead to problems like split fruits or blossom end rot in tomatoes. Regular, deep watering helps maintain steady growth and better-quality harvests.

    It’s also worth adjusting your approach during dry spells or hotter summer weather. If you’ve had a week or more without meaningful rain, your plants will almost certainly need extra support, even if they look fine on the surface. Soil can dry out quickly in warm conditions, especially in containers and raised beds. During these periods, you may need to water more frequently, but still aim to water deeply rather than just wetting the surface. A good soak every few days is far more effective than a quick daily sprinkle.

    A couple of simple habits will make a big difference:

    • Water at the base of the plant, if possible, not over the leaves
    • Water early in the morning or later in the evening to reduce evaporation
    • Check soil moisture before watering, rather than sticking to a rigid schedule

    (Keep an eye on your slug population if watering during the evening. They love dark, damp conditions. If you notice a significant increase, try changing to a morning watering routine if at all possible).

    Watering at the base can feel counterintuitive – after all, plants get rained on from above. But rain is usually gentle and spread out, while a watering can or hose delivers water much more directly. Wet leaves, especially in warm or still conditions, can encourage disease. By watering the soil instead, you’re delivering moisture exactly where it’s needed: the roots. It’s simply a more efficient and safer way to water most vegetable crops.

    If you are new to growing veg don’t get too caught up in trying to water everything at the root – although it’s what I would recommend. Depending on your plant spacing and growing conditions, it’s not always possible to get the hose or the watering can that close to the soil. So, as close to the root of the plant as you can is fine – if you’re half a foot above the ground, the plant will still be fine. Most veg plants, once established, are quite robust, so don’t fret if you can get your hose or watering can that near to the plant root. It’s the amount of water you’re giving the plant that’s key here.

    Perspective – If I am using a hose, I water each plant or a very small section of plants while counting slowly to 20 or 30. To water all my outside raised beds takes around 1 1/2 hours. This sounds like a lot, but I’m only watering around once a week or possibly twice when the weather is very hot.

    To build your confidence, it helps to learn the signs your plants give you. Many vegetables will show early indicators if they need more water:

    • Leaves starting to curl or droop
    • A dull or slightly grey-green leaf colour
    • Soil pulling away from the edges of containers
    • Dry soil when you check below the surface
    • Crispy edges to leaves

    One of the simplest and most reliable methods of checking if your plants need more water is the finger test. Push your finger about 1–2 inches (2.5–5 cm) into the soil. If it feels dry at that depth, it’s time to water. If it’s still damp, you can wait another couple of days. This removes guesswork and helps you respond to your garden’s actual conditions.

    You’ll often see more advanced setups like drip irrigation or soaker hoses. While these can be very effective (and widely used by market gardeners), they’re not essential for most home gardens or allotments. A simple watering can or hose will do the job perfectly well. What matters far more is consistency and observation, not the equipment you use.

    It’s also worth thinking ahead in terms of water use. With increasingly dry summers and the increasingly common summer hosepipe bans in the UK, even a small amount of water storage can make a difference. A water butt connected to a shed, outside wall or greenhouse is ideal, but even a few containers to catch rainwater can help keep your garden going during dry spells. If you’re growing your own food, a little self-reliance with water goes a long way.

    Finally, a practical tip that’s often overlooked – think about where you plant. If you can, position your most water-hungry crops closer to your water source. The easier it is to water, the more likely you are to stay consistent, especially during busy periods or hot weather. Lugging heavy watering cans across the garden quickly becomes a chore, and anything that removes that friction will help you care for your plants more effectively.

    Conclusion

    Ultimately, watering is less about strict rules and more about observation and consistency. Aiming to water deeply encourages strong roots and responds to what your plants are telling you. With a little practice, observation and patience, it becomes second nature and one of the most satisfying parts of caring for your garden.

    I find watering strangely meditative. Admittedly, there are days when it feels more like a chore than a pleasure, but once I get started, it gives me the chance to slow down, observe my plants more closely, and really appreciate the process of watching them grow. It’s a bit like doing exercise – I never want to do it, but I know that once I’ve started, I’ll enjoy it and I know it’s good for me 😊

    Let me know in the comments what your watering routine is, or if you struggle to keep to a routine.

    If you enjoyed this post or found it useful, please consider subscribing to the Solitaire Gardener community. Subscribing is free and will keep you up to date with posts & exclusive content directly to your inbox. I’ll also email you a copy of my free Organic Pest Control Guide.

    Follow me on BlueSky, Pinterest or Instagram.

    See below for more content.

  • Build Your Own Dead Hedge: A Beginners Guide

    Illustration of a dead hedge structure featuring wooden stakes and layered branches, showcasing a simple and natural garden design.

    A dead hedge is one of the simplest, yet most effective & environmentally friendly garden structures you can build. However, for some reason it remains surprisingly under-used in many gardens. This may be a lack of access to materials if you live in a city or very built up area or maybe just because it’s not the first thing people consider when planning a plot or garden.

    Traditionally seen in ancient woodland management, dead hedges are now enjoying something of a revival among gardeners. So if you are looking for a sustainable, low-impact boundary that supports wildlife and deals with your pruning waste, then this is the blog for you. Whether you have a large rural plot, an allotment, or a postage stamp garden, a dead hedge can be easily adapted to fit your space and needs.

    Below we will look at the benefits of a dead hedge and give a step by step guide for the construction of your gloriously natural hedge.

    What is a dead hedge?

    At its core, a dead hedge is a woven barrier made from cut branches, twigs, prunings and other woody waste material. Instead of burning or binning garden waste, you layer it between upright stakes. Hazel or chestnut are good for dead hedges but really any straightish, sturdy branches can be used as the frame for you dead hedge. The beauty is that almost anything woody can go into it: bramble stems, hedge trimmings, fallen branches, pruned fruit tree limbs and even woody perennial cuttings. Larger pieces form the base structure, while thinner twigs weave into the gaps to make it sturdier and more compact.

    Dead hedges are great for nature. They offer shelter and nesting sites for a wide range of wildlife. Robins, wrens, hedgehogs, beetles, frogs and solitary bees can all find sanctuary in a dead hedge. The hedge will provide protection from predators, safe overwintering spots and a steady food source as insects colonise the decaying wood. In areas where hedgehog populations are struggling, a dead hedge can become a vital refuge. Birds benefit from the insects that thrive within the hedge, while frogs enjoy the moist, protected microclimate that forms at the base.

    In larger spaces, you might create a long boundary hedge or use one to section off a composting or woodland area. In smaller gardens, even a short hedge – just a metre (3ft) or so, can offer valuable wildlife habitat. They also make excellent windbreaks, privacy screens and natural barriers to gently steer foot traffic without resorting to fencing. Because they are built from materials already on site, they blend into the landscape far more naturally than manufactured structures.

    Over time, a dead hedge will slowly break down as microbes, fungi and insects do their work. This decomposition is part of the design rather than a flaw. Depending on the materials used and the local climate, a dead hedge can last anywhere from 3 to 10 years. Hardwoods decay more slowly, while softwoods and thin twigs rot down faster. As the structure gradually settles, it enriches the soil beneath it with organic matter, improving soil health and supporting fungi and invertebrate life. In this way, your hedge becomes a living part of a natural nutrient cycle. Because it’s no a one and done, and is added to over time, you can continue to fill it as the original contents breakdown,

    Caring for a dead hedge is about a low-maintenance as it gets. Simply top it up with more prunings, autumn cuttings, winter windfall wood or general garden clippings. This keeps the structure sturdy while giving you a convenient place to recycle garden waste year-round. There’s no need for tools beyond basic loppers and secateurs (pruners). Adding new material every few months creates a layered effect, helping the hedge stay compact and effective as a barrier. It also ensures a constant supply of fresh habitat for insects and small animals.

    Just to give an idea of how a simple dead hedge can be, this is small one I created last season to hold some of my butternut squash plants. Granted it’s not the prettiest you’ll ever see, but hopefully it will give you an idea of it’s simplicity and versatility.

    A small dead hedge structure filled with soil and topped with fallen leaves and twigs, surrounded by green foliage.

    Step-by-step build

    Step 1 – Mark out the line

    Decide on the length or shape of your new dead hedge and mark out your shape with string, or whatever you have to hand. This is just a marker so the stakes go in the correct desired place.

    Step 2 – Set the upright stakes

    Place two rows of stout stakes at roughly 60 –100 cm (2–3 ft) intervals along the line. For small hedges you can go 80 cm or less apart; for very robust hedges reduce spacing. Drive stakes about 30 – 40 cm (12–16 in) into the ground so they’re firm (leaving 1–1.2 m (3 – 4 ft) above ground). These measurements are only a guide, it will very much depend on what you have available. The spacing in the picture above is really quite random as I needed a new growing bed quite quickly and threw it together in a couple of hours one afternoon.

    Step 3 – Make the base

    Lay larger, thicker pieces of wood lengthways between stakes at the base. These form the backbone and help the hedge settle on the ground evenly. They also help to make the structure more sturdy. If you’re creating a longer, taller hedge then I wouldn’t skip this step. However, if the structure is smaller then it’s desirable but not essential to have a base layer of thicker wood go in first.

    Step 4 – Layer and pack

    Begin adding branches and prunings between the stakes, laying them lengthwise along the hedge. Use thicker pieces toward the centre and base; use thinner twigs to fill gaps and add compactness. Pack material tightly so it won’t slump – aim for a dense structure.

    Step 5 – Weave or tie (optional)

    If you want more stability, weave thinner flexible rods (hazel works well, but anything a bit bendy will suffice) horizontally through the stakes (like wattle) or tie bundles with twine to hold them in place. This is more work but makes a neater, longer-lasting barrier.

    Step 6 – Build in layers & habitat

    Continue building in layers until the hedge reaches the desired height. commonly 0.6 –1.5 m (2–5 ft) for garden use, or taller if used as a boundary. Compact each layer as you go. Again these measurements are only a guide. This is all your own creation so what feels right for your design and the space available.

    Step 8 – Cap it off

    Finish with a top layer of smaller twigs and brash to shed rain and give a tidy appearance. If you like, add a “cap” of larger branches laid across to slow decomposition of the top layer and for ascetic affect then feel free – you do you!

    Things you can put in a dead hedge

    • Hedge clippings
    • Prunings from fruit trees and shrubs
    • Brash, bramble (useful for structure)
    • Fallen branches and coppice material
    • Woody perennial cuttings (not diseased)
    • Avoid large quantities of sap-rich green cuttings (they rot anaerobically) and avoid diseased wood
    • Avoid large quantities of weeds – they will tend to spread and can create weeding issues down the line. You don’t need to be too picky if there are a few weeds in a pile of brush. However, I’d save the majority of weeds for the compost bin.

    Care, maintenance & longevity

    • Top up regularly: add fresh prunings every few months or annually to maintain bulk and renew habitat.
    • Longevity: depending on materials and weather, a dead hedge typically lasts 3 –10 years. Hardwoods last longer, softwoods break down quicker.
    • Monitoring: every year check stakes for rot; replace any that become loose. Tidy if necessary, but don’t over-neaten, wildlife prefers a bit of mess.
    • When it collapses: as it decomposes you can either let it integrate into the ground as a wildlife log/compost strip, or dismantle and reuse large pieces in new hedges.

    Safety & best practice

    • Don’t include treated wood, paint-coated timber or invasive roots.
    • Be careful with thorny material – use gloves and eye protection.
    • If the hedge sits on a boundary, check with neighbours and local bylaws if needed (usually fine in private gardens, but be polite).
    • Avoid building in areas that block water flow or contravene conservation rules (if you’re in a protected site, check with your local council or wildlife trust).

    In an age when many gardeners are trying to reduce waste, support biodiversity and work more closely with nature, a dead hedge is a simple but powerful solution. It turns what would have been green waste into a living, breathing structure that benefits wildlife, improves soil health and offers a cheap easy solution when pennies are tight. Whether tall or low, long or short, rustic or neatly woven, a dead hedge is an easy, ecological and rewarding feature you can build at any time of year.

    If you want straightforward visual information about creating a dead hedge then you might find this video by ‘Lovely Greens’ https://www.youtube.com/watch?v=k2A9k2kk_hs

    If you enjoyed this post or found it useful please consider subscribing to the solitaire gardener community. Subscribing is free and will keep you up to date with posts & exclusive content directly to your inbox. Just type your email address in the box below and hit the subscribe button. You can also follow me on bluesky http://@solitairegardener.bsky.social

    Master Your Garden: The Art of Observation

    The post emphasizes the importance of observation in gardening, encouraging gardeners to slow down and learn from their plants. By recognising growth patterns and changes, they can address issues effectively and enhance their confidence as gardeners.

    Preventing Overgrown Courgettes: Essential Tips

    If you’ve ever gone out to admire your courgette/zucchini plants, spotted a perfectly sized fruit, and thought, ‘I’ll pick that tomorrow’. You excitedly wander into the garden the next day, only to discover what appears to be a small submarine lurking under the leaves. You’re not alone. Trust me, I’ve been growing Courgettes/Zucchini for years,…

    Top Vegetables to Sow in June for a Bountiful Harvest

    June is an excellent month for sowing various heat-loving vegetables, with rapid germination and growth. Ideal conditions for crops like pumpkins, turnips, and spring onions encourage healthy yields. Newer gardeners can still enjoy successful harvests, even if the growing season began slowly.

    Unlock Healthy Growth with Deep Watering Techniques

    Effective watering fosters strong root systems in plants. Deep watering enhances drought resilience and reduces evaporation, essential for healthy growth. Observational skills help gardeners adjust their watering techniques for optimal results.

    Something went wrong. Please refresh the page and/or try again.

  • Planting by the Phases of the Moon

    Planting by the moon is often called lunar gardening and is the practice of timing your sowing, planting and key garden tasks to the phases of the moon rather than the standard calendar alone. The idea is that the moon’s gravitational pull influences soil moisture, sap movement, and plant growth rhythms in a similar way to ocean tides. While the concept began as folklore, it was formalised in the 20th century by biodynamic gardener Maria Thun, whose lunar sowing calendar is still widely used across the UK and Europe. For beginners, moon planting offers a natural rhythm to the gardening month that feels grounding and surprisingly practical.

    Luna planting can often feel quite complicated, but there are some basics and if the practice excites you it’s worth taking the time to learn more. Alternatively you can take my approach which is to learn enough about the subject to pick a choose the bits of various gardening techniques that fit with both my gardening and lifestyle. I’m not a proponent of sticking rigidly to anything unless it works for you 😊

    A Brief History of Moon Planting

    The earliest records of Luna planting appear to date back to the Sumerians around 4000 BCE who developed a Luna calendar that influenced their agricultural practice. Ancient civilisations such as the Babylonians and Mayans also used a form of Luna planting. They believed that certain crops would thrive during specific Luna phases, leading to more prolific harvests. Medieval European farmers adopted similar techniques, and many traditional almanacs preserve these ideas. Today, moon planting has seen a revival through biodynamic agriculture, permaculture, and gardeners wanting to reconnect with the earths natural cycles. Many UK growers still follow lunar calendars and report improved germination and early plant vigour. The Biodynamic Association UK has been instrumental in this revival (https://www.biodynamic.org.uk), and many growers follow the annual Maria Thun Sowing and Planting Calenda.

    How Moon Planting Works

    Moon planting centres on two main lunar phases: the waxing moon (new moon to full moon) and the waning moon (full moon to new moon). The dates for these phases can be tracked via NASA’s Moon Phase Calendar (https://moon.nasa.gov/moon-in-motion/moon-phases/) or search for your UK county here https://www.timeanddate.com/moon/phases/uk

    • Waxing Moon:
      • As moonlight increases, gravitational pull is believed to draw moisture upwards, supporting above-ground growth. This phase is used for sowing leafy greens, brassicas, peas, beans and indoor sowings of tomatoes and cucumbers.
    • Waning Moon:
      • As light decreases, the pull is thought to encourage downward growth, making this the ideal time for root crops such as carrots, beetroot, radishes, potatoes and onions.

    Quarter-moon periods (first and last quarter) are often used for garden maintenance, pruning, mulching and weeding.

    Why Gardeners Follow Moon Planting

    Scientific evidence is mixed but interesting.
    A commonly cited study, published in Biological Agriculture & Horticulture (1994), observed slight differences in seed germination between lunar phases, though the results were not strong enough for broad scientific consensus. A summary of related research can be explored through the Taylor & Francis Online archive (https://www.tandfonline.com/).

    The Royal Horticultural Society (RHS) has also commented on lunar gardening, stating that evidence is inconclusive but acknowledging the many gardeners who report positive results:
    https://www.rhs.org.uk/garden-jobs/lunar-gardening

    The respected and and prolific grower Charles Dowding has also written an interesting article on his experiments with Luna planting Moon Sowing

    Supporters argue that even if the moon’s gravitational influence on soil water is small, lunar planting still improves gardening habits, timing, and planning leading potentially to healthier crops.

    Vegetables for Waxing vs. Waning Moons

    Best for the Waxing Moon (above-ground crops):
    • Lettuce, spinach, rocket
    • Kale, cabbage, broccoli
    • Peas and beans
    • Chard
    • Tomatoes, cucumbers, chillies (started indoors with heat in UK conditions
    Best for the Waning Moon (root crops and below-ground veg):
    • Carrots, parsnips, beetroot
    • Turnips, swedes, radishes
    • Potatoes
    • Onion sets and garlic

    More advanced practitioners follow biodynamic calendars that also link sowing days to the zodiac constellations (earth signs = roots, water = leaves, fire = fruiting, air = flowers). This tradition is covered in detail by the Biodynamic Association UK.

    If I’m honest I love the underpinning philosophy and practice of luna planting and enjoy researching the topic. However, it does take a commitment which I struggle with. Perhaps when I eventually retire I will have more time to follow the practice more deeply. But for now pick the bits that fit with my lifestyle.

    Advantages and Disadvantages

    Advantages:
    • Offers a natural, organised sowing structure
    • Encourages mindful, intentional gardening
    • Can improve routine and planning for busy growers
    • Aligns comfortably with organic and no-dig gardening styles
    • Many gardeners claim better germination and plant health
    Disadvantages:
    • Lunar “planting windows” do not always match UK weather
    • Limited scientific consensus
    • Requires a lunar calendar for accuracy
    • Can feel complicated for beginners

    Even so, many UK gardeners embrace lunar gardening for the rhythm, ritual and the connection it brings to their growing year, even if they follow it flexibly rather than strictly.

    Final Thoughts

    Whether you follow lunar gardening to the letter or simply use it as a gentle guide as I do, planting by the moon offers a meaningful way to connect growing with natural rhythms. The method may not have universal scientific backing, but it has centuries of traditional practice behind it and continues to inspire gardeners who enjoy a slower, more mindful approach to growing. At its heart, moon planting is less about strict rules and more about creating structure, intention, and a deeper awareness of the cycles happening above, and below the soil. If you’re curious, start small, experiment through a few lunar cycles, and let your garden show you what works. After all, gardening is always a blend of knowledge, observation, and a little bit of witchy magic.

    If you enjoyed this post or found it useful please consider subscribing to the solitaire gardener community. Subscribing is free and will keep you up to date with posts and exclusive content directly to your inbox. Just type your email address in the box below and hit the subscribe button. You can also follow me on bluesky.

    I also have a free 10 page guide to Organic DIY pest control. Subscribe for your free copy.

  • A Beginners Guide to Leaf Mould

    An illustration of a tree with colorful autumn leaves shedding onto a pile of fallen leaves, with a light background.

    Black Gold

    Leaf mould isn’t called ‘black gold’ or ‘gardeners gold’ for nothing – it’s a truly magical garden ingredient and it’s beauty is in the simplicity – just leaves!

    Unlike more traditional composts which are rich in nutrients formed by bacteria decomposition like the materials in your compost bin. Leaf mould is created almost entirely by the action of fungi which is a much slower process.

    The results of fully decomposed leaf mould is a dark, crumbly, sweet-smelling material that looks a bit like the rich soil you get under tress in dense woodland. Leaf mould is not technically a fertiliser, as it doesn’t contain some of the things most plants need to grow like nitrogen, phosphorus, and potassium. So why make it I hear you say? Well it’s main benefits are its innate ability to improve soil structure. Leaf mould enhances aeration, improves drainage in clay soils and boosts moisture retention in sandy soils. It encourages the growth of mycorrhizal fungi, which forms a mutually beneficial relationship with plant roots and helps them absorbed water and soil nutrients. All this from a pile of decomposed leaves makes leaf mould a must for the garden.

    Below we will look at how leaf mould is made, best and worst types of leaves to use (and why) where to source your leaves, how to store them and how long the whole processes takes.

    How Leaf Mould Is Made

    Making leaf mould couldn’t be easier – it’s about patience rather than effort. Ideally collect fallen leaves in autumn when they’re dry and crisp. Pile them into a corner of the garden, a wire mesh bin, or large heavy-duty plastic sacks with holes poked in for air circulation. Add a little moisture if they’re too dry, then leave nature to do the rest. Over the next 12–24 months, fungi and microscopic organisms will slowly digest the tough leaf tissue, transforming it into that soft, dark, earthy material. The cooler temperatures of the UK (and similar climates) mean this process takes time, but it’s entirely self-sustaining, so no turning, no feeding. You just pile up your leaves and wait. I store my leaf mould in the large 1200 ltr. bags in which we get our mushroom compost delivered. My top tip is to make sure whatever you use to store your leaf mould has plenty of airflow, without getting it too wet.

    The Breakdown Process – and How Long It Takes

    Because leaf mould doesn’t create as much heat as regular compost and the cooler decomposition process is slower, you will need some patience to create good ‘gardeners gold’. The fungi in the leaf mould feeds on the carbon rich cell walls of the leaves, gradually converting them into humus (the soft, spongy organic matter that gives soil it’s structure). In the UK’s mildish, damp winters this process can take anything from 18 months to 2 years.

    You can speed this process up somewhat if you shred the leaves before storing them. This can cut as much as a year from the decomposition process. My tip here is to lay your leaves on the ground and run the lawn mower over them. That should break them down enough to speed up the process. You will know your leaf mould is ready when it’s dark brown, crumbly, and smells like a woodland floor. If it still looks a bit ‘leafy’ then leave it a few more months.

    If you really can’t wait the length of time it takes for the leaves to proper decompose, you can still use your leaves for a general mulch. The coarser texture will help with weed control and also help to moderate the soil temperature below.

    The Best Leaves to Use – and Why

    Some leaves break down more easily and produce better-quality leaf mould than others. The best choices are oak, beech, hornbeam, birch, hazel, and alder – these are thin, rich in lignin (Lignin is a complex organic polymer that provides rigidity, strength, and support to the cell walls of plants). Maple, ash, and fruit tree leaves also work beautifully, producing a fine, crumbly texture. Sycamore and plane tree (Platanus) leaves are slower to rot, but still usable if shredded first. For the best results, use a mix of leaves – this mimics the natural diversity of a forest floor and encourages a broader range of beneficial fungi.

    Leaves to Avoid – and Why

    Not all leaves are suitable for leaf mould. Avoid evergreen leaves like holly, laurel, conifer, and Leylandii, they have a waxy coating and resins that resist decomposition and can even inhibit fungal growth. Laurel and in particular Cherry Laurel are problematic as they contain cyanogenic glycosides, which when cut or damaged can release hydrocyanic acid (that’s cyanide to you and me.). If you are going to use laurel leaves it’s probably best to use them sparingly in your general compost with other ingredients to allow any toxins to dissipate over time in an outdoor environment. Alternatively make a separate pile and leave it to decompose for around 3 + years or use them around the base of trees as a mulch. We have quite a bit of Laurel on our property which needs regular cutting back. So I have a pile of laurel leaves which I store in one spot, then after a good few years I will those at the very base of my raised beds and around other trees. Using them in the bottom of the bed works well as it means they are mixed with other material and safer to use.

    Black walnut and eucalyptus leaves are also best left out – they contain natural chemicals (juglone and cineole) that can suppress plant growth and harm soil microbes. Tough leaves such as sycamore, horse chestnut, and magnolia can be used in moderation, but shred or mow them first to speed up breakdown. Keeping the right balance ensures your leaf mould matures evenly and safely.

    One final point on what types of leaves to use: Pine leaves (needles) are also slow to breakdown and tend to create a more acid environment. So use these around acid loving plants such as blueberries, or azaleas.

    Storing and Managing Leaf Mould as It Breaks Down

    If you have space, a simple chicken wire cage or wooden frame about 1 metre square is perfect. Line the sides with hessian or cardboard to hold in moisture, and position it in a shaded, sheltered corner where wind won’t dry out your leaf mould pile. Alternatively, use sturdy bin liners or compost sacks with a few holes for ventilation. Check the pile occasionally – if the leaves feel dry, sprinkle with water; if they’re soggy, loosen the pile for airflow. The key is maintaining steady moisture, like a wrung-out sponge. Label the bags with the year, so you can tell which batch is ready first, and remember patience is the key to excellent leaf mould.

    How to Use Leaf Mould in the Garden

    Mature leaf mould is incredibly versatile. Use it as a soil improver by spreading a few centimetres over beds in autumn or spring – it lightens heavy clay, improves drainage, and helps sandy soils hold water. It can also be mixed 50:50 with compost to create a gentle, organic seed-sowing mix, perfect for seedlings that prefer lower nutrient levels. As a mulch, it protects soil from erosion and feeds beneficial fungi that form symbiotic relationships with plant roots. Over time, it helps build rich, living soil that supports stronger, healthier, and more resilient plants. Gardeners who use leaf mould year after year find their beds become easier to work and their crops more productive – it’s the quiet miracle of decomposition at work.

    Where to Collect Leaves If You Don’t Have Trees

    If your garden or allotment doesn’t have trees, don’t worry – there are plenty of ways to gather leaves responsibly. Local parks, public paths, and wooded verges often have piles of fallen leaves that councils are happy for residents to collect, especially if it helps keep paths clear (always check local rules first, or talk to your local council). Ask neighbours with large gardens if you can take a few bags off their hands. Many municipal recycling centres or allotment associations also have leaf drop-off piles you can dip into. Bring a few reusable bags and a rake, and you’ll have enough to fill a compost cage in no time. Just make sure to avoid leaves from busy roadsides, as they may contain pollutants or salt residues.

    Final Thoughts

    Leaf mould is one of gardening’s simplest pleasures – a gift from the trees that costs nothing but patience. By gathering, storing, and reusing fallen leaves, you’re not just tidying up the garden; you’re closing the nutrient loop, enriching your soil naturally, and supporting the hidden life beneath your feet. Once you’ve used homemade leaf mould, you’ll never want to throw another leaf away.

    If you enjoyed this post or found it useful please consider subscribing to the solitaire gardener community. Subscribing is free and will keep you up to date with posts and exclusive content directly to your inbox. Just type your email address in the box below and hit the subscribe button. You can also follow me on bluesky.

    I also have a free 10 page guide to Organic DIY pest control. Subscribe for your free copy.

  • 10 Winter Garden Tasks for a Thriving Spring

    A colorful illustration of a farm scene featuring a wooden bridge, a storage shed, and bags labeled 'MULCH' and 'SOIL'. The sun is shining in the background, adding to the vibrant atmosphere.

    The day by day advance of winter is a magical time of year, with the sun low in the sky chilly mornings, and longer evenings it can feel like gardening season is coming to an end. But the growing season never truly sleeps – it simply slows down.

    When UK temperatures begin to drop, the soil rests, and nature exhales, your garden ‘to do’ list can sometimes go the way of all those new years resolutions. Yet even on cold, short days, a few easy maintenance jobs now can make all the difference come spring. These small winter tasks don’t take much effort, but you will reap the rewards later with healthier soil, fewer pests, and a smoother start to the next growing season. So wrap up warm, grab a mug of tea, and tick off a few of these satisfying, low-energy garden wins.

    1. Give Your Compost Bin Some Love

    Compost heaps slow down in winter, but they never stop working decomposing all that beautiful organic matter. If you’ve not done this already then it’s time to turn your compost or at least give a good poke around with an aerator tool. Turning your compost will allow more oxygen into the mix, which, in turn will help the aerobic bacteria work more efficiently. It will also help your compost from getting smelly and compacted. Covering your compost with a piece of ply wood, hessian sacks or a tarp will help retain warmth and moisture and protect it form getting too wet when it rains
    Healthy compost means free, organic soil conditioner for next season – and every handful means money you save on buying compost next year.

    2. Check and Clean Your Tools

    Blunt, dirty tools spread disease and make garden jobs harder. Take a quiet afternoon to wash, sharpen, and oil your secateurs, spades, and hoes. Use a dab of organic linseed oil on wooden handles to stop cracking, and a touch of vinegar or bicarbonate of soda or WD40 to remove rust. It’s a good idea to first brush tools with a small stiff brush to ensure the dirt and debris is removed. Even this small task can help the moving parts move function more freely.
    Clean tools last longer, work better, and prevent plant infections. So while this might seem like an insignificant task it will increase the lifespan of your tools and save you money in the long run.

    3. Clean Out Greenhouses and Cold Frames

    Before storing some of your over wintering plants in your greenhouse, polytunnel or cold frames it’s always a good idea to give them a pre-winter clean. I do my major clean in late February early March before the bulk of my new seasons seed are planted. But I do like to give the greenhouse a bit of pre winter clean. I choose a mild, dry day to wash greenhouse glass, lids, and shelving with a warm, eco-friendly soap (Dr. Bronners is my favourite). Remove moss, algae, and old plant debris, as these harbour pests and block precious winter light.
    A clean greenhouse warms faster, lets in more sunlight, and reduces the disease risk for seedlings or overwintering plants. It’s one of the simplest ways to make your space feel fresh and ready for the new season.

    4. Check Your Shed, Water Butts, and Paths

    Inspect your shed for damp, leaks, or pests. Rats and mice love dark sheds and signs of the little blighters are easily spotted. You will see corners and edges nibbled and will often see their droppings.

    Its a good idea to tighten shed hinges, sweep the floor, and organse tools or pots while things are relatively quiet in the garden. Clean out water butts to prevent algae build-up, and check any associated guttering for blockages so you can collect clean rainwater over the winter months.
    Tidy up slippery paths by sweeping with a broom and some sand, or lay woodchip where mud gathers. Keep some salt to hand in case you need it for icy paths. . All these jobs take some effort – emptying a full water butt for cleaning isn’t a five minute job but these little bits of maintenance keep your garden safer and more efficient.

    5. Look After the Wildlife

    A thriving garden depends on its wildlife. Clean bird feeders with warm water and refill regularly; scatter seed and fat balls during cold spells. Leave a few piles of leaves or logs undisturbed for hedgehogs and insects or get the children/grandchildren involved in building a bug house.
    Encouraging birds and beneficial creatures helps with future pest problems – they’re nature’s own gardeners, and they’ll repay your kindness in spring by keeping aphids and slugs in check.

    6. Feed the Soil, Not Just the Plants

    Add a layer of well-rotted compost, leaf mould, or seaweed to your beds now, even if nothing’s growing. This feeds the soil ecosystem that underpins every healthy plant.
    Winter moisture helps nutrients filter down gently, ensuring your spring seedlings have a rich, fertile base. Investing time in soil health now educes the need for digging or feeding during the busy planting months. It’s always a good idea once you’ve fed your soil to pop on a good layer of mulch – leaves, compost, woodchips etc. will all keep your soil comfy and cosy for the winter.

    7. Harvest the Last of the Greens

    Pick over any hardy winter crops like leeks, kale, chard, or spinach, and remove yellowing leaves to prevent rot. Don’t forget evergreen herbs such as thyme, rosemary, and parsley, which can still be harvested sparingly.
    Clearing damaged leaves reduces overwintering pests and diseases, while feeding or mulching around surviving crops helps them produce fresh growth in early spring. A little attention now means stronger plants and better yields later.

    8. Organise and Clean Your Pots and Seed Trays

    Winter is the ideal time to sort through that stack of pots and seed trays hiding in both in the shed and around the garden. Wash and give them a bit of a scrub with warm, soapy water to remove algae, pests, and old soil. Stack them neatly by size and recycle any cracked plastics.
    Cleaning containers reduces the risk of fungal diseases like damping-off, and having everything organised now means you’ll save time when sowing time.

    9. Refresh Your No-Dig Beds

    If you follow the no-dig method, winter is your secret weapon. Instead of turning the soil, simply add a generous 5 – 10 cm (2 – 4 inch) layer of compost or well-rotted organic matter right on top. The worms and microbes will do the digging for you, pulling nutrients down as they feed.
    This approach preserves soil structure, protects fungal networks, and reduces weed germination, while locking in carbon and moisture. It’s the ultimate low-effort, high-reward winter job that builds long-term fertility without lifting a spade.

    10. Dream, Read, and Learn

    Finally, give yourself permission to slow down. Curl up with a good gardening book, browse seed catalogues, or make a list of new crops you’d like to try. Winter is the gardener’s pause – a time to reflect, plan, and gather inspiration. Read through your gardening notes, assess what worked and what you might do differently next season.
    A good plan now will result in saved money and time come planting season. Plus, dreaming about tomatoes and courgettes is a lovely way to banish those winter blues.

    If you enjoyed this post or found it useful please consider subscribing to the solitaire gardener community. Subscribing is free and will keep you up to date with posts and exclusive content directly to your inbox. Just type your email address in the box below and hit the subscribe button.

    I also have a free 10 page guide to Organic DIY pest control. Subscribe for your free copy.

  • Revive Your Raised Beds: Essential Winter Care Tips

    Two metal raised garden beds partially filled with dark soil, surrounded by greenery.

    As autumn (fall) moves ever deeper into winter, many of us notice that our once-full and lush raised beds are looking a little deflated – leaving a noticeable drop in the soil level, sometimes by a good few inches. This is completely natural and generally a good thing if you originally used lovely organic matter to fill them. Over time the organic matter breaks down, worms and microbes digest compost, bark rots down and roots pull nutrients from the soil. Often resulting in a drop of a good few inches in the soil level toward the end of autumn. It’s a sign that your soil has been busy – but it also means it’s time to top up and rebuild fertility before the next growing season.

    I’ll do a deeper dive into the benefits of mulch in a later blogs – it’s a topic that justifies a longer read. But for now we’ll just deal with topping up your current raised beds ready for use next season.

    How to build back better

    A wooden raised garden bed filled with dark soil, surrounded by green plants and grass.

    Personally I use a lasagne approach to building the soil level, but use whatever organic material you have available. I am very lucky and have many trees on my property so have access to lots of leaf mould, wood chips, and shredded tree foliage. But use whatever organic matter you have access to

    My lasagne layers are as follows:

    • spent compost from things I’ve gown in pots
    • 1 – 2 year old leaf mould
    • Homemade compost
    • Peat free compost from a reputable garden centre or nursery

    Compost is a living matter, teeming with beneficial microorganisms that help feed your plants organically, so aim to refill your beds with a generous 2–4 inches (5–10 cm) layer. This will not only restore the volume but will also replenish nutrients and humus – the organic glue that improves structure, moisture retention, and aeration. No dig gardeners avoid over-disturbing the soil as it can damage its delicate ecosystem of fungi and bacteria that naturally sustain fertility. So I just add my lasagne layers on top of the existing soil. Those who don’t follow no dig principles will tend to dig any new additions lightly into the existing soil.

    I know many people will say once you have topped off your soil you should re-test its pH. It’s not a bad idea, but I am with Charles Dowding on this one. When talking about spent mushroom compost with a pH of 9.5 he says ‘Don’t believe everything you read saying that pH has to be ‘correct’. You can read his article here Compost. Obviously you don’t want it to be so high or so low that it adversely affects your plants. But the plant will tell you what it needs as it grows. I tend not to overly fuss about pH if I’ve used good organic materials to begin with if figure nature will do the rest and will shout if she’s not happy.

    However, if pH is something you feel is important then here are a few tips and amendments you can make once you have finished topping up your beds. If your soil is on the acidic side, adding a small amount of crushed eggshells, wood ash or garden lime (organic and non-synthetic) this can gently bring it into balance. If it’s too alkaline, try incorporating more leaf mould or aged manure which can help to nudge it downward. Most vegetables like a fairly even pH 6.0 to 7.5.

    Finishing touches

    Once your raised beds are nicely topped up, finish by giving them a cosy blanket of winter mulch. A lovely comfy covering of chopped leaves, grass clippings, or composted bark will insulate the soil from heavy rains and temperature swings, reducing soil erosion and nutrient leaching. Straw can also be used as a mulch, but be careful if you are prone to mice. Mice love the to hide in layers of a thick straw mulch, so if you are going to use straw perhaps use it sparingly. In milder more temperate regions, mulching also protects earthworms and beneficial microbes that remain active when soil temperatures stay above freezing. This living layer continues working for you all winter, quietly digesting organic matter and enriching the soil cossetted beneath.

    Green Mulch

    For gardeners who want to try something a little bit different, consider a green mulch, also known as a living mulch. A green mulch is essentially a cover crop such as clover, field beans, winter rye, or phacelia. The seeds are sown directly into raised beds after your main harvest. They protect the soil surface from compaction and erosion, suppress weeds, and actively capture nitrogen from the air, storing it in the root zone. As temperatures rise in early spring, simply ‘chop and drop’ the green mulch, letting it decompose in place to feed the soil. This living carpet not only keeps your raised beds biologically active all winter but also adds a continuous source of fresh organic matter.

    Final Thoughts

    Topping up your raised beds each winter isn’t just a matter of aesthetics, or worries about the depth of your soil for next years planting – it’s a vital step in maintaining soil health. Healthy soil is fundamental to an organic garden: it stores carbon, holds water, buffers nutrients, and supports the intricate web of life that feeds your plants. By adding fresh organic material and protecting it with a heavy or living mulch, you’re setting the stage for next spring’s growth. When the days lengthen and you’re ready to sow again, your raised beds will be brimming with the rich, dark, fertile soil. Healthy soil, means healthy plants, which intern considerably increases the chances of an abundant harvest next year.

    If you are in the UK and want a recommendation for quality raised bed I would suggest looking at this company Estate to Garden I am not an affiliate, I just use and like their products. You might also find this previous post about growing in raised bed useful Raised bed gardening.

    If you enjoyed this post or found it useful please consider subscribing to the solitaire gardener community. Subscribing is free and will keep you up to date with posts and exclusive content directly to your inbox. Just type your email address in the box below and hit the subscribe button.

    I also have a free 10 page guide to Organic DIY pest control. Subscribe for your free copy.

  • Essential Gardening Tools for No-Dig Organic Gardening

    An assortment of gardening tools including a hand trowel, seed tray, secateurs, small handle fork, small hoe, garden knife, watering can, shovel, and long handle fork on a light green background.

    I garden in a no-dig organic way mostly in raised beds so soil health is everything. Instead of turning over soil, I layer compost and organic matter and let the worms and microbes do all the hard work. That means I need fewer heavy tools for growing vegetables.

    But as a new gardener before rushing out to buy shiny fancy new rakes and dibbers, remember: you can start small and simple. Many great gardeners began with little more than a trowel, a bucket, and a truck load of creativity. You really don’t need to go overboard when you’re starting out, but there are some basics that will make your fledgling garden easier.

    Below we will go over some basic tools, their uses, some alternatives, and toward the end I’ll talk about where to look for pre-loved tools. But keep in mind, while all of the tools mentioned below are useful, people have been growing food thousands of years with whatever they have available.

    Let’s begin with the most important issue, and that’s maintenance. Whatever tools you have they will not perform well unless there’re maintained properly. Kept them clean, sharpened and oiled if needed.

    🔧 Tool Care and Maintenance

    Good tools, whether makeshift, new, or second-hand deserve care. The more you take the time to look after them, the better they will perform.

    Routine care:

    • Wipe off soil and dry after use.
    • Apply a touch of linseed oil to metal and wooden parts.
    • Sharpen blades regularly with a sharpening block or stick
    • Hang or store upright in a dry environment

    DIY maintenance tools:

    • Bucket of oily sand – stab metal tools in after use to clean and protect. Just be careful with really sharp tools as sometimes they can blunt in the sand. Trowels and hand tools should be fine.
    • Old toothbrushes – for scrubbing the soil from tools
    • Rags dipped in natural oils – for wiping down handles.
    • Vinegar scrub – for removing rust in the absence of some WD40.

    🪴 Seed Trays and Pots

    Starting seeds doesn’t require professional trays, just a bit of imagination. Reusing and repurposing household items reduces plastic waste and cost.

    Uses:

    • To sow seeds for germination
    • Seed trays are portable so allow you to control the germination climate
    • Easier protection from pests
    • Allow you to choose the strongest seedling to plant on

    Makeshift alternatives:

    • Ice cube trays, egg boxes/cartons, small containers (the ones that mushrooms come in), take away containers for seed starting. Make sure you put a few drainage holes in the bottom.
    • Yoghurt pots, or any pot roughly the shape as a plant pot for when your seeds need potting on
    • Cardboard tubes (like toilet rolls) for root crops such as beans or leeks – they can be planted directly into the soil tube and all as that will break down as the plant grows
    • Shallow cardboard boxes lined with compostable paper – easy to move and recycle
    • Newspaper pots – you can make your own pots from folded newspaper. There are lot’s of examples on YouTube – Lovely greens has a simple to follow example here Two ways to make Newspaper Plant Pots (the simple way + the origami method)

    Later, you might invest in sturdy, reusable seed trays made from recycled plastic or biodegradable fibre pots. I get my seed trays form Charles Dowding https://containerwise.co.uk/product-category/charles-dowding/ (not affiliated). They are a little more expensive, but they are amazing and will last for many years.

    ✂️ Hand Pruners (Secateurs)

    A reliable pair of secateurs (garden clippers or pruning shears) is one of the most versatile small tools in your kit. In an organic, no-dig garden, where you aim to manage growth naturally rather than by force, pruners are invaluable for keeping everything healthy, accessible, and productive. Secateurs are honestly the tool I use most in my garden.

    Uses:

    • Cutting back overgrown foliage
    • Trimming spent stems
    • Removing dead or damaged leaves
    • Deadheading flowering plants
    • Snipping small branches or woody stems
    • Shaping plants and training growth
    • Harvesting cleanly
    • Light pruning in tight spaces

    Makeshift alternatives:

    • Sharp kitchen or craft scissors
    • Utility or Stanley knife (box cutter)

    Tip: If you are going to purchase a secateurs, my advice would be to by the best you can afford. Apparently (according to an internet search) Monty Don uses Felcon No.2 secateurs which come in at about £50 (about $80 in the US according to Felcon’s website). However, that’s quite the investment for a new gardener, or an experienced one come to that. I would go for something from about £20 to £30 if your finances allow. Mine were a xmas pressie & are from Kent and Stowe at £34.99 (https://kentandstowe.com/products/kent-stowe-eversharp-bypass-secateurs I’m not affiliated). They are excellent, and I keep them well sharpened weekly.

    🥄 Trowel

    A hand trowel is a good tool to have around. Trowels have many uses but essentially they are scoops to move soil.

    Uses:

    • Digging small holes in compost for seedlings or transplants
    • Mixing organic fertilisers or adding compost around a plant
    • Lifting small weeds or dividing herb
    • Prying weeds from the soil
    • Creating little drills or furrows in the soil for planting

    Homemade or makeshift alternatives:

    • Large serving spoon or dessert spoon – perfect for container gardening or smaller veg patches.
    • Repurposed paint scraper or a small plastering trowel.
    • An old mug or cup: For scooping potting soil or compost, a hard plastic or metal cup with a handle is an easy substitute
    • 2 ltr repurposed plastic milk bottle: there are plenty of youtube vids on how to make a scoop from a plastic bottle

    Pretty much anything that can easily shovel small amounts of soil will suffice

    Perfect for planting when larger holes are needed for transplants.
    If you decide to purchase a trowel choose with a sturdy handle and rust-rust resistant.

    💧 Watering Can

    Gentle watering is key in no-dig and organic systems – keep the soil moist, not soggy. Remember we are growing plants not ducks 🦆

    Uses:

    • Watering seedlings and raised beds
    • Adding liquid feeds like comfrey or nettle tea
    • Moistening compost heaps

    Homemade or makeshift alternatives:

    • Plastic milk bottle with holes poked in the lid
    • Water jug
    • Old teapot
    • Colander or sieve – for sprinkling water over seed trays.
    • Bucket – be with a bucket around seedlings

    If you don’t have fancy hoses or cans a simple bucket or washing up bowl will suffice for small scale gardening. If you have a larger plot then a decent watering hose may be the order of the day. But for smaller plots a simple bucket, 5 litre water bottle or will do just fine.

    A quick word about water butts – if you are lugging water it can be a pain but decent water butts can be expensive. So capture rainwater in whatever you have. An old bin, some buckets anything you can leave near your plot so you make watering a but easier.

    Tip: I use a small child’s watering can to water my seedlings especially ones in the greenhouse or small carrot seeds planted direct in my raised beds. These little kiddies cans are cheap and the flow of water from the rose spout is gentle enough not to disturb newly planted seeds.

    As seedlings become young plants, you’ll need simple tools to help maintain healthy, living soil. The no-dig approach means fewer tools, less disturbance, and more natural resilience.

    🌾 Garden Fork (long and small handle)

    A fork is useful, but in no-dig gardening, it’s used sparingly to aerate compacted areas or lift crops, not to turn the soil. In my experience the best use of a long handled garden fork is to turn the compost bin 😂

    Uses:

    • Gently lifting root crops – both long and small handled forks
    • Turning compost heaps – long handled fork
    • Loosening compacted ground before top-dressing with compost – long handles

    Makeshift alternatives: for small handle forks

    • Sturdy barbecue fork
    • Old cutlery fork
    • Broken table fork or serving fork
    • Repurposed metal kebab skewers

    Makeshift alternatives: for long handle fork

    It’s difficult to find an alternative for a long handled fork. There are ideas online to construct wooden alternatives, but you would need to ensure it was reinforced particularly if your soil is heavy. A pitchfork or spade will also substitute if you already have one or know of somewhere you can borrow one.

    Tip: For small beds or raised beds, a hand fork gives great control without disturbing soil layers.

    🥕 Spade (Shovel)

    As a no dig raised bed gardener I can count on the fingers of one hand the number of times in a year I use a spade. Generally the only time i use one is to fill a new raised bed or shovel compost. However, it is a very useful tool to have around.
    Uses:

    • Moving compost or mulch onto beds
    • Shaping edges of paths or borders
    • Transplanting shrubs or fruit bushes and trees

    Makeshift alternatives:

    • Old coal shovel or fireplace shovel – great for smaller jobs
    • Dustpan – for smaller transfers, if you have a metal one that’s even better as it will be more sturdy than a plastic one.

    I would say there is probably no decent substitute for a shovel if you need to move significant amounts of soil or dig a hole.

    🌾 Hoe

    A hoe is a brilliant tool for weed management – helpful in organic systems where chemicals are avoided. These can be long handled if you are planting direct in the soil or lower raised beds and short handle ones if you have waist high raised beds. The idea is the hoe removes the tops of the weeds which can then decompose on the soil surface or be put on the compost bin.

    Uses:

    • Skimming weeds off just below the surface (leave them to compost in place or put them on the compost heap)
    • Creating shallow trenches for seeds
    • Loosening compacted top layers without digging deeply

    Makeshift alternatives:

    • Old kitchen spatula or knife
    • Car windscreen scraper
    • Old butter knife or cake server

    Tip: If you know you have to contend with a variety of weeds particularly over the summer. Make sure you sow your seeds at least the width of you hoe so you can easily get in-between your planting rows. There are many types of Hoe ‘Dutch Hoes’ ‘Oscillating hoe’ ‘draw hoe’ so if you are thinking about buying one consider the type of hoe that’s right for you.

    🔪 Garden Knife

    A garden knife (gardening utility knife) is one of those underrated tools that quickly becomes indispensable. It’s my second most used tool in my garden. In a no-dig garden, where soil is left undisturbed and planting is done by hand, a sturdy knife helps with precision work – from lifting seedlings to slicing compost bags.

    Uses:

    • Cutting through roots and stems cleanly
    • Easing seedlings or transplants out of pots
    • Harvesting crops
    • Trimming roots, stalks, or foliage
    • Cutting garden twine, jute, or netting
    • Opening compost, mulch, or soil bag
    • Scraping off stubborn soil
    • Whittling plant labels or stakes
    • Cutting through light cardboard or weed membrane

    Makeshift alternatives:

    • Old kitchen knife
    • Craft knife or Stanley knife (box cutter)
    • Multi-tool or penknife

    Tip: Obviously when using sharp knives make sure you keep it safe and out of reach of children. Also think about how you carry your knife so when you bend you don’t stab yourself. I know this sounds so basic, but having stabbed myself on numerous occasions I now always wrap my knife in a cloth

    ♻️ Budget-Friendly & Sustainable Sources

    Sustainable gardening doesn’t require a fortune – just resourcefulness and keeping your eyes open for bargains. Older tools are often superior – forged steel and ash handles can outlast more modern materials.

    Where to find tools:

    • Car boot sales (flea markets).
    • Charity shops, jumble sales, and thrift stores.
    • Salvage yards or community recycling centres.
    • Tool libraries or local community gardens – for borrowing.
    • Online marketplaces – Freecycle, Gumtree, or Facebook.
    • Local tip or dump – many tips in the U.K. have a facility whereby you can purchase old tools

    Tip: If you have an allotment very often people will lend you tools until you can source your own. Sometimes your local allotment shop will also sell used tools.

    🌻 Final Thoughts:

    No-dig organic gardening is about working with nature, not against it, and that includes how we use tools. From spoons as trowels from milk bottles to watering cans, every homemade creation and recycled tool saves money and keeps waste out of landfill.

    Start small, repurpose what you have, and let the way you choose to garden dictate the tools you need.

    Let me know in the comments what tools you could not do without or what makeshift alternatives are you still using years later?

    If you enjoyed this post or found it useful please consider subscribing to the solitaire gardener community. Subscribing is free and will keep you up to date with posts and exclusive content directly to your inbox. Just type your email address in the box below and hit the subscribe button.

    I also have a free 10 page guide to Organic DIY pest control. Subscribe for your free copy.

  • Accessible Gardening Tips for Everyone

    Gardening is one of life’s great joys. It keeps us active, brings us outside, and rewards us with fresh, healthy food. But sometimes the work involved—bending, lifting, carrying, and long hours on the plot—can become harder to manage. There are many reasons why at various time in your life gardening may prove more challenging. Times when your health or physical ability are limited, either temporarily or permanently. The good news is that with a few clever adaptations, some forward planning you can still enjoy growing your own vegetables, without it feeling overwhelming.

    This post address some of the adaptions, and suggestions for making gardening a bit more accessible for everyone.

    I do need to set some boundaries before we start. Firstly I’m not an expert, I have taken the suggestions in this blog from various disability focused websites, a wee bit of personal experience and general internet research. Secondly please don’t take my suggestions without doing your own research first, especially if you intend to spend money on a product. Thirdly I would also strongly recommend you consult a doctor or specialist to discuss your health needs in connection with gardening.

    Reduce bending, kneeling and repetitive strain

    Bending and kneeling are often the hardest parts of gardening. With the right setup and tools, you can protect your back and joints.

    Practical ideas:

    • Raised beds at different heights: Bringing the soil up to waist level means less stooping and kneeling. Beds can be built to suit different needs—standing, seated, or wheelchair height.
    • Containers on benches or tables: Lift pots (get someone to help you lift) and troughs up onto sturdy surfaces. Not only does this save your back, it can also create a lovely display of grouped vegetables or herbs.
    • Long-handled and ergonomic tools: If plants are at ground level extended handles can help keep you upright while hoeing or weeding. Padded grips can reduce strain on wrists.
    • Vertical gardening: Grow upwards with trellises, wigwams, or wall planters can help reduce bending. Beans, cucumbers, and tomatoes all climb well, making harvesting easier.
    • Garden kneelers with handles: These double as a seat and a support when you need to get lower. My advice for these types of garden kneelers is to buy the best you can afford as the cheaper ones often break. If you know a good carpenter they may be able to make you something bespoke and you can a cushion for extra comfort.
    • Back supports and braces: These can give extra stability, especially for longer sessions. They can be quite reasonably priced but may get hot and uncomfortable in the heat of the summer. They are useful for infrequent digging and twisting jobs where muscles are not built up for those particular tasks.
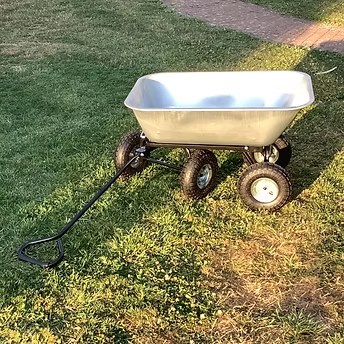
    • Use wheels for heavy loads: A lightweight barrow, trolley, or rolling cart saves your back. Break heavy jobs into smaller tasks and carry lighter loads. More frequent trips with lighter loads might seem counter intuitive but it can save injury or further muscle strain.
    • Switch tasks regularly: Avoid long spells of the same job. Alternate between sowing, watering, and harvesting to give your body a break.
    A sturdy hand truck with a tall frame and a large rubber wheel, designed for transporting heavy items easily.

    Improve mobility and access in the garden

    Getting around the garden or allotment safely and easily makes a big difference. Uneven paths, heavy tools, and long walks with a watering can all take the joy out of gardening.

    Practical ideas:

    • Smooth, wide pathways: Level, firm paths reduce trip hazards and make moving around more comfortable. Paths can be expensive to put in – but if you need them to be able to enjoy your garden then it might be worth considering. It also helps to keep your gardening space clear of possible trip hazards i.e. errant pots, bits of netting, garden tools. Obviously if you need ramps for wheelchair or frame access you may need to take advice from a qualified garden designer or builder to ensure ramps and paths are safe.
    • Zoning your space: Keep your most-used beds, compost bins, and water butts close together so you don’t have to make long trips. It’s worth taking time to consider the design of your gardening area, think about what you will need an plan your area well.
    • Rolling stools or wagons: Sit while you work, and use the storage underneath for tools. If you are in the market for one of these pieces of kit make sure you go to a reputable supplier and try them out before you buy. Some are studier than others so make sure you feel secure on it when sitting.
    • Tool caddies and buckets: Keep tools with you to save repeated trips to the shed. Anything from a bucket, basket, or box will do just make sure it’s easy to carry.
    • Lightweight barrows and trolleys: Two-wheeled barrows and folding carts are stable and easy to manoeuvre. Four wheeled barrows can also be useful as they are more stable yet still manoeuvrable. Keep in mind when planning your plot and you beds to leave enough space to wheel your barrow between the beds.
    • Accessible allotments: Many councils and allotment associations offer plots with wider paths, water points nearby, or raised beds. It’s always worth asking about options.

    Make planting and harvesting easier for tired or low vision eyes

    Gardening relies a lot on eyesight—spotting seedlings, reading seed packets, or identifying weeds. With small changes, you can make tasks simpler and safer.

    Practical ideas:

    • Large, clear labels: Use bold, high-contrast plant markers so crops are easy to identify. Labels can be colour coded with tape or tied with bright ribbon.
    • Bigger seeds or pre-spaced seed tapes: Beans, peas, and courgettes are easier to handle than tiny seeds. Seed tapes can reduce the fiddly part of sowing.
    • Contrasting containers and edging: Growing in light pots with dark soil (or vice versa) makes seedlings stand out. Raised bed edges also help define planting spaces. Put tape or paint darker pots so they stand out.
    • Smell and touch: Herbs and textured plants like mint, rosemary, or chives are easy to recognise without relying on sight alone.
    • Bright tape: Use this to mark the edged of garden beds, garden furniture, or your small handle tools to distinguish their use.
    • Sound beacon: A water feature, or wind chimes to identify certain areas of your space. Leave a radio on where you are working, so if you move from your work area you can easily identify your way back to your workspace.
    • Good lighting: Solar or plug-in task lights make evening gardening safer and easier.

    Make watering and feeding less effort

    Watering is essential but can be one of the heaviest jobs. Smart systems help reduce the strain.

    Practical ideas:

    • Drip irrigation or soaker hoses: These water plants slowly and directly at the roots, cutting out most manual watering. These can get expensive so make sure you do some research before you buy.
    • Water butts near beds: Place several around the garden so there’s always a nearby water source. Anything will do to collect water, an old bin, or a large bucket. Our polytunnel is away from the house & while our extendable hose will reach it’s a pain to get out and drag down to the tunnel. So we keep a water butt in the polytunnel, fill it when we have the hose out, then use the water from the butt. It’s ideal for those quick watering’s without having to drag 200 foot of hose across the garden
    • Self-watering pots and wicking beds: Containers with built-in reservoirs reduce the need for daily watering. Again these can be pricy although during the colder wetter months you can often find these on sale.
    • Mulching: A thick layer of compost, straw or small woodchips holds moisture, reduces weeds, can cut down on watering. Don’t underestimate the power of a good mulch. If you get the chance one summer do a test of side by side pots, mulch one and leave the other – after a few days pop you finger about an inch into the soil underneath and notice how the mulched pot retains moisture.
    • Lightweight watering tools: Choose smaller watering cans, a hose reel on wheels, or spray nozzles with easy triggers. Many hose attachments have a trigger, but be careful as some of them you have to manually depress constantly. This can be tricky with conditions such as arthritis, so try to get one that you don’t need to keep depressed.

    Choose easy, rewarding crops

    The right crops can give you healthy harvests with less work.

    Good options:

    • Salad leaves and spinach: Quick, forgiving, and keep producing after cutting.
    • Bush beans and dwarf peas: Productive, compact, and easy to harvest.
    • Cherry tomatoes: Perfect for pots, only need light staking, and crop for weeks.
    • Potatoes in bags or towers: No digging required—just tip out when ready.
    • Herbs: Low-maintenance, fragrant, and useful every day in the kitchen.
    • Perennials like asparagus or rhubarb: Plant once, harvest for years
    • Crops that can be grown vertically such as beans, cucumber, tomatoes,

    Extra tips for allotments

    Allotments are wonderful community spaces, but they can sometimes be more demanding than home gardens. A few changes help make them easier to manage.

    Practical ideas:

    • Ask for accessible plots: Many allotment associations now provide raised beds, level paths, or plots near entrances.
    • Share work with neighbours: Team up for heavy jobs like turning compost or moving soil.
    • Shared resources: Look for communal tool sheds, compost bays, or water points to reduce trips.
    • Ask for help: Don’t be afraid to ask for help, we all want our independence, but there is no point in making your condition worse or tiring yourself out because you didn’t ask the folk around you to help.

    Look after your body as well as your garden

    Gardening is exercise, so treat it that way. Working smart helps you stay comfortable.

    Practical ideas:

    • Warm up before tasks: Simple stretches protect your joints. It sounds silly to say warm and stretch your body before you do physical gardening tasks but it’s wise to approach this in the same way you would an exercise class.
    • Work “little and often”: 20–30 minute sessions with breaks are easier than hours at a stretch.
    • Alternate sitting and standing: Vary positions to avoid strain.
    • Supportive footwear and gloves: Prevent slips and protect your hands. It’s really tempting to just pop your flip fops on to do a bit of light gardening. However, once you are out there and get side tracked (we all get side tracked in the garden 😊) with more meaty tasks you risk not only damaging your feet, but also slips and trips. It’s a pain we all know – but please put your gardening shoes on!
    • Again ask for help when needed: Whether it’s lifting bags of compost or installing raised beds, sharing the load means you can keep gardening for longer.

    Quick Checklist

    • At least one raised bed at waist height.
    • Rolling stool or kneeler with handles nearby.
    • Long-handled tools and lightweight barrow.
    • Drip hose or water butt close to beds.
    • Clear labels and bold markers for plants.
    • 20–30 minutes of work, then a break.

    Final Thoughts

    Gardening doesn’t have to stop when the work feels harder. With a few smart adjustments—whether it’s raised beds, lighter tools, or watering systems—you can keep enjoying fresh vegetables without compromising your health. The key is to garden smarter, not harder, and to create a space that works for you. It doesn’t need to be pretty, it just needs to be safe and allow you to continue enjoy your garden.

    If you enjoyed this post or found it useful please consider subscribing to the solitaire gardener community. Subscribing is free and will keep you up to date with posts and exclusive content directly to your inbox. Just type your email address in the box below and hit the subscribe button.

    All subscribers will also receive a free download with tips and hints for DIY organic pest control.

  • Veg Patch jobs for September

    A collage of gardening tools and scenes, including a rake among fallen leaves, a planting trowel, a garden tool shed, and stacked copper pots.

    Tidy, prep and sow

    September is a turning point in the veg patch. You’re still enjoying the last of the summer harvests, but you can feel autumn creeping in with its cool mornings, shorter evenings, and the perennial question ‘is it too early to put the heating on?’.

    September a lovely mix of celebrating what you’ve grown and getting your plot ready for the months ahead. I’ve pulled together some ideas for jobs you might want to tackle this month—not a strict list, just a few suggestions. And if you’re new to gardening, don’t worry; even doing a little prep now will make things feel more manageable and set you up nicely for winter and the next growing season.

    1. Keep Sowing Where You Can

    It’s easy to think September means the end of sowing, but there’s still plenty you can get in the ground. Hardy crops like spinach, winter lettuces, rocket, pak choi, lamb’s lettuce, spring onions, broad beans (for an early crop next year), and radishes can all be sown now for cut and come again leave over the winter period. If you have a greenhouse or polytunnel, use it to extend the season with salads and herbs.

    1. Prepare Beds for Onions and Garlic

    Onions and garlic are best planted in October, so now’s the time to prepare. Start by removing weeds, then dig in a good layer of well-rotted compost or manure to feed the soil and improve structure. If your soil is heavy clay, consider adding grit or sand to improve drainage—garlic in particular hates sitting in water over winter. A light scattering of wood ash (from untreated wood) can also help, as alliums enjoy slightly more alkaline conditions. If you have a wood burning stove the ashes will work well to help promote more alkaline condition. Taking the time now means your beds will be in perfect condition when planting day arrives.

    2. Harvest Summer Crops

    September is a generous month, and continuing to harvest summer crops keeps plants productive while making sure nothing goes to waste.

    • Potatoes should be lifted and dried off before being stored in paper sacks somewhere cool, dark, and frost-free. Some people do leave potatoes in the ground – however I find they can suffer from critters nibbling away at them. So probably better to lift them as store them now.
    • Tomatoes benefit from regular picking—this encourages the plants to ripen the remaining fruit. Store ripe ones in a cool place, or pick green ones to ripen indoors. Freeze or can for storage.
    • Chillies can be frozen whole, threaded and dried, or turned into sauces for winter use.
    • Melons are best eaten fresh, but they’ll keep in the fridge for a week or two.
    • Apples can be stored in shallow trays in a cool shed or garage, checking regularly to remove any that start to spoil. Obviously they can be frozen for pie filling later or turned into apple cider vinegar.

    By harvesting regularly, you’re making space in the beds for autumn and winter crops, while also reducing the risk of pests and diseases that thrive on forgotten, overripe fruit.

    3. Clear Spent Crops and Mulch Beds

    Once beans, courgettes, or sweetcorn have finished, remove the plants and compost them if they’re healthy. Then, mulch the bare soil with compost, well-rotted manure, or leaf mould. This not only adds nutrients back into the soil but also protects it from heavy rain, erosion, and compaction over winter. Worms and soil life will work the mulch down naturally, leaving you with healthier, easier-to-dig beds in spring

    4. Sow Green Manure

    If you’ve got beds that won’t be used over winter, consider sowing a green manure such as rye, vetch, or clover. You can buy ‘green manure ‘ seeds in any reputable garden centre or nursery. Green manure is fast-growing and acts as a living blanket for your soil, preventing weeds from taking hold and improving fertility. In spring, simply cut the growth down and dig them into the soil, where they’ll rot and provide a natural nutrient boost. Some green manures, like clover also fix nitrogen, making them particularly useful for the following year’s hungry crops. Don’t worry about digging them in too much if you are a no dig gardener. Generally green manure is easy to pull up if that works better for you or just cut them down leaving the roots and then plant you spring crops into the soil.

    5. Tidy Perennials and Structures

    • Cut back asparagus once the fronds turn brown to tidy the bed and prevent disease. The cut fronds can then be composted.
    • Check supports for Brussels sprouts, kalettes, and any cabbages that are likely to get large and heavy. Technically supports should go in when you initially plant the seed or the plug plant. However, if you forgot put them in now but be careful not to damage the plant roots when you do.
    • Prune back strawberry runners you don’t want, and tidy the plants for winter.
    • Tie in any long canes or stems of blackberries, raspberries, or tayberries to prevent wind damage.
    • If you grow rhubarb, now’s a good time to remove any old, tatty leaves and add some compost around the crowns.

    A bit of care for perennials now helps them face the winter battering and ensures better crops next year.

    6. General Maintenance

    September is the perfect month for those small but important jobs that can easily be forgotten.

    • Clear leaves and moss from paths to prevent slipping in the wet.
    • Clean oil and sharpen tools. It’s good practice to perform this regular maintenance and September is the perfect time/
    • Repair or replace damaged fences, gates, or water butts before winter weather makes things worse. It’s easier to do these tasks in the cool of late summer/early autumn as opposed to battling the January weather.
    • Check sheds and compost bins for leaks, and patch them up.
    • Lag outdoor taps or set up insulation to prevent freezing later on.
    • As the need for the hosepipe lessens with the increased rainfall outside consider giving it a clean along with any attachments prior to packing it away for the winter.
    • Turn and cover compost beds – turn while the weather is still reasonable and cover as you don’t want too much water in compost when it’s maturing.

    All of these little jobs will save you trouble once the cold and wet really set in.

    Garden Furniture and Delicate Items

    Don’t forget the non-veg side of your garden. Bring in fairy lights, lanterns, and delicate ornaments that might not survive autumn gales or frosts. Secure or store garden furniture, parasols, and cushions—a sudden storm can do a surprising amount of damage. Even moving pots closer to walls or grouping them together can offer extra protection.

    Greenhouse and Polytunnel Care

    Your greenhouse or polytunnel can make a huge difference to how much you grow through autumn, so give it some love:

    • Close doors at night to hold in warmth, but keep vents cracked during the day to reduce damp.
    • Sweep paths and clean glass or plastic to maximise light.
    • Mend any tears in polytunnel covers or cracks in greenhouse panes—autumn winds can make small problems much worse.
    • Wash down benches and trays to reduce pests and disease.
    • Remove weeds from under staging or pathways where slugs like to hide.

    A well-maintained greenhouse will stay warmer, cleaner, and healthier through winter.

    The Little Extras

    There are always a few extra touches to think about:

    • Pick herbs like basil, parsley, and mint, and dry or freeze them for winter use.
    • Collect seeds from flowers and veg you’d like to grow again next year. Dry, store and don’t forget to label. For the importance of labelling see Labelling simple but vital
    • Gather fallen leaves for the leaf mould pile—it’s free, rich mulch for future seasons.
    • Dig out your waterproofs and wellies now and get them ready – you will undoubtedly need them!
    • Plant spring bulbs in corners of the veg patch for a splash of colour early next year. Try some daffodils, tulips or alliums.
    • Enjoy the last of the summer sunshine on the plot—it won’t be long before the days get much shorter.

    Final Thoughts

    September is all about balance: enjoying the abundance of summer while quietly getting ready for winter. Clearing, mulching, sowing, and tidying now will make life so much easier later. Plus, there’s something deeply satisfying about stepping into autumn knowing your plot is prepped, protected, and ready to keep producing. Winter may seem far off, but as every gardener knows, it sneaks up quickly—so best to be a step ahead

    If you enjoyed this post or found it useful please consider subscribing to the solitaire gardener community. Subscribing is free and will keep you up to date with posts and exclusive content directly to your inbox. Just type your email address in the box below and hit the subscribe button.